

Utilizza clip di 5–15 secondi e seleziona uno stile di destinazione: contorni netti, sfumature piatte e una palette vivace ma controllata. Assicurati che la transizione tra i fotogrammi rimanga *fluida*, in modo che il movimento appaia naturale piuttosto che scattoso. Affidati a un modello integrato ottimizzato per la diversità dei media per fornire risultati coerenti a 1080p e oltre.
Per implementare rapidamente, raccogli gli strumenti giusti: un modello integrato addestrato su media diversi, un estrattore di fotogrammi, un editor per la temporizzazione e un gestore del colore. Avrai bisogno di materiale live-action come input; se ti mancano dati accoppiati, usa l'apprendimento auto-supervisionato per scoprire l'allineamento tra i fotogrammi. Questo approccio ti consente di iterare fino a quando non vedi bordi coerenti e uno stile da cartone animato, offrendo senza sforzo un aspetto coeso che supporta i segnali musicali.
Nella fase di editing, monitora gli artefatti: sfarfallio temporale, deriva dei colori e smussatura eccessiva dei bordi. Affina il peso in modo che i toni della pelle rimangano *realistici* e le texture rimangano leggibili. Questo apparirà coeso quando passerai da una singola clip a un progetto *completo*, dando agli editor spazio per affinare i dettagli senza sacrificare l'atmosfera da cartone animato. Il processo aiuta ad acquisire competenze mentre la pipeline gestisce la maggior parte del lavoro.
Guardando avanti, adotta un approccio modulare: tieni il passaggio di base separato dalle regolazioni di texture e illuminazione. Puoi scoprire nuovi look semplicemente scambiando i pesi di stile e rieseguendo la pipeline. I risultati saranno *fluidi* e *stilizzati* su tutti i formati multimediali, dalle clip per i social a montaggi più lunghi; per i team che cercano un'estetica coerente, ciò consentirà una pubblicazione più rapida e una sperimentazione continua.
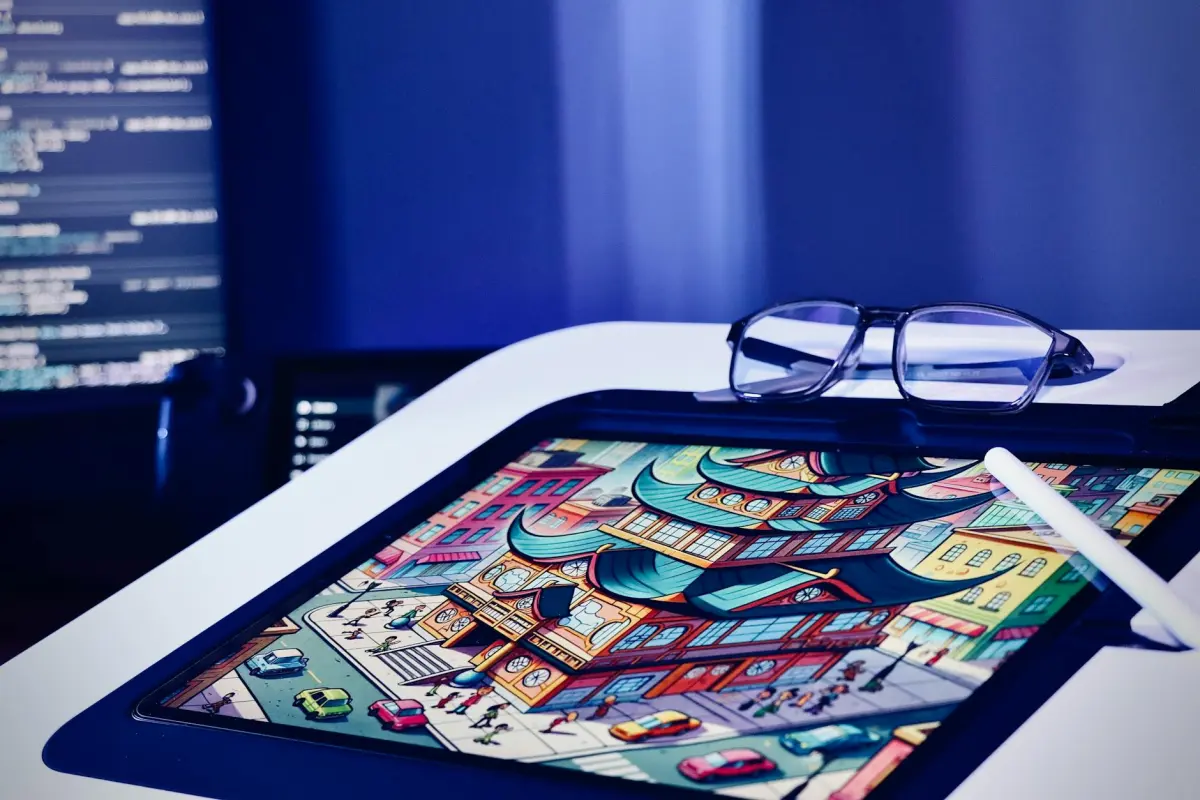
Video-to-Video AI: Scene Reali in Cartoni Animati – Recensione Pratica del Generatore
Raccomandazione: scegli un generatore basato su GPU con anteprime rapide, un'ampia suite di modelli di stilizzazione e preset di esportazione con un clic in linea con la consegna finale. Esegui diverse brevi clip attraverso lo strumento e confronta la fedeltà del movimento, il trattamento dei bordi e la gestione delle texture tra gli stili. Questa base informa la pipeline che scalerai per la produzione senza iterazioni sprecate e puoi facilmente perfezionare l'aspetto per adattarlo senza sforzo al pubblico di destinazione.
Cosa testare per primo: preservazione del movimento, nitidezza dei bordi e realismo della texture tra le opzioni. Utilizza più *demo* fornite dalla piattaforma, confronta l'output con i fotogrammi sorgente e giudica se la *stilizzazione* regge su riprese più lunghe. Controlla la stabilità dell'esportazione per evitare scatti e fai riferimento a modelli di renderforests e altri *strumenti* affidabili per garantire risultati coerenti.
Suggerimenti per il flusso di produzione: imposta una frequenza dei fotogrammi fissa (24–30 fps), applica un approccio a due passaggi (stilizzazione di base, quindi rifinitura del colore e dei bordi) ed elabora le clip in batch per mantenere la temporizzazione coerente. Questo approccio preserva i segnali di movimento e produce uno stream finale coerente attraverso una sequenza, scalando facilmente da un singolo video a una libreria di episodi.
Linee guida pronte per il creator: per le clip di vlogger o di marketing, punta a un aspetto accattivante ma leggibile sugli schermi mobili. Inizia con tre preset, produci un reel di prova di 30–60 secondi e confronta su diversi dispositivi. Esporta a 1080p o 4K, scegliendo codec (H.264 o H.265) in base alle esigenze della piattaforma. Un flusso di lavoro semplificato "un clic per l'aspetto" può ridurre drasticamente i tempi di produzione mantenendo intatto il tuo distintivo aspetto realistico.
Artefatti e gestione dei rischi: aspettati artefatti occasionali con movimenti rapidi o texture dense; riduci la forza della stilizzazione o regola la compensazione del movimento per ridurre al minimo lo sfarfallio. Se i colori deviano tra le scene, applica un passaggio globale di corrispondenza dei colori prima di rendering il taglio finale. Documenta le impostazioni utilizzate per ciascun progetto per semplificare il lavoro futuro e mantenere una coerenza visiva che preservi la vita.
Costi, licenze e flussi di lavoro: molte opzioni offrono un piano gratuito con risoluzione limitata o filigrane; per progetti commerciali, investi in una licenza che copra l'uso in produzione. Privilegia modelli che si aggiornano regolarmente e forniscono stili diversi. Assicurati che l'esportazione includa la risoluzione, il bitrate e lo spazio colore preferiti. Usa le *demo* per calibrare l'aspetto prima di impegnarti in una produzione e monitora l'impatto di marketing con video brevi e misurati.
Come preparare il girato sorgente per la cartomizzazione
Struttura il tuo girato in clip concise e orientate all'azione: 6–12 secondi ciascuna, con soggetti chiari e movimento prevedibile per supportare una stilizzazione pulita. Acquisisci materiale live-action a 24–30 fps per preservare la temporizzazione naturale, quindi allinea le modifiche al ritmo di destinazione per un risultato cinematografico. Mantieni la fotocamera stabile utilizzando un treppiede o un gimbal per ridurre gli scatti, che complicano il controllo durante la stilizzazione successiva.
Stabilizzazione e inquadratura: assicurati una velocità dell'otturatore e un'esposizione costanti, evita Motion Blur estremo e blocca il bilanciamento del bianco per preservare la continuità del colore. L'inquadratura dovrebbe minimizzare tagli improvvisi tra le transizioni, consentendo una facile applicazione di modelli e modelli.
Illuminazione e colore: filma in condizioni di illuminazione controllata o usa una luce diffusa per ottenere un'illuminazione uniforme. Imposta un profilo colore fisso o un bilanciamento del bianco neutro; colora con una palette limitata per supportare la coerenza estetica per la stilizzazione. Ciò aiuta l'algoritmo ad applicare un aspetto coerente al materiale creato, rendendo il risultato finale più vicino all'estetica desiderata.
Audio e segnali di movimento: isola il dialogo quando necessario e prepara segnali di temporizzazione per la sincronizzazione labiale, se applicabile. Mantieni il movimento della telecamera prevedibile in modo che le animazioni e i riferimenti di movimento si traducano in modo pulito nello stile finale.
Risoluzione, formato e proxy: esporta a 1080p o 4K e in formato 16:9; imposta un bitrate elevato, preserva la profondità del colore e mantieni l'audio separato per il re-linking. Crea versioni proxy per iterazioni rapide; quando sei pronto, ri-collega all'alta risoluzione per il rendering finale, assicurando un flusso di lavoro scalabile e ripetibile che supporta test iterativi.
Asset e flusso di lavoro: crea una struttura di elementi riutilizzabili: modelli di sfondo, forme di silhouette, riferimenti di movimento. Raccogli modelli, modelli e palette estetiche da renderforests o altre fonti gratuite per accelerare la configurazione. Pianifica idee per la stilizzazione e testa con brevi animazioni per verificare quanto bene i modelli scelti si traducano nell'estetica di destinazione.
Iterazione e QA: esegui test rapidi su una breve clip per valutare la temporizzazione e il controllo; durante il perfezionamento, regola il ritmo, la sincronizzazione labiale e i dettagli dei bordi fino a raggiungere un'atmosfera cinematografica. Mantieni un registro di controllo con note sulle impostazioni che hanno prodotto i risultati più forti per ciascun modello, consentendo cicli facilmente ripetibili durante la produzione.
Formati di input e risoluzioni migliori per risultati di qualità
Inizia con 4K60 MP4 (H.265) o ProRes 422 HQ per la massima qualità; profondità colore a 10 bit se la sorgente lo consente. Ciò preserva i dettagli fini e la temporizzazione per i trasferimenti di stile basati sull'IA. Se i limiti di budget o hardware esistono, 1080p60 MP4 (H.264) rimane accettabile, sebbene i dettagli e la fedeltà del movimento possano essere ridotti.
Formati di input che evitano artefatti: MP4 in H.265/HEVC a 4K60 (o 1080p60) e Apple ProRes 422 HQ o ProRes 4444 per flussi di lavoro post-produzione su Mac; mantieni un bitrate elevato in entrambi i casi; evita sorgenti a 480p gravemente compresse poiché degradano i dettagli nelle animazioni e nella stilizzazione.
Risoluzioni e proporzioni: preferisci il 16:9 nativo; per contenuti mobili verticali, 9:16; mantieni 3840x2160 o 4096x2160 come input quando possibile; 1920x1080 come fallback. Mantieni i frame rate fissi a 24, 30 o 60 fps; 60 fps per l'azione, 24 fps per un'atmosfera cinematografica. Se non sei sicuro, guarda i metadati sorgente e assicurati che il target scelto corrisponda al tuo dispositivo di output; quindi unifica tra le clip per evitare transizioni brusche. Questo approccio ti aiuta a far corrispondere l'aspetto tra le inquadrature.
Profondità colore: consigliato 10 bit; 8 bit comune; imposta lo spazio colore su Rec.709; per progetti HDR, Rec.2020; evita una color grading pesante all'input; mantieni saturazione e contrasto per supportare trasformazioni estetiche successive. Esporta almeno 8 bit per canale in MP4 o MOV, ma 10 bit preserva meglio i gradienti; usa il gamma log solo se la tua catena lo supporta.
Contenitore e audio: Contenitori di file: MP4, MOV; evitare di mescolare più flussi che confondono la pipeline. Mantenere l'audio a 48 kHz, 16-bit o 24-bit; separare l'audio dal video all'esportazione per semplificare la gestione della timeline. Nell'editor, fare clic su esporta per applicare la preimpostazione scelta. Per i team di produzione, esportare un master di alta qualità e un proxy leggero per risparmiare tempo durante l'editing e la revisione; questo aiuta i flussi di lavoro dei vlogger a rimanere nei tempi previsti, risparmiando tempo.
Controlli di qualità e riutilizzo: eseguire rendering di prova su una clip di esempio, controllare tempistica, colore e movimento; se si desidera aumentare la scala, creare preimpostazioni in modo che i team possano riprodurre facilmente i risultati. Durante l'esportazione, salvare il master in varianti senza perdita di dati o ad alto bitrate, quindi generare i deliverable per le pipeline di produzione. Se si utilizzano pacchetti di asset da renderforests, verificare la compatibilità 4K e la coerenza dei colori. Che tu sia un creatore single o parte di un piccolo team, input puliti riducono il lavoro di rifacimento e accelerano la vita del progetto. Le preimpostazioni create per generi comuni accelerano la configurazione.
Procedura passo-passo per convertire una scena in stile cartone animato
Passaggio 1 – Valutare la sorgente e definire il concetto di destinazione: scegliere un fotogramma live-action, annotare i battiti di movimento e impostare la stilizzazione desiderata. Questo crea una struttura per il flusso di lavoro e aggiunge protezione contro l'eccessiva elaborazione.
Passaggio 2 – Analizzare movimento e posa: tracciare i vettori di movimento, esagerare le pose chiave e mapparli su silhouette semplificate. Questo aiuta a far corrispondere l'aspetto finale tra i fotogrammi e a mantenere il ritmo.
Passaggio 3 – Progettare personaggi e oggetti di scena: disegnare silhouette chiare, definire caratteristiche distintive e costruire un piccolo set di forme ripetibili per l'eroe e le figure di supporto. Questo rafforza la coerenza del concetto e rende il processo di creazione efficiente.
Passaggio 4 – Applicare livelli di stilizzazione: scegliere un'atmosfera ispirata agli anime o uno stile a inchiostro audace. Creare una struttura a livelli: colore di base, ombreggiature, luci e disegno al tratto nitido per ottenere un aspetto fantastico e coeso.
Passaggio 6 – Revisionare, regolare ed esportare: eseguire il rendering di un breve video o sequenza per una rapida revisione. Controllare la coerenza del movimento, la fedeltà dei bordi e l'equilibrio dei colori. Se necessario, modificare lo spessore delle linee o la saturazione ed esportare nuovamente per preservare la qualità.
Passaggio 7 – Salvare un modello riutilizzabile per l'istruzione e progetti futuri: archiviare la struttura e le regole come risorsa gratuita per la comunità di maker. Il modello archiviato offre un percorso diretto per creare rapidamente asset video stilizzati da nuovo materiale.
Come confrontare i generatori di animazione AI: funzionalità importanti
Raccomandazione: Scegliere un generatore con un flusso di lavoro basato su script, una solida protezione degli asset e un ciclo di anteprima rapido per risparmiare tempo mantenendo il controllo sull'aspetto. Preferire strumenti progettati per i creatori per fornire output puliti in modo rapido e affidabile, supportando il tuo lavoro in ogni fase.
Il supporto all'input è importante: verificare un'ampia compatibilità sorgente, inclusi video live-action, sequenze di immagini e prompt di testo. Preferire prodotti che supportino l'importazione drag-and-drop, l'elaborazione batch e una gestione coerente dei colori per ridurre le modifiche manuali all'interno della pipeline esistente.
Qualità vs velocità: valutare la fedeltà, il realismo del movimento e il comportamento dell'illuminazione. Cercare preimpostazioni cinematiche, illuminazione regolabile, dettagli delle texture e la capacità di impostare risoluzione e frame rate senza destabilizzare l'output. Un'opzione solida offre un flusso di lavoro di trasformazione che rimane eccezionale sotto pressione.
Personalizzazione e modifica: ispezionare come è organizzata la struttura e se le preimpostazioni sono modulari. Controllare i controlli granulari per il disegno al tratto, le ombreggiature e le curve di movimento, oltre a un sistema di script o macro accessibile che consente di automatizzare le modifiche ripetitive con il minimo sforzo.
Controllo e automazione: garantire un'interfaccia utente pulita con un controllo visibile sui parametri, la possibilità di salvare e riutilizzare le preimpostazioni e opzioni di ripristino affidabili. Cercare hook di automazione che consentano l'integrazione nella propria pipeline basata su script, solo l'automazione sufficiente per accelerare la produzione.
Protezione e licenza: confermare le opzioni di filigrana, i termini di licenza e i diritti di riutilizzo per le pipeline di prodotti commerciali. Il rendering basato su GPU o su cloud dovrebbe includere termini chiari in modo da poter pianificare il marketing e la distribuzione senza sorprese.
Collaborazione per vlogger e lavori di marketing: valutare la modifica multiutente, la condivisione dei progetti e le funzionalità di anteprima live che supportano il feedback just-in-time. Queste funzionalità aiutano a trasformare le brief in contenuti pronti per la pubblicazione e a mantenere un aspetto coerente tra gli episodi.
Hardware e prestazioni: confrontare i requisiti di elaborazione, le opzioni cloud vs on-device e se la soluzione è basata su GPU. Assicurarsi che la configurazione soddisfi i requisiti di RAM e GPU necessari per evitare colli di bottiglia durante la produzione.
Prezzi e ritorno sull'investimento: mappare i livelli al volume di output previsto, alla qualità dell'esportazione e al supporto continuativo. Preferire prodotti con costi prevedibili, limiti di prova generosi e licenze chiare in modo che il tuo team possa scalare senza sorprese, specialmente per le campagne di marketing.
Checklist per una valutazione rapida: formati di input, controlli di fedeltà, struttura, profondità di personalizzazione, strumenti di modifica, supporto script, opzioni di protezione, formati di esportazione e hook di integrazione per il tuo flusso di lavoro. Utilizzare questa rubrica per scegliere un prodotto che soddisfi le proprie esigenze.
Suggerimenti per evitare artefatti e mantenere la coerenza del movimento
Iniziare con un passaggio offline di 2-4 secondi su una ripresa semplice utilizzando il proprio strumento di conversione video-in-video basato su IA. Eseguire il rendering alla risoluzione di destinazione dopo un rapido controllo di qualità, regolare i campi di movimento e verificare la presenza di artefatti in un segmento in loop. Mantenere questo campione di prova rappresentativo del concetto finale in modo da poter ottimizzare i parametri prima della produzione finale.
- Deriva del movimento e allineamento dei fotogrammi: puntare a ≤1,5 px di traslazione per fotogramma e ≤0,2° di rotazione. Utilizzare l'allineamento del flusso ottico e un passaggio di levigatura temporale di 3 fotogrammi (0,65–0,8) per mantenere la coerenza attraverso i secondi.
- Stabilità dei bordi e dei contorni: applicare una leggera riduzione del rumore che preservi i bordi; limitare l'affilatura per evitare aloni; mantenere i contorni dei personaggi puliti per prevenire sfarfallii durante le transizioni di movimento.
- Guida del modello per preservare lo stile: selezionare un piccolo set di modelli per lo stile di movimento e garantire che le trasformazioni preservino l'integrità della silhouette. Riutilizzare le preimpostazioni per evitare deriva e semplificare la produzione, aiutando a trasformare le idee senza perdere l'identità del personaggio.
- Coerenza di colore e illuminazione: bloccare il bilanciamento del bianco su un riferimento fisso; imporre una tavolozza di colori stabile. Monitorare il deltaE tra i fotogrammi (target ≤3) per mantenere un aspetto uniforme nell'intera sequenza.
- Risoluzione e profondità del colore: lavorare in colore a 10 bit ove possibile; scegliere un bitrate sufficientemente alto da prevenire il banding; mantenere il campionamento cromatico coerente con la propria pipeline (4:2:2 o 4:2:0) per gradazioni uniformi durante il movimento.
- Privacy e flusso di lavoro offline: elaborare localmente durante la formazione e le prime fasi di produzione; evitare le esportazioni cloud fino al passaggio finale per preservare la privacy del materiale sorgente.
- Controlli di qualità e metriche: eseguire benchmark SSIM e PSNR su 3-5 brevi intervalli per clip; puntare a SSIM ≥ 0,92 e PSNR ≥ 28 dB; contrassegnare i fotogrammi con grandi differenze temporali per correzioni mirate.
- Ciclo di revisione iterativo: mantenere un registro delle modifiche dei parametri e dei risultati; trasformare le impostazioni riuscite in modelli riutilizzabili in modo che chiunque possa riprodurre istantaneamente il risultato.
- Rilevamento di artefatti durante la revisione: abilitare un semplice rilevatore di artefatti per contrassegnare sfarfallii, spostamenti di colore e artefatti sui bordi; affrontare i fotogrammi contrassegnati prima di passare alla produzione finale.
- Ciclo di vita e allineamento narrativo: assicurarsi che le regolazioni preservino il concetto del creatore e la coerenza del personaggio, in modo che la narrazione rimanga avvincente mentre le immagini rimangono fluide tra le inquadrature.


