

توصية: طبّق خطوة معالجة مسبقة واعية للضوضاء تعزل الخطوط، ثم انشر نموذجًا قائمًا على الانتشار مخصصًا لصقل الخطوط الفنية، مما ينتج خطوطًا أكثر ترتيبًا مع الحفاظ على قصد المؤلف.
يحدد تصميم البنية والواجهة كيفية تعاون الفنانين مع الأداة. تدعم خطة العمل المتعددة الاستخدامات التخصيص عبر أنماط الرسم، مما يسهل التجارب السريعة وإدارة التغيير، دون توقف في الإبداع. تعمل التكاملات مع Corel والمجموعات الأخرى على توسيع الدعم للإبداعات التي تتم داخل الاستوديو وسير عمل التسويق، مما يمكّن المسوقين من مقارنة النتائج واختيار الإصدارات الناجحة.
لتوجيه التحسين، أدخل لمسات من التوجيه في خطوات الانتشار الحاسمة، لتوجيه تماسك الخطوط مع الحفاظ على الملمس. تغطي مجموعة من النماذج الخط اليدوي، والرسوم البيانية الفنية، والإبداعات بأسلوب المتجهات، مما يوفر مرونة أكبر لمطابقة جماليات العلامة التجارية. توفر خطة العمل تحكمًا معززًا، مع معاينات مباشرة ومسار واضح لنقل الخبرة عبر الفرق.
تظهر فوائد ملحوظة عندما تواءم الفرق البنية مع أهداف المستخدم: واجهة مبسطة، تخصيص في كل خطوة، و دعم قوي من الخبراء. يحسن النهج التماسك بين الخطوط والمساحة السلبية، مما يمكّن المسوقين من تحقيق دورات أسرع وإنتاج إبداعات متسقة عبر القنوات، مع تقديم نماذج الانتشار نتائج قابلة للتطوير عبر الأحجام والتنسيقات.
بينما تتوسع، احتفظ بمكتبة من الإعدادات المسبقة التي تقنن استراتيجيات التغيير، وتحافظ على قصد المبدع، وتمكّن التكرار السريع عبر الفرق. مع التركيز على البنية وواجهة سهلة الاستخدام، يصبح الحل ميزة متعددة الاستخدامات للاستوديوهات التي تستثمر في إنتاج الأعمال الفنية بمساعدة الذكاء الاصطناعي.
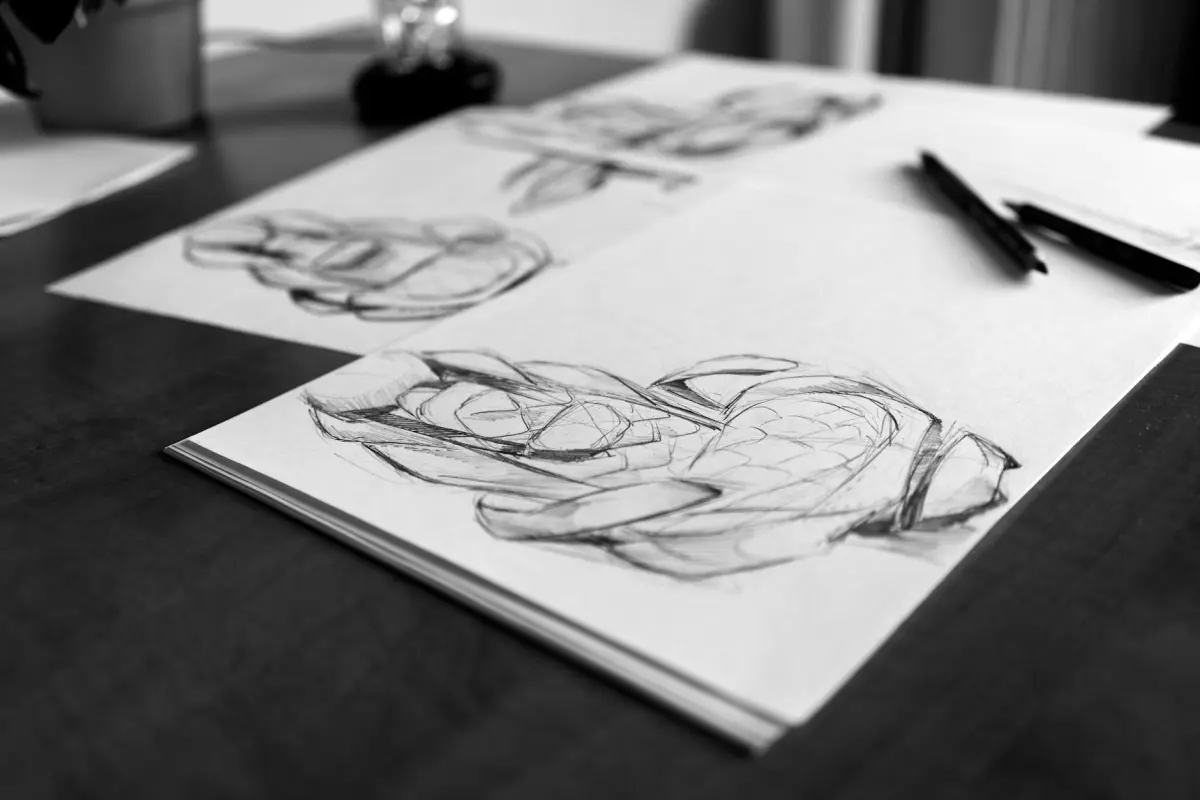
قيّم جودة الرسم الأولي: حدد الخطوط التي يجب الاحتفاظ بها وتلك التي يجب إعادة رسمها
ابدأ بفحص سريع للجودة: ضع علامة على أقوى الخطوط التي تحدد الوضع، والنسب، والصورة الظلية الرئيسية، واحتفظ بالعلامات التي تشير فقط إلى الملمس. ما تريد الاحتفاظ به هو الهيكل الواضح؛ استخدم مقياسًا بسيطًا من 3 نقاط: 3 = احتفظ كما هو، 2 = صقل مع تصحيحات طفيفة، 1 = أعد الرسم بالكامل. إعطاء الأولوية للحواف التي تقفل الهيكل (المفاصل، العمود الفقري، المستويات الرئيسية) والحفاظ على إيقاع الحركة؛ أي شيء لا يساهم في تلك الإشارات يعاد رسمه.
لتمكين التعاون، قم بالتعليق على منصة مشتركة مثل Miro وسرد القرارات بالتعليقات. اسحب الأجزاء المحفوظة إلى طبقة مخصصة؛ احتفظ فقط بالمخططات الأساسية وأعد بناء الباقي في تمريرة منفصلة، باستخدام الخطوط المطلوبة فقط. قم بتصدير الخطوط المحفوظة إلى نماذج أولية معدة مسبقًا، جرب الأفكار التي تم إنشاؤها بواسطة الذكاء الاصطناعي من DALL-E، وقارن النتائج على قوالب Vmaker. قم دائمًا بدعوة التعليقات من الفنان والخبراء؛ معظم المدخلات تساعدك على التقارب بشكل أسرع. أيضًا، قم بتتبع التغييرات في سلسلة ديناميكية حتى يتمكن الفريق من التكرار معًا اليوم.
إطار اتخاذ القرار للاحتفاظ مقابل المراجعة
ركز على ثلاثة معايير: الوضوح الهيكلي، واتساق النسب، والقابلية للقراءة المرئية بالحجم المقصود. إذا كان الخط ينقل موقع المفصل أو المفصل الرئيسي، فاحتفظ به؛ إذا كان يتتبع الملمس فقط، فأعد رسمه. عندما تكون غير متأكد، اختبر بديلاً سريعًا عن طريق إنشاء تمريرة موازية باستخدام DALL-E وقارن جنبًا إلى جنب. الخيار الأفضل هو الخيار الذي يقلل الشكوك حول الخطوة التالية في الاستوديو.
سير عمل تعاوني للتكرار السريع
ضع حلقة سريعة: بمجرد تحديد الخطوط التي يجب الاحتفاظ بها، قم بإنشاء طبقة محسنة وتكرار نظيف بفرشاة خفيفة. استخدم النماذج الأولية للتحقق من قابلية القراءة عبر الوسائط؛ قدم ملاحظات صوتية للسرعة؛ اجمع التعليقات من زملائك في الفريق؛ لخص إيجابيات وسلبيات وقرر ما يجب الاحتفاظ به أو مراجعته. هذا يبني عملية تعاونية وسهلة الوصول يمكن أن تصبح خط أساس مستقر للنتائج التي تم إنشاؤها بواسطة الذكاء الاصطناعي والمشاركة الاجتماعية؛ تحتفظ المنصة بكل شيء في مكان واحد حتى تتمكن من التكرار اليوم.
اختر استراتيجية التنظيف: تتبع المتجهات، تنظيف النقط، أو سير عمل هجين
توصية: ابدأ بتتبع المتجهات عندما تتطلب الحواف هندسة دقيقة ونتائج قابلة للتطوير؛ هذا المسار يوفر الاتساق، وأحجام ملفات أصغر، وتكرارات أسرع على الأجهزة التي تشغل تصميمك. بالنسبة للمصمم الذي ينشئ عناصر جاهزة للهندسة المعمارية، يتوافق التتبع بالمتجهات أولاً مع سير العمل ويحافظ على وضوح الفكرة، كما في عمل أدبي مخصص لإعادة الاستخدام عبر مشاريع مماثلة.
استخدم تنظيف النقط للمقاطع الغنية بالملمس، والتدرجات، والمراجع الممسوحة ضوئيًا حيث يجب أن يبدو التظليل طبيعيًا. يحافظ هذا النهج على ثراء التفاصيل ويدعم التسميات التوضيحية والسرد الذي يشرح خطوات التحسين. توقع فترات استغراق وقت طويل، ولكن النتيجة تظل وفية للصورة المصدر ومفيدة لعمل الموقع الإلكتروني والمعرض؛ لا تهمل أبدًا حماية الملكية الفكرية عند مشاركة النتائج مع العملاء أو على موقع عام.
يمزج سير العمل الهجين بين الطريقتين: خطوط المتجهات للأشكال والهيكل، بالإضافة إلى صقل النقط للملمس. هذا النهج عملي عندما تريد الاتساق عبر متغيرات التصميم، مثل عائلات الهندسة المعمارية، وعندما تحتاج إلى الحفاظ على توافق قوي بين الكلمات والتسميات التوضيحية والإخراج المرئي. إنه يمثل ميزة للفرق ذات الخبرات المتفاوتة؛ يدعم سير العمل التحسين التكراري ويجعل العملية أسرع في المشاريع الكبيرة ويقلل من خطر التشوهات أثناء التصدير. استخدم ChatGPT للسرد أو الأوصاف الوصفية لمرافقة العمل على موقعك على الويب؛ هذا يساعد في الحفاظ على المفهوم واضحًا وسهل الوصول إليه. استخدم Visla للتسميات التوضيحية والسرد لمزامنة النص مع الحركة أو الشرائح، مما يحسن الحماية والاتساق عبر القنوات.
استراتيجية المتجهات أولاً
الإيجابيات: هندسة دقيقة، نتائج قابلة للتطوير، تعديلات سهلة، أحجام ملفات أقل، واتساق قوي عبر الصفحات. تعمل بسلاسة على الأجهزة النموذجية وتناسب التصميم الموجه نحو النمذجة والهندسة المعمارية. هذا المسار يناسب المصممين الذين يريدون عملية يمكن التنبؤ بها وتنسيقات تصدير موثوقة؛ يدعم التسميات التوضيحية والسرد المتوافقة مع الفكرة، ويمثل ميزة في حماية الملكية الفكرية عبر تنسيقات المتجهات.
السلبيات: التقاط محدود للملمس، المزيد من العمل عندما يكون التظليل ضروريًا، ومقايضات محتملة في الدقة للعناصر الواقعية. يتطلب تخطيطًا دقيقًا أثناء ترجمة التفاصيل إلى متجهات لتجنب التشوهات في الأصول المماثلة.
اعتبارات سير العمل الهجين
عندما تمزج الأصول بين الهندسة والملمس، يتألق النهج الممزوج. حافظ على تنظيم الطبقات، وسمها بوضوح، وقم بتصدير أصول منفصلة لبيانات المتجهات والنقط. يوازن المسار الهجين بين التحسين والاتساق والسرعة، ويدعم سردًا موحدًا من خلال التسميات التوضيحية. هذا الأسلوب يناسب المشاريع ذات النطاق الكبير مثل الأعمال الأدبية حيث يجب أن تظل نية التصميم باقية عبر المنصات، ويوفر ميزة عملية للفرق ذات الخبرات المتنوعة. لمشاركة النتائج على موقع ويب أو في مراجعات العملاء، يمكنك الاعتماد على التسميات التوضيحية التي يتم إنشاؤها بواسطة ChatGPT أو Visla لشرح الخطوات وحماية الملكية الفكرية.
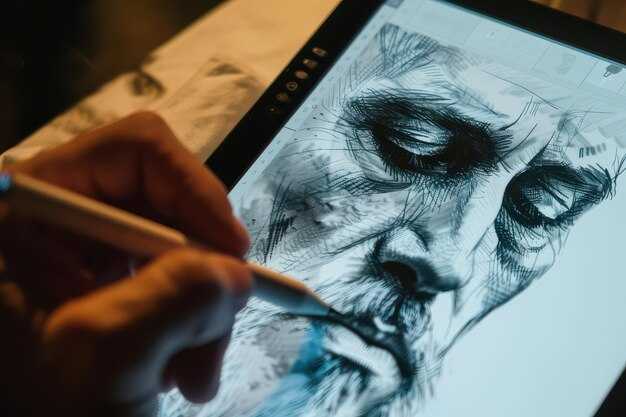
حدد صورة مرجعية: الاتجاه الأسلوبي، والمنظور، والإضاءة، واللون
اختر صورة مرجعية تحدد الأسلوب والمنظور والإضاءة واتجاه الألوان؛ يمكن أن يتيح ذلك تقديم عروض متسقة وأسرع للحصول على الأفكار. تعمل المرجع كخط أساس عمل يساعد على التقدم ويقلل من إضاعة الوقت. يمكن استخدام هذا النهج عبر المشاريع وهو خدمة قوية للفرق، مما يخلق مكتبة أفكار طويلة الأجل في سير العمل الرقمي؛ وجدنا أنه يحافظ على توافق الزملاء ويحصل على قرارات أسرع.
الأسلوب والمنظور
- وضح الأسلوب المقصود في توجيه واحد (خطوط قليلة، ملمس رسم، أو رسومات بيانية جريئة)؛ الهدف الواضح يخلق أيضًا اتساقًا معززًا ويحافظ على توافق الخبرة.
- اختر المنظور: نقطة واحدة، نقطتان، أو ثلاث نقاط، وقم بتمييز خط الأفق لتوجيه النسب؛ هذا الخيار الديناميكي يحدد العمق للعمل بأحجام مختلفة.
- وثق زاوية الكاميرا ولغة الجسد: لاحظ الميل، والتقصير، واتجاه الأعضاء للحفاظ على قراءة موحدة للأشكال؛ قم بالتعديل أثناء تحسينك.
- قم بتنظيم المواد المصدر التي تطابق الحالة المزاجية؛ تخطى المراجع التي تتعارض مع اللون أو الحالة المزاجية؛ فضل الأصول مفتوحة المصدر لتسريع الحصول على الأفكار.
اتجاه الإضاءة واللون
- وصف اتجاه الإضاءة: أمامي، جانبي، أو خلفي؛ تحديد الشدة؛ قد يتيح ذلك تحسين التباين والعمق.
- تحديد اتجاه اللون: عائلة اللون السائدة، درجة الحرارة، وصبغة الظل؛ إرفاق لوحة ألوان للحفاظ على اتساق العرض.
- توثيق سيناريو الألوان أو لوحة المزاج؛ هذا يعزز الفهم ويقلل من التكرارات ذهابًا وإيابًا.
- حافظ على سير العمل مناسبًا للبيئة الرقمية؛ استخدام أدوات مفتوحة المصدر أدوات وأصول مشتركة يتيح تعاونًا أسرع وتقدمًا أفضل.
- ضع في اعتبارك استجابة المواد (معدن، قماش، جلد) للضوء لتحسين الواقعية دون إضاعة الوقت؛ هذا يساعد في الخبرة وينتج نتائج أغنى.
- قم بتضمين فحص طبقة تراكب أو طبقة للتحقق من المحاذاة قبل العمل التفصيلي؛ يمكن إجراء هذا الفحص الأولي بسرعة وتعديله بكفاءة.
محاذاة ودمج المرجع: المقياس، الدوران، نقاط الربط المشتركة
اضبط إطار المرجع على مقياس ثابت 1.0، قم بتدويره لمحاذاة محور التصميم الرئيسي، وثبّت ثلاث نقاط ربط مشتركة: أعلى اليسار، أسفل اليمين، والمركز. يصبح هذا الإطار الثابت هو المصدر الوحيد للحقيقة لجميع المخرجات في الإنتاج، مما يساعدك على البقاء على المسار الصحيح نحو روائع العمل ويتيح تسليمات سريعة للمسوقين وأصحاب المصلحة.
باستخدام هذا الإطار، يمكنك تعديل المقياس بسرعة: احسب العرض المستهدف / العرض المصدر = ق؛ حدد فرق الدوران θ = زاوية الهدف - زاوية المصدر؛ طبّق كلاهما على جميع المدخلات وأعد الربط عند نفس النقاط الثلاث. قبل المتابعة، تحقق من أن الإحداثيات المخططة تقع ضمن حدود دقيقة (±2 بكسل بدقة عالية) ووثّق القيم في خطتك. احفظ التحديثات في المستودع المشترك لضمان عمل الجميع من نفس المرجع.
قائمة تدقيق التنفيذ
ثبّت المقياس عند 1.0، واضبط الدوران على زاوية الهدف المقاسة، وثبّت تعيينات نقاط الربط بحيث تتوافق أي مدخلات جديدة في ثوانٍ. استخدم ثلاث نقاط ربط لتقييد الترجمة بعد الدوران، مما يضمن الاتساق عبر الأصول اللاحقة في سير عمل نماذج المانجا المتقدمة. هذه الطريقة تبسّط التواصل مع الفريق، وتساعد المسوقين وأصحاب المصلحة على البقاء متسقين، وتدعم الإنشاء السريع للإعلانات وغيرها من روائع المخرجات.
التحقق والتكامل
بعد المحاذاة، قم بتشغيل فحص سريع على 5-7 عينات لقياس الفعالية: سجل انحراف الربط، وخطأ الدوران، وتبايُن المقياس في دقائق. احفظ التحديثات في المستودع المركزي، وأبلغ زملائك في الفريق عبر التقويم، واحتفظ بسجل لتحسين التعلم. هذا يقوّي حلقات التعلم، ويحسن دقة الخطة، ويمنح القوة لدورات الإنشاء المستقبلية.
إعداد سير عمل قابل للتكرار: طبقات، تعليمات، نقاط فحص، وفحوصات الجودة
ابدأ بتثبيت مكدس أربع طبقات وقائمة تعليمات؛ يتم ذلك مرة واحدة ويبقى فعالًا للعديد من الأصول. تستضيف الطبقة 1 رسمًا تخطيطيًا أساسيًا يلتقط الوضع والصورة الظلية. الطبقة 2 تحتوي على خط رسم نظيف بوزن خط متسق. الطبقة 3 تتعامل مع التظليل واللون، بما في ذلك درجات المانجا أو التدرجات. الطبقة 4 تطبق المؤثرات النهائية، والملمس، والإضاءة. قم بتسمية المجموعات بوضوح واحتفظ بالمراجع مرفقة، بحيث تعيد كل عملية تشغيل إنتاج الهيكل. يوفر هذا الإعداد ميزة كبيرة عند تسليم مفاهيم الأفاتار أو رسومات أوسع في الوقت الفعلي. يضمن استخدام عمليات الدُفعات وواجهة مستقرة بقاءك فعالًا ويقلل من فقدان التفاصيل عبر التكرارات.
سير عمل الطبقات
الطبقة 1: يبقى الرسم التخطيطي الأساسي كخط مرجعي؛ احتفظ بالرسم التخطيطي على طبقة منفصلة لمنع التعديلات العرضية على أدلة الأبعاد. الطبقة 2: يحافظ خط الرسم على وضوح المحيط واتساق وزن الخط؛ قم بتمكين التنعيم للحفاظ على حواف نظيفة مع الحفاظ على الطاقة في الحركة. الطبقة 3: يضيف التظليل واللون عمقًا؛ قم بإنشاء خرائط قيم، ثم طبّق اللون باستخدام لوحة ألوان مقيدة لتجنب الضوضاء. الطبقة 4: تنتهي المؤثرات النهائية من الملمس والإضاءة والجو الدقيق؛ استخدم تمريرات الانتشار لتحسين الإبرازات والظلال. بالنسبة لأصول الأفاتار وأسلوب المانجا، قم بالتبديل إلى مظهر حاد وواضح عن طريق تحسين وزن الخط وتقليل البكسلات المتناثرة. يمكن إدارة هذا الهيكل باستخدام معاينات في الوقت الفعلي وعمليات الدُفعات في واجهة قادرة، وتجنب إعادة العمل غير المنظمة.
تعليمات، نقاط فحص، وفحوصات الجودة
التعليمات: حدد التعليمات الخاصة بالمرحلة وقم بتخزينها في قائمة. تعليمات المرحلة 1 تحويل الرسم التخطيطي إلى تخطيط متماسك؛ تعليمات المرحلة 2 تستهدف وضوح المحيط؛ تعليمات المرحلة 3 تحدد عمق التظليل وتوازن الألوان؛ تعليمات المرحلة 4 تنهي الملمس والإضاءة. استخدم التعليمات المتغيرة لمعالجة الآثار المكتشفة؛ ربط التعليمات بالمرجع الحالي (الأفاتار أو الرسومات الأوسع) والحفاظ عليها متسقة عبر الجلسات.
نقاط الفحص: بعد التخطيط، قم بتشغيل فحص محاذاة سريع؛ بعد خط الرسم، تحقق من استمرارية المحيط؛ بعد التظليل، قم بتأكيد نطاق القيم والتباين؛ بعد الانتهاء، قم بتقييم التناغم العام.
فحوصات الجودة: قم بتشغيل مقارنات آلية مع المراجع، وقم بقياس فقدان الميزات الهامة، وراجع للحصول على صور ظلية واضحة، وحواف غير متقطعة، وعمق واقعي. إذا فشل أي مقياس، قم بتعديل عناصر التحكم في الواجهة، وأعد تشغيل التحسينات المستندة إلى الانتشار، وأعد اشتقاق النتيجة لتبقى على المسار الصحيح. يجب أن تكون النتيجة رسومات قابلة للاستخدام بمظهر حقيقي وجاهز للنشر يعمل مع إضاءة بأسلوب v-ray أو عمليات عرض أخرى. عمليًا، ينتج هذا النهج تحويلًا أسرع وأكثر قابلية للتنبؤ من الرسم التخطيطي إلى العمل الفني النهائي، مع تكرارات أقل وحاجة إلى إعادة رسم يدوية أقل.


