

从具体的提纲和单一的观众回报开始,以指导每一个镜头。创作者总是在渲染素材之前绘制情感弧线,这使得内容紧凑,帮助他们保持情感联系,并使最终结果个性化,对观众来说很棒。
简洁的文字和强烈的视觉提示的使用支持更高质量的渲染。尽量使用最少的文字,并依靠视觉传达情绪;这可以增强观众的理解,并使作品感觉个性化和真实。
遵循映射场景到节拍的引导序列,以便流程保持紧凑。人工智能助手可以组装镜头、交换素材和调整节奏,而你可以控制核心角色及其欲望。
通过模板化素材、重用成功的视觉效果和跨剪辑调整色调来建立可重复的工作流程。这种方法允许你为想要保持一致并为观众提供出色体验的创作者渲染更多内容。
通过测试不同的视觉风格和信息来不断完善和反馈。恰当的用法、个性化触感和精心挑选的文字的结合,确保内容感觉强大,并让观众持续关注。
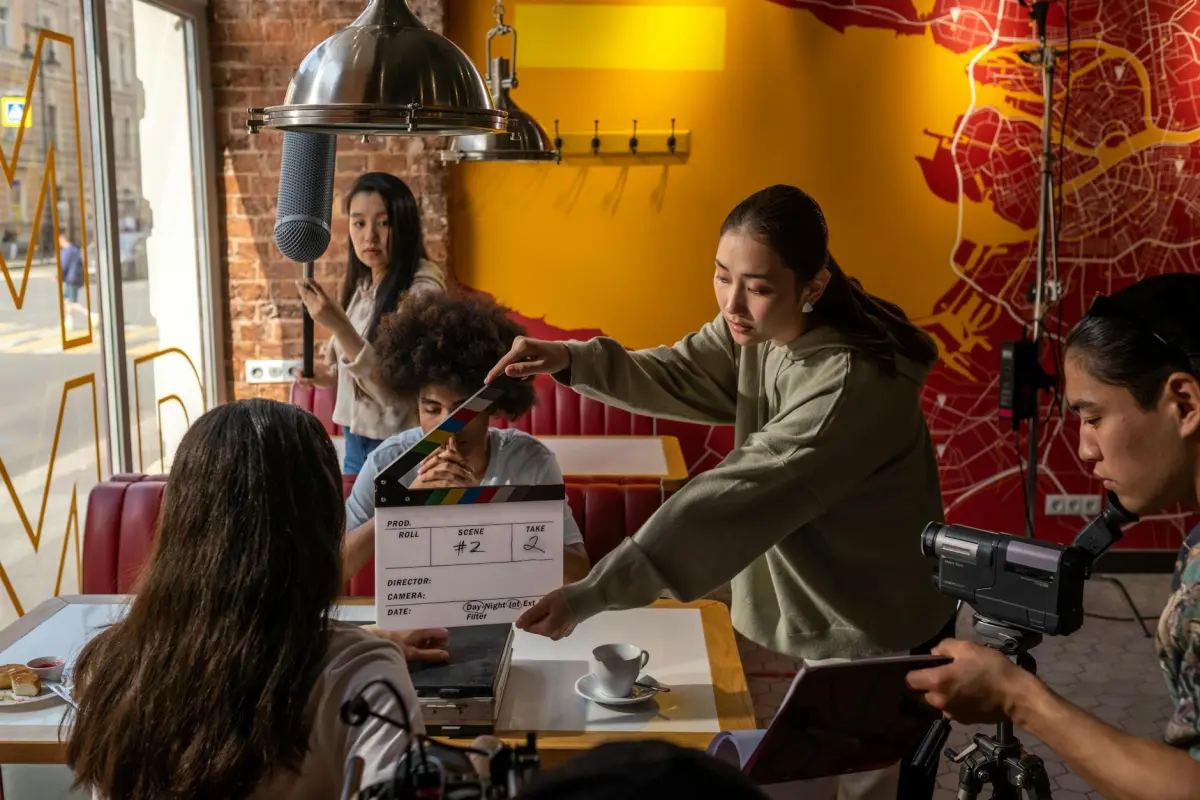
使用 VideoGPT 简化的故事制作工作流程
使用 5 个场景的大纲并在 videogpt 中锁定语音风格,以实现跨角度和运动的超快速对齐。
- 定义目标和预算:目标时长 60-90 秒,平台限制,并决定使用免费素材还是付费订阅;为团队分配角色以保持一致。
- 配置核心素材:选择角色类型,设置调色板,并规划航拍镜头;使用运动提示以保持观众参与度;按场景整理文件。
- 设置旁白和语调:选择符合情绪的声音;制作简短的脚本,其中包含生成式提示;这种方法使你无需培训即可制作专业质量的成果;videogpt 算法会处理节奏。
- 生成视觉效果和动态:应用角度和运动,例如动态推拉镜头;保持统一的色彩方案;利用 videogpt 实现音频和视觉效果的同步;在适当的情况下包含航拍序列。
- 组装和完善:将语音与视觉效果合并,修剪时间,应用色彩分级,验证专业质量的输出;快速迭代以控制预算;这会将过程转化为适用于团队和其他人的出色、可扩展的工作流程。
- 导出和共享:为团队制作可发布素材;尽可能免费提供预览;为未来的项目保持干净的工作流程。
- 重要提示:在场景之间保持单一的故事线索,以保持连贯性和吸引力。
- 最佳实践:重用模板和库;按场景组织素材;使用标签进行标记以加快搜索和重用。
- 预算意识:计划 1-2 轮编辑;使用免费素材;跟踪支出并保持在限额内。
- 质量检查点:验证色彩一致性、语音时序和运动与叙事节拍的对齐。
定义一个具有清晰节拍的 60-90 秒故事弧
草拟一个映射到精确时间窗口的 6 节拍弧:0-5 秒的钩子,5-15 秒的铺垫,15-25 秒的触发事件,25-60 秒的上升动作,60-75 秒的高潮,75-90 秒的结局。 从第一帧开始就使用旁白和声音来设定语调;混合近景和 B 卷镜头,玩转阴影和柔和的光线来烘托情感。保持低复杂度;准备一个符合影片节奏的简洁脚本,并附带发音和节奏的说明,同时始终注意经济性。
钩子(0-5 秒):揭示一个引人注目的画面、声音提示或台词,以锚定主角的核心欲望。铺垫(5-15 秒):通过紧凑的视觉效果和脚本中的想法来展示世界;用旁白和声音建立语调,并引入一些阴影来暗示冲突。
触发事件(15-25 秒):呈现一个选择或障碍,迫使采取行动并与中心冲动相关联。使用第一印象和简洁的视觉效果;通过有限的 B 卷镜头和专注的对话来保持紧凑的节奏。上升动作(25-60 秒):堆叠挑战,使用演员传递受控的台词,并通过环境声音和快速剪辑来建立紧张感。考虑动画帧或真实运动来匹配语调;运行一个通过 chatgpt 的生成器草稿来生成变体并进行测试以选择选项。
高潮(60-75 秒):交付一个揭示核心欲望或道德的关键时刻;确保讲述者的声音通过清晰的发音和强烈的节奏来引导。使用近景捕捉充满情感的表演,并保持声音和图像之间的保真度。
结局(75-90 秒):以一个干净、情感上令人满意的收尾;以短暂的转折或顿悟呼应开头。以一句简洁的、引人反思的话结束,并保持剪辑紧凑,以保留六节拍的节奏,无论是对电影制作人还是故事讲述者;确保跑道的节奏以软着陆结束,这样一个紧凑的弧线呼应了开头。
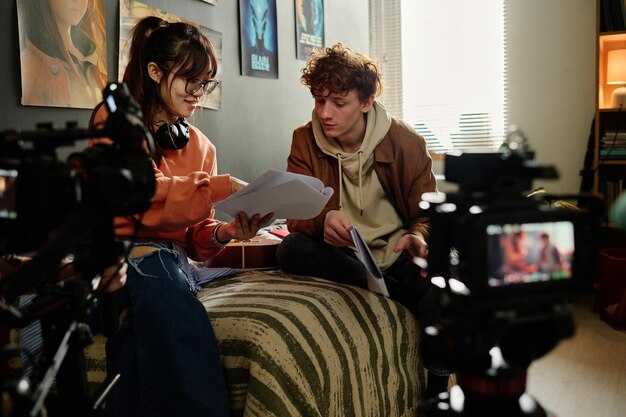
生成一个紧凑的脚本:用于快速草拟的提示和模板
从一个包含五个问题的提示包开始,该包可以立即生成一个简洁、可用于场景的脚本。使用第二个生成器生成一个变体,然后进行编辑以定制观众的情感参与体验。
- 用于启发对话和行动的提示
- 提示 1:定义两个角色和他们的目标。用两句话设定赌注,然后生成 8 行对话,以揭示动机和障碍。每行保持在 12 个单词以下。
- 提示 2:构建一个钩子和一个以问题为导向的弧线。以一句钩子开始,提出 3 个问题,并在第 6 行进行一个转折。
- 提示 3:设定语调和风格。指定电影化或亲密感,并包含至少 3 个关键词来锚定情绪。
- 提示 4:视觉整合。添加角度和简短的动画提示,使台词与摄像机移动相匹配。
- 提示 5:情感节拍。添加一句能增强情感并说明冲突在情感上为何重要的台词。
- 提示 6:行动号召和转化。以清晰的观众行动和反馈或分享提示结束。
- 用于快速草拟的模板
- 节拍表模板
- 钩子:[单行冲击]。
- 铺垫:[两句话的铺垫]。
- 对抗:[3-4 行对话和行动]。
- 转折:[一个重塑赌注的转折]。
- 结局/行动号召:[结束语和可选的观众行动]。
- 优先对话模板
- 以一段清晰的对话开始,以揭示每个角色的动机。
- 通过简短的交替行进行推进以保持节奏。
- 插入一个在最后一节拍之前升级紧张感的问题。
- 以一句决定性的台词结束,以指示观众的下一步行动。
- 电影化提示模板
- 为每个节拍附加一个摄像机角度(例如,特写 → 过肩 → 全景)。
- 将每行与一个最小的动画提示配对,以强调情感。
- 将总脚本长度保持在可配置的限制内(例如,60-90 秒)。
- 教育/操作指南模板
- 简介:用一句话陈述课程内容。
- 分步说明:通过对话呈现 3 个具体的步骤或技巧。
- 结论:总结关键要点并邀请行动。
- 节拍表模板
- 编辑和定制
- 这里有一个小技巧:替换名称并修改台词以适应目标受众,同时保留核心节拍。
- 当你从第二个生成器得到两个变体时,比较节奏和情感影响,然后进行编辑以与你的细分市场保持一致。
- 通过调整语调、长度和复杂性来定制草稿;使用可定制的模板来适应不同的创作者和体验。
- 包含与你的主题相关的关键词,同时不偏离情感弧线;平衡 SEO 需求和自然对话。
- 跟踪、审查和优化
- 跟踪指标:钩子强度、节拍清晰度、情感峰值;争取早期获得极佳的回报。
- 通过生成替代角度和动画进行迭代,然后选择更能引起观众共鸣的变体。
- 将见解转化为可操作的编辑:缩短台词,明确意图,并在每个节拍中加强动机。
- 向创作者报告一个简洁的清单:长度、节奏、语调和参与提示。
创建视觉效果和语音:使用提示使图像与脚本对齐
建议:起草一套集中的提示,以匹配脚本,确保视觉效果与每个时刻同步。对于每个场景,在单个提示中描述运动、灯光和构图,以指导制作。这种方法可以使叙述者保持在叙事上,并减少制作过程中的来回沟通。
将视觉效果与音频相结合,选择与旁白节奏匹配的背景音和音乐。考虑自然的语音表达和音色;测试提示词以保持平稳的节奏。可选的体积效果能在不分散核心信息注意力的同时增加深度。 第一步:在脚本中找出关键时刻;第二步:为这些时刻量身定制提示词;第三步:制作反映文本的草稿视觉效果;第四步:测试、迭代和定稿。每一步都确保图像支持信息并提高制作质量。 收集与视觉效果和平台相符的素材。素材经过精心挑选,以匹配语气和受众期望。利用这些素材加快制作速度;对于 TikTok,强调竖屏构图和清晰的剪影。将素材与提示词对齐,使场景保持连贯且易于复制。 重要提示:出色的视觉效果依赖于精心的制作。恰当的动态、色彩分级和音频时序能够转换叙事。当提示词被及早考虑时,制作可以规模化而不牺牲质量。 通过您的网站和社交渠道发布并与您的受众沟通。提示词能够指导素材之间的一致性;为管理内容日历的人员保留一个中央提示词库。这种方法支持叙事者并加强与观众的沟通。 以下是保持动力的方法:验证视觉效果和脚本之间的对齐,调整节奏,并保持自然的过渡。使用易于重复使用的提示词和快速测试循环,在最终制作前验证节奏。这种严谨的实践对于制作引人入胜、富有生命力的体积视觉效果至关重要。添加画外音、字幕和音乐:同步到节奏和语气
从清晰、干净的画外音和与口语流同步的字幕开始。以自然的语速调整旁白级别,并导出包含句子边界的计时文件,作为编辑的指导。每条字幕包含 1-2 行,每行限制在 32-42 个字符,并显示口语片段的持续时间加上少量填充,例如 0.25-0.5 秒。这种方法可以保持信息清晰,使跨场景的流程准确,并经常与剪辑节奏保持一致,从而显著提高对不同受众的可访问性。 字幕使用与旁白相同的信息;生成备用线条,通过生成器测试重点或重新排版;确保单词断开与标点符号对齐。构建字幕以反映口语句子,保持行长度在 32-42 个字符之间,并使每行同步显示。不同团队的频繁审查有助于捕获误读,并确保跨设备的访问性。 情绪和速度:选择能反映场景情绪的电影配乐,范围从紧张到奇妙。将背景音乐保持在对话下方 12-18 dB,并应用闪避效果,使语音保持清晰。使用生成器或自动化在蒙太奇拍子处调整节奏;选择应进行细化以适应流程。对于中世纪场景,添加微妙的、符合时代的音效以加深色调。 角度和流程:将剪辑角度与情绪变化对齐,并调整编辑速度以增强叙事弧线。使用快速剪辑来处理高能量的节拍,并使用较长的镜头来处理反思的时刻。使用支持该想法的素材和概念,并为团队提供清晰的指导以优化音轨。包含一个快速审查循环,其中不同团队测试可读性、时序和声音平衡;进行细化,直到流程显著满足目标。社交平台的导出就绪设置:格式、比特率和宽高比
| 平台 | 视频格式 | 分辨率 / 宽高比 | 目标视频比特率 (Mbps) | 音频比特率 (kbps) | 帧率 (fps) | 注意事项 |
|---|---|---|---|---|---|---|
| YouTube | MP4, H.264 | 16:9, 1920x1080 (HD) 或 4K: 3840x2160 | 1080p: 8–12; 4K: 35–45 | 128–256 | 24/30/60 | 建议采用两遍编码;将重要动作置于中心;BT.709 色彩 |
| Instagram Reels | MP4, H.264 | 9:16, 1080x1920 | 6–12 | 128 | 30 | 优先竖屏;将关键内容保留在中心 1080x1620 安全区域内;字幕友好 |
| TikTok | MP4, H.264 | 9:16, 1080x1920 | 5–10 | 128 | 30 | 针对快速剪辑进行优化;谨慎使用屏幕文字以保持可读性 |
| Facebook Feed | MP4, H.264 | 16:9, 1920x1080 | 6–12 | 128 | 30 | 接受方形和竖屏变体:1:1 (1080x1080) 和 4:5 (1080x1350) 提升参与度 |
| MP4, H.264 | 16:9, 1920x1080 | 6–10 | 128–256 | 30 | 专业语气;保持标题清晰易读,方便快速浏览 | |
| X / Twitter | MP4, H.264 | 16:9, 1280x720 | 4–6 | 128 | 30 | 较短的剪辑;避免过长的片头;考虑竖屏作为替代方案 |
| 方形 / 1:1 变体 | MP4, H.264 | 1:1, 1080x1080 | 6–10 | 128 | 30 | 非常适合基于网格的布局和交叉发布 |


