

Почніть із відстеження за допомогою камери, використовуючи недорогі веб-камери; навчіть легку модель ШІ, яка перетворює кадри на корисні пози, а потім перепризначте їх до ригу в Blender, швидко доставляючи анімацію без носіння обладнання.
На практиці ви можете досягти обробки 60 кадрів/сек для потоків 1080p, затримки менше 90–120 мс та середньої похибки пози менше 5 см за допомогою конвеєра, який залишається внутрішнім. Ця інформація лежить в основі досвіду, блогів та демонстрації, яка демонструє можливості в масштабі платформи; бізнес-кейс збільшує доходи завдяки швидшій ітерації, зменшенню витрат на обладнання та новим пропозиціям послуг для ігрових та неігрових клієнтів.
Рекомендований робочий процес: оцінка для кожного кадру, застосування динаміки, зведення до універсального ригу, випікання рухів, експорт на цільову платформу, а потім надсилання ресурсів до Blender та збереження аудиторського сліду з інформацією, яка повідомляє команду.
Впровадьте модульну інтеграцію, щоб деякі внутрішні студії могли розвивати спільний конвеєр: інструменти на основі Python для прийому кадрів, компактний тренажер та середовище виконання, яке виводить криві анімації на цільові програмні рушії, такі як Unity, Unreal чи Blender. Таким чином, команди мають послідовну структуру, створюють насичені інформацією враження та публікують кейси у блозі, щоб продемонструвати цінність.
Ранні внутрішні пілотні проекти демонструють скорочення часу ітерацій у 2–3 рази, економію обладнання на 20–40% та швидше зростання творчого виведення. Система відстежує рухи та динаміку з високою точністю, тоді як враження в блозі приваблюють партнерів, які цінують інтуїтивно зрозумілі інструменти, які відчуваються як ігри. Чітка демонстрація показує, як студія з власною командою може масштабуватися, контролювати витрати та забезпечувати неймовірно ефективні робочі процеси анімації.
Захоплення руху ШІ без костюма: практичне налаштування та робочий процес
Встановіть компактний конвеєр на пристрої з камерою глибини, підключеною до сучасного ноутбука з графічним процесором, щоб досягти затримки менше 20 мс та виведення 60–120 Гц. Це налаштування забезпечує плавні, інтерактивні дані руху безпосередньо у ваш цифровий робочий процес. Використовуйте один добре вирівняний вигляд камери, щоб зменшити приховування, та калібруйте раз на сеанс.
Вибирайте пристрої, які забезпечують високу якість глибини, такі як Azure Kinect DK або Intel RealSense, плюс опціональний інерційний модуль для складних рук. З'єднайте з ноутбуком або робочою станцією з щонайменше 16 ГБ оперативної пам'яті та окремим графічним процесором (RTX 3060 або краще), щоб стабілізувати висновки за потокового навантаження. Якщо ви масштабуєтеся до кількох персонажів, використовуйте другий порт HDMI або док-станцію USB-C для підтримки плавного шляху даних, дозволяючи використовувати кілька видів для покращення чіткості зображення. Фізична опорна поза покращує точність масштабу, і це налаштування надає корисні дані для подальшого уточнення.
Обладнання марне без потужного програмного стека. Легка модель ШІ, навчена на студійних даних, може витягувати сигнали з потоків зображень у 3D-позиції суглобів, забезпечуючи повністю цифрові виконання. Розробники можуть налаштувати мережу за допомогою навчального набору з кількох тисяч кадрів і розширити його за допомогою синтетичних даних для охоплення одягу, освітлення та ландшафтів. На практиці це забезпечує високий рівень інтерактивного зворотного зв'язку для художників.
Калібруйте, використовуючи нейтральну позу стоячи та швидке масштабування. Пряме потокове передавання з камери до етапу висновку мінімізує затримку, з пост-фільтром, який зменшує тремтіння. Виводи експортуються до вашого рушія через просту структуру JSON, яка перепризначається до вашого ригу персонажа, надаючи дані пози на основі зображення, які можна впекти в анімацію для кожного ресурсу.
Цей робочий процес підтримує інтерактивні попередні перегляди в редакторі, дозволяючи вам налаштовувати параметри в реальному часі. Використовуйте попередній перегляд цифрового двійника для налаштування часу, застосування згладжування та збереження цілісності руху. Потокове передавання до ігрового рушія повинно бути налаштоване для попередніх переглядів 1080p або 4K залежно від обладнання; 1080p 60 Гц є поширеним для ітерації в реальному часі, що допомагає ігровим командам ітерувати швидше.
Щоб забезпечити безпеку та послідовність, розміщуйте камери на стабільних кріпленнях, уникайте зон приховування та встановлюйте безпечну висоту столу; використовуйте світлий фон та рівномірне освітлення для зменшення хибних спрацьовувань. Використовуйте багатовидовий набір, коли це можливо, для підвищення точності, що збільшує ефективність у динамічних сценах, таких як демонстрації ігор та прямі трансляції.
На практиці дотримуйтесь мінімальної процедури калібрування після зміни приміщень. Надайте локальний шлях потокового передавання до рушія, зменшуючи залежність від хмари. Використовуйте кольоровий зворотний зв'язок для позначення впевненості відстеження та журналюйте кадри для подальшого аналізу в навчальних наборах даних для покращення моделей. Цей підхід забезпечує гнучкість та цінність для різноманітних команд, роблячи систему корисною у всіх ігрових сценаріях, ландшафтах та потоках зображень.
Що робить захоплення руху ШІ без костюма можливим сьогодні?
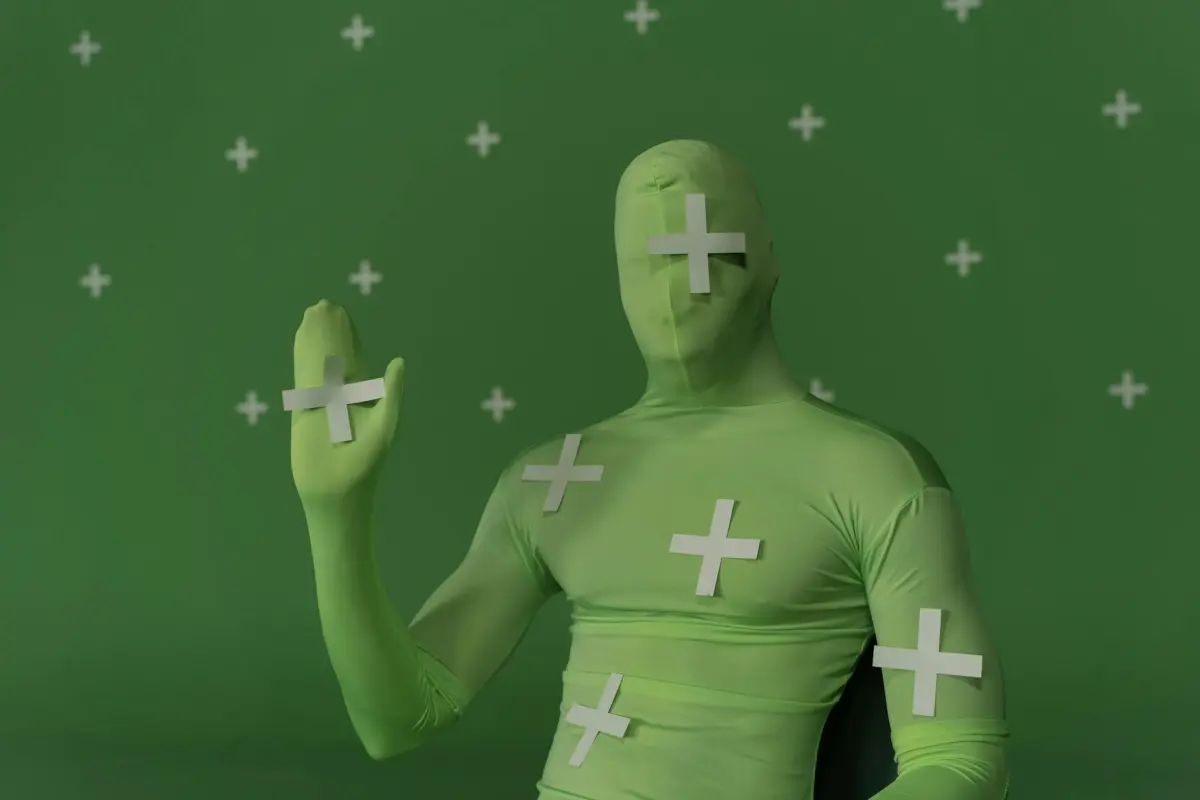
Почніть з безмаркерної стекової системи відстеження, яка об'єднує багатовидові кольорові камери, датчики глибини та легкі інерційні одиниці, встановлені на ключових сегментах тіла. Конвеєри обчислень інтегрують потоки для отримання точних 3D-поз у реальному часі, із затримкою зазвичай менше 20–40 мс на сучасних ЦП/ГП. Ця комбінація покладається виключно на датчики, а не на повноцінний комбінезон.
За цим ефективність забезпечується завдяки фільтрації на основі фізики, де кінематичні обмеження та пріоритети гравітації уточнюють оцінки. Інтегруйте пріоритети машинного навчання з геометричною оптимізацією для підтримки точності під час приховувань, особливо коли кінцівки перетинаються або частково приховані тілом суб'єкта. Відзнаку слід віддати дослідникам, які стоять за цими безмаркерними підходами.
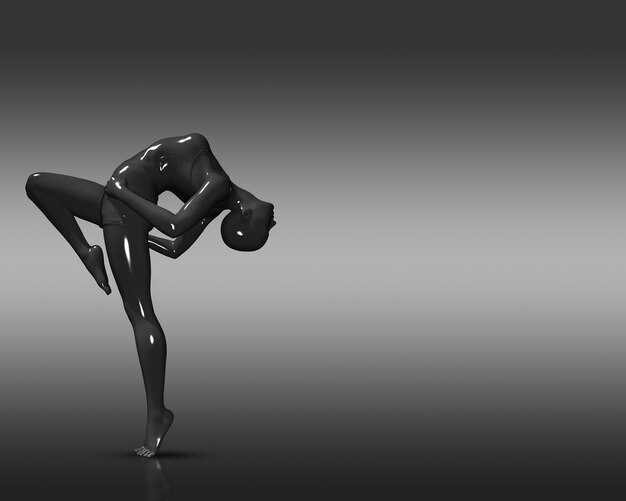
Щоб охопити широкий спектр завдань, записуйте різноманітні пози, такі як спортивні рухи, пози йоги та повсякденні дії; створіть бібліотеку поз та використовуйте її для ініціалізації відстеження. У проектах студій, ігор, додатків для здоров'я та конвеєрів симуляції, що стоять за дизайном, ви можете повторно використовувати дані для прискорення калібрування.
Інтегровані апаратні засоби та доповнення, такі як додаткові інфрачервоні маяки або пристрої IMU, що носяться на тілі, можуть підвищити надійність; додавання цих елементів є необов'язковим і покращує стабільність, забезпечуючи сумісність через модульні інтерфейси. Доповнення надають стандартизовані потоки даних.
Практика, керована дизайном, орієнтованим на здоров'я: легкі корпуси, рівномірний розподіл ваги та перерви після коротких блоків для підтримки комфорту. простота налаштування сприяє швидшому освоєнню та меншій кількості помилок, тоді як тихі кроки калібрування дозволяють операторам зосередитися.
Практичні кроки: розгорніть 3–4 камери навколо суб'єкта на відстані 0,8–3 м; калібруйте з нейтральною позою; запускайте потоки 40–60 кадрів/сек; застосовуйте згладжування на основі фізики; перевіряйте виводи на 5–10 проектах для підтвердження ефективності.
Обладнання та програмне забезпечення, яке вам справді потрібно (без костюма)
Дві-три камери RGB-D, розташовані навколо суб'єкта, забезпечують надійні дані тіла для аватара без необхідності носити костюми. Це налаштування безпосередньо надає готові до захоплення дані руху, які ви можете імпортувати в Blender та інші відкриті платформи.
Освітлення: триточкова установка з дифузним ключовим, заповнюючим та заднім світлом. Цільова колірна температура 5500–6000K та CRI вище 90; тримайте близько 500–700 люкс на суб'єкті та уникайте мерехтіння від інших джерел світла. Це освітлення покращує просторову чіткість даних.
Програмний робочий процес: Blender, відкрита платформа, підтримує попередню візуалізацію; ви можете перепризначити захоплені дані до існуючих ригів; легкий скрипт відображає орієнтації суглобів у риг аватара.
Тестування та валідація: запускайте послідовності поз йоги для перевірки лімітів суглобів; оцінюйте в існуючих сценах; налаштовуйте масштаб, відстань та час для природного руху. Глибокі кроки калібрування уточнюють вирівнювання між камерами.
Вибір обладнання: вибирайте камери від надійних сімейств брендів; Azure Kinect, Intel RealSense або якісні USB-веб-камери від брендів, що пропонують потужне відстеження тіла. Переконайтеся, що пристрої підтримують захоплення 60–120 кадрів/сек та надійні драйвери.
Витрати та доходи: бюджетний комплект коштує від кількох сотень до кількох тисяч доларів залежно від обсягу; інструменти з відкритим кодом зменшують первинні витрати; цей шлях підтримує швидку попередню візуалізацію в клієнтських проектах, забезпечуючи творче виведення та дохід.
Розміщення камери та освітлення для чистого захоплення
Розмістіть камеру на відстані 1,0–1,2 м, вирівнявши її по середній лінії тулуба, з об'єктивом на висоті 0,95–1,05 м та нахилом вниз на 15–20°. Стабілізуйте на нерухомому штативі, щоб запобігти зсуву. У трикамерному налаштуванні утворіть трикутник навколо суб'єкта з відстанню 0,6–0,9 м між об'єктивами та спрямуйте кожен до центру грудей, щоб максимально збільшити охоплення. Ця база забезпечує чисті силуети в більшості приміщень і залишається міцною при зміні освітлення.
План освітлення: впровадити систему триточкового освітлення. Основне світло розміщене під кутом 60–75° до об’єкта, забезпечуючи 1000–1400 лк на обличчі, колірна температура 5400–5600 К. Використовувати розсіювач для пом'якшення тіней, з ослабленням на 1–2 ступені. Заповнювальне світло під кутом 30–45° з протилежного боку, 300–500 лк, та сама колірна температура. Контурне світло під кутом 60–90° позаду, 150–250 лк для відділення фігури від фону. Використовувати нейтральний фон із CRI 95+ від світлодіодів без мерехтіння; уникати прямого сонячного світла, закриваючи вікна за потреби. Цей підхід забезпечує узгоджені, висококонтрастні лінії постави, придатні для подальшої обробки. Така конфігурація надає стабільні, відтворювані результати між сесіями та підтримує високоточні візуальні показники.
Потік даних: захоплені сесії зберігаються в центральному сховищі; переглядати недавні відео з наявного блогу для калібрування моделі постави; експортувати у формати, готові для Blender; використовувати готові доповнення для прискорення калібрування; через цей конвеєр ділитися результатами з клієнтами. Це уможливлює інтерактивні терапевтичні сесії, сприяє галузевим оглядам ефективності та надає надійні робочі процеси, що працюють на наявному обладнанні. Підхід забезпечує практичний шлях до покращення галузевих пропозицій за допомогою високоякісної аналітики та міжкомандної співпраці.
| Налаштування | Відстань (м) | Висота (м) | Нахил (град) | Основне (лк) | Заповнювальне (лк) | Контурне (лк) | Колір (K) | Примітки |
|---|---|---|---|---|---|---|---|---|
| Одиночна базова лінія | 1.0–1.2 | 0.95–1.05 | 15–20 | 1000–1400 | 300–500 | 150–250 | 5400–5600 | розсіювальна панель; штатив; акцент на поставі; захоплення з високою узгодженістю |
| Трикамерний трикутник | 1.2–1.4 | 0.95–1.05 | 15–25 | 900–1300 | 300–500 | 150–250 | 5400–5600 | кут максимізує покриття, зменшує перекриття, покращує спільні дані |
| Верхній контроль | 2.0 | 1.60 | 0 | – | – | – | 5200 | додає підтвердження постави зверху |
Від необробленого відео до придатних даних про рух: конвеєр даних
Передане необроблене відео відображається на стандартизованому полотні руху за лічені хвилини, що забезпечує швидку ітерацію, безперебійну інтеграцію в продуктивні конвеєри та полегшує співпрацю з розробниками.
Використовуючи штучний інтелект для оцінки пози, система виявляє 2D ключові точки на кожному кадрі та генерує 3D дані за допомогою моделі глибини та геометричних обмежень, надаючи координати суглобів та метрики впевненості.
Калібрування вирівнює простори координат та частоту кадрів, тоді як очищення видаляє тремтіння та перекриття за допомогою таких методів, як згладжування та фізично обґрунтовані обмеження; наука, що стоїть за цими кроками, зберігає рухи біомеханічно правдоподібними.
Перепризначення даних на наявні риги та активи, регулювання масштабу для відповідності аватарам користувачів та збереження інтеграції в продуктовий конвеєр; розроблено для підтримки терапевтичних робочих процесів з перевірками безпеки.
Перевірки якості відстежують результати за помилкою на суглоб, середнім кутовим відхиленням та високою частотою кадрів; між сценами результати спрямовують покращення моделі, збільшуючи залученість та дохід.
Операційне керівництво: зберігати конвеєр модульним; забезпечити швидкі оновлення розробниками; повторно використовувати наявні активи для прискорення генерації нового контенту; впровадити засоби контролю конфіденційності та безпеки.
Вимірювання та покращення якості руху: практичні метрики та перевірки
Рекомендація: почати з базової перевірки надійності за допомогою відеокліпів у реальному часі, зібраних у різноманітних сценах, а потім порівняти реконструкції за допомогою ШІ із реалістичними позами; обчислити RMSE пози (см) та кутове відхилення (градуси); встановити цільові діапазони для кожного суглоба, актора та сцени, а також повторювати після виправлень.
Ключові метрики охоплюють точність, надійність та стійкість. Ці перевірки розроблені так, щоб бути відтворюваними між налаштуваннями, інструментами та командами, допомагаючи будь-кому, хто працює над проєктом, покращити якість без додаткового обладнання.
- Точність та достовірність пози
- Точність пози: звіт про середньоквадратичну помилку (RMSE) позицій суглобів у сантиметрах; цільові діапазони варіюються залежно від довжини кінцівок, з зап'ястями та щиколотками зазвичай у межах 2–5 см, колінами та ліктями 3–6 см, стегнами 4–8 см для добре відкаліброваних даних.
- Точність кутів суглобів: задокументувати середню абсолютну похибку в градусах для основних суглобів (плече, лікоть, стегно, коліно, щиколотка); прагнути до 3–6 градусів при помірному освітленні та стандартних сценах.
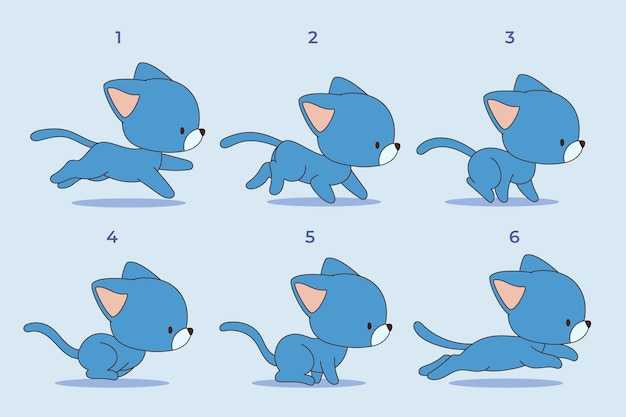
- Охоплення поз: забезпечити щільний розподіл захоплених поз під час дій (стояння, ходьба, присідання, нахили) для запобігання сліпим зонам у моделі.
- Вирівнювання реальних даних: використовувати коротку послідовність у реальному часі з опорними маркерами для перевірки вирівнювання між реконструйованим скелетом та видимим силуетом; надати звіт про похибку репроекції в пікселях для ключових кадрів.
- Часова стабільність та дрейф
- Послідовність кадр за кадром: виміряти середню зміну пози (відстань між послідовними кадрами) та обмежити дрейф менш ніж 1,5–3 см за секунду залежно від активності.
- Дрейф по кліпах: відстежувати сукупне відхилення протягом 10–30 секунд; цільовий загальний дрейф менш ніж 5 см для типових дій, з жорсткішими обмеженнями для швидких послідовностей.
- Затримка анімації: кількісно оцінити затримку між рухом у реальному часі та реконструйованою позою, віддаючи перевагу менш ніж 100 мс, щоб зберегти достовірність синхронізації в живих попередніх переглядах.
- Стійкість до різних налаштувань
- Стійкість до освітлення: порівняти метрики точності за трьох сценаріїв освітлення (яскраве, середнє, низьке); переконатися, що зміни залишаються в межах ±20% від базових помилок.
- Складність фону: тестувати на сценах із захаращенням або рухомим фоном; повідомити про зниження видимості ключових точок та відповідні зміни точності.
- Вплив синтезу датчиків вплив: при додаванні зовнішніх сигналів (наприклад, глибини, інерційних сигналів) кількісно оцінити приріст стабільності та точності; задокументувати зменшення віддачі за межею певного порогу.
- Якість даних та індикатори стану
- Рівень відсутніх даних: відстежувати кадри з перекритими або невиявленими ключовими точками; тримати менш ніж 2–5% у контрольованих умовах, вищі пороги допустимі в складних сценах.
- Рівень шуму: відстежувати тремтіння в областях із низьким контрастом; застосовувати згладжування лише після підтвердження реального рівня помилок, а не фільтрації корисних деталей.
- Стан датчиків та інструментів: реєструвати статус калібрування, частоту кадрів та навантаження на обробку; сповіщати, коли будь-яка метрика падає нижче заздалегідь визначених цільових показників надійності.
- Фізіологічне вирівнювання та перевірки реалізму
- Показники здоров’я та мобільності: перевірити, щоб довжини кінцівок та межі суглобів залишалися в межах правдоподібних людських діапазонів; позначати анатомічно неправдоподібні пози для ручної перевірки.
- Проксі-сервери узгодженості сили: порівняти оцінені сили суглобів або правдоподібність контакту з відомими шаблонами активності; виділити сцени, де оцінки сили виглядають неузгодженими з рухом.
- Робочий процес валідації та зворотний зв’язок
- Зіставлення реальних даних: створити легкий набір для валідації за допомогою відеокліпів із чіткими реалістичними посиланнями; оновлювати пороги після кожних 5–10 проєктів.
- Цикл зворотного зв’язку команди: збирати детальні нотатки від аніматорів та технічних директорів (ТД) після оглядів; агрегувати проблеми за типом (перекриття, швидкий рух, незвичайні пози) для спрямування цільових уточнень.
- Цикл ітерацій: проводити короткий цикл щотижня, зосереджуючись спочатку на найчастіших режимах збою; документувати покращення та залишені прогалини в живому контрольному списку.
- Практичні перевірки за сценою та актором
- Різноманітність сцен: включати дії, пов’язані з ходьбою, стрибками, нахилами та лазінням; відстежувати, чи зберігається точність при переходах між діями.
- Різноманітність акторів: тестувати з виконавцями різного зросту, статури та рівня мобільності; коригувати моделі для зменшення упереджень у розміщенні маркерів та інтерпретації пози.
- Повністю автоматизовані інформаційні панелі: впровадити інформаційні панелі, що показують показники для кожної сцени, тенденції для кожного актора та стан налаштування; дозволити будь-кому в команді швидко виявляти регресії.
- Поради щодо процесу та впровадження
- Огляд після сесії: проводити короткі брифінги для порівняння числових результатів із візуальним відгуком з попередніх переглядів на основі візуальних даних та реалістичних посилань.
- Документація: вести детальний журнал налаштувань, версій інструментів та кроків калібрування, щоб команди, які працюють над проєктом, могли відтворювати результати.
- Гнучкість: розробляти перевірки для розміщення нових сцен, обладнання або наборів даних; зберігати масштабовану структуру, яка зростає разом із вашими робочими процесами на основі ШІ.
- Дієві пороги: визначати конкретні критерії проходження/невдачі для кожної метрики; уникати розпливчастих цілей, щоб тюнінг був сфокусованим та вимірюваним.
Додаткові елементи: забезпечити чітку видимість сцен, поз та синхронізації; надавати дієвий зворотний зв’язок редакторам та аніматорам за допомогою стислих нотаток та числових трасувань; підтримувати здоровий робочий процес навколо якості даних, калібрування та оновлень моделі; завдяки такому структурованому підходу кожен учасник отримує надійний, прозорий шлях до покращеного реалізму та достовірного руху без громіздкого інструментарію.


