


Почніть з конкретної рекомендації: перетворіть завантажені кліпи на цілісну розповідь, яка резонує справжніми клієнтами.
Визначте ролі у вашому робочому процесі онлайн-виробництва, створивши готову до побудови ітераційний цикл, який запускається після захоплення матеріалу та проходить через вашу систему.
Після того, як ви визначите основну тему, створіть навколо неї шоу з особистим дотиком, який звертається до бізнесів та їхньої мови, використовуючи стислі елементи, такі як «крихітні» кліпи, субтитри та чіткі заклики до дії.
Завдяки сфокусованій задачі визначте швидке, повторюване рішення: витягніть момент, який виблискує, поєднайте його з читабельною мовою та елементами на екрані та представте як невелике, спільне шоу для онлайн-каналів.
Використовуйте особисті історії для побудови довіри; узгодьте розповідь з мовою бренду та людськими ролями, що стоять за виробництвом, щоб результат відчувався автентичним на всіх онлайн-точках дотику для бізнесів будь-якого розміру.
Ітерація має значення: відстежуйте, які завантажені кліпи працюють найкраще, визначайте, які елементи розповіді стимулюють залучення, знаходьте можливості для вдосконалення сценарію та візуальних матеріалів відповідно, відмовляючись від здогадок.
Завдяки послідовному виробництву ви створюєте онлайн-бібліотеку шоу, які можна повторно використовувати, заощаджуючи час та дозволяючи командам швидко реагувати на тенденції та запитання клієнтів.
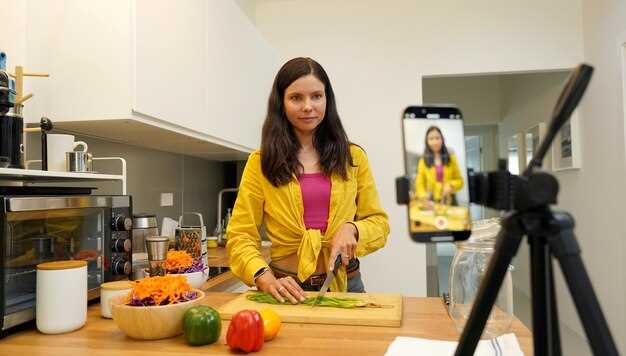
Конвеєр виробництва UGC Sora 2: від Брифу до Публікації Відео
Почніть з точного брифу та пробного запису, щоб зафіксувати напрямок перед повними зйомками. Визначте тему, аудиторію, власника та метрику успіху, пов’язану з прибутком. Підготуйте контент, що відповідає форматам, і встановіть свої очікування.
План контенту: призначте команду, визначте формати та складіть список завдань. Записуйте широкі плани у широкоекранному форматі та сфокусовані крупні плани, щоб захопити емоції. Статичні кадри забезпечують контекст між сегментами, формуючи послідовність, подібну до книги.
Під час зйомки підтримуйте послідовність контексту: узгоджуйте напрямок освітлення та баланс білого; вибирайте візуальний стиль, який підтримує тему та голос власника. Носій повинен повністю передавати повідомлення, як голос бренду.
Підхід до редагування: застосуйте стандартну кольорокорекцію; обріжте до щільних блоків; додайте субтитри; вставте статичні кадри для темпу; посиліть навички кадрування та темпу; проведіть випробування, щоб порівняти версії та вибрати найефективніший монтаж; результат дає чітку вигоду контенту та ефективності.
Публікація та вимірювання: доставляйте у форматах, дружніх до стрімінгу; зберігайте однакові та альтернативні співвідношення сторін; відстежуйте метрики та приріст прибутку. Інсайти, отримані з початкового чернетки, показують, що потрібно скоригувати після кожного релізу.
| Етап | Ключові дії |
|---|---|
| Бриф та Контекст | Визначте тему, власника, аудиторію; встановіть зв’язок з прибутком; окресліть формати; встановіть потік завдань. |
| Запис та Зйомка | Призначте команду; плануйте теми; знімайте широкі (широкоекранні) та крупні плани; збирайте статичні кадри для контексту; створюйте послідовність, подібну до книги. |
| Редагування та Огляд | Застосуйте стандартну корекцію; обріжте блоки; додайте субтитри; проведіть випробування для порівняння версій; тримайте контент сфокусованим та ефективним. |
| Публікація та Вимірювання | Розповсюджуйте у форматах стрімінгу; підтримуйте однакові та альтернативні співвідношення сторін; відстежуйте вплив на прибуток; коригуйте після відгуків. |
Таргетинг: напишіть UGC-бриф на 15–30 секунд для TikTok проти Instagram Reels з точними елементами запитів
Рекомендація: два кліпи по 15–30 секунд, вертикальне співвідношення 9:16, 30-60 кадрів на секунду. Почніть негайно з крупного плану продукту; з'являються собаки для дружнього моменту; потім швидкі рухи та різкі переходи. Використовуйте яскраве освітлення та чисту сцену, будь то в магазині чи на компактній знімальній площадці. Після гачка опишіть основну перевагу стисло; утримуйте статичні моменти для акценту; включіть накладання зображення та фінальний заклик «відвідайте магазин». Використовуйте наявні стокові або зняті на місці кадри; ітеруйте після першого дубля і навчайтесь на кожному поколінні змін; знайте посібники для обох форматів та відповідно адаптуйте кадрування.
Елементи запиту для TikTok: інтер’єр, знятий командою з 1–2 осіб; включіть появу собак для підвищення енергії; крупний план рук, коли вони тримають продукт, потім вказують на певну функцію; рухи швидкі, але контрольовані з 3–4 швидкими переходами; освітлення яскраве та з високим контрастом; опишіть переваги двома короткими рядками; накладіть текст із позначкою «що нового» та простим стоковим/пропозиційним знаком; швидкість 1.0–1.2x, ціль – 15–30 секунд загалом; закінчіть чітким закликом відвідати магазин; використовуйте стоковий кадр, якщо доступний, для підтримки основного дубля; після запуску запускайте цикли ітерацій для покращення розуміння та потоку.
Елементи запиту для Instagram Reels: почніть з крупного плану, потім перейдіть до ширшого плану, що показує контекст; повільніший темп, ніж у TikTok, але все ще обмежений 15–30 секундами; включіть описові накладання та коротку розповідь, що описує те, що знаходиться в кадрі; освітлення має бути рівномірним, з м’яким заповненням, щоб уникнути різких тіней; підкресліть текстуру та рух, використовуючи стабільний, навмисний підхід; представте появу собаки або непомітний реквізит, щоб додати шарму, зберігаючи фокус на продукті; відобразіть «що нового» читабельним текстом та включіть стислий рядок з перевагами; закінчіть «відвідайте магазин» та нагадуванням дізнатися більше; підтримуйте 30-60 кадрів на секунду для плавного відтворення; переконайтеся, що кожен кадр підтримує основне повідомлення, а конкурентний кут зору є чітким.
Загальні рекомендації для обох форматів: тримайте послідовність щільною з сильним гачком у перші 2 секунди; використовуйте крупні плани для опису ключових деталей, потім розширюйте до статичного або середнього плану для встановлення контексту; вказуйте пальцем або рукою на функцію, щоб спрямувати увагу глядача; включіть короткий рух команди або оточення, щоб передати автентичність; тримайте стокові кадри доступними як резерв для підтримки швидкості виробництва; підпишіть пост чітким знаком та прямим закликом до дії; після кожної ітерації аналізуйте падіння часу перегляду та відповідно коригуйте генерацію запитів; завжди тестуйте обидва формати, щоб побачити, які елементи конвертуються краще, і коригуйте темп та рухи, щоб залишатися конкурентоспроможними в стрічках.
Інженерія запитів: запити, готові для ШІ, для генерації автентичних відгуків від першої особи та демонстрацій продуктів
Рекомендація: розробляйте запити з двошаровою структурою: базовий голос та завдання сцени. Базовий голос пише від першої особи та генерує контент, який відчувається традиційним та достовірним. Завдання сцени визначає, де знаходиться глядач, що показано, та яку вигоду він отримує. Цей підхід скорочує розрив між написаним текстом та реальною розмовою, створюючи елементи, які виглядають природно при зйомці рухів рота та підходять для різних платформ. Розділення також полегшує розуміння їхньої мети та швидке коригування для різних робочих процесів.
Запити повинні бути конкретними та уникати нечітких прохань. Вказуйте аудиторію, контекст та сценарій продукту, щоб скоротити час ітерації. Між запитами адаптуйте тон до кожної платформи та цільової мови. Це розширює бачення того, що можна захопити, і допомагає автору уникнути загальних фраз. Використовуйте метрики або конкретні результати, щоб глядач міг одразу уявити реальний вплив.
Запит на відгук: «Ви — [персонаж клієнта]. Ви нещодавно використовували [продукт]. Опишіть проблему, момент, коли ви зрозуміли, що вона вирішує вашу потребу, та результат у конкретних термінах. Пишіть так, ніби ви розмовляєте з другом, використовуючи «я-висловлювання», природний темп та просту мову. Включіть один кількісний результат та одне застереження. Зазвичай це має тривати приблизно 60-90 секунд розмови. Почніть із зазначення, чому ви спробували, і закінчіть щирою рекомендацією.»
Запит на демонстрацію: «Покажіть продукт у дії в одному чіткому кадрі. Зосередьтеся на відображенні та результаті. Озвучуйте те, що ви бачите, виконуючи кроки, опишіть потік і уникайте двозначних тверджень. Використовуйте просту мову та природний ритм; якщо це програмне забезпечення, опишіть кожен клік та перехід. Включіть швидкий заклик до дії з «кліком».»
Запит на адаптацію платформи: «Перепишіть відгук для [платформи], зберігаючи основні пункти, але налаштовуючи мову, тривалість кліпу та темп для платформ. Замініть загальні формулювання на конкретні візуальні образи та докази. Відповідність тону платформі та забезпечення достовірності та безпосередності контенту.»
Візуальне налаштування: виберіть кадрування камери, попередні налаштування руху смартфона та профілі освітлення в Sora 2
Базовий рівень: використовуйте співвідношення 9:16 для шортів, 16:9 для готових матеріалів, 1:1 для брендових роликів. Кадруйте від грудей до верхівки, залишаючи простір над головою, щоб обличчя залишалися по центру під час руху. Розміщуйте суб’єктів у верхній третині та створюйте чисте коло елементів фону для зміцнення брендингу. Ознайомтеся з інструкціями в додатку, щоб підтвердити сумісність співвідношення сторін, а потім налаштуйте кадрування, доки візуальні елементи не залишатимуться стабільними під час панорамування.
Попередні налаштування руху смартфона: вибирайте між трьома стилями для створення послідовних візуальних ефектів: стабільна розмова для основ, легка динаміка для залучення та тонкий ручний режим зі стабілізацією для невимушеного вигляду. Тримайте фокусну відстань незмінною; уникайте агресивного масштабування. Встановіть криві руху на плавний нахил, щоб переходи відчувалися природно; потренуйтеся в швидкому циклі з кількома репліками, а потім запишіть кілька дублів, щоб порівняти ракурси, швидко вибираючи найкращі кадри.
Профілі освітлення: три режими охоплюють більшість приміщень: нейтральне денне світло (5200-5600K) для чіткості продукту; тепле навколишнє освітлення (3000-3500K) для побудови довіри; яскраве освітлення з високим контрастом (5600K з потужним заднім світлом) для брендових моментів. Основне світло під кутом 45° до суб’єкта, на відстані 0,8–1,2 м; заповнююче світло на 1–1,5 ступені м'якше; контурне світло для відділення від фону. Адаптуйте інтенсивність залежно від яскравості кімнати та перевіряйте наявність обрізання білих ділянок; використовуйте відбивач для вирівнювання тіней на обличчях. Ніколи не покладайтеся лише на навколишнє освітлення в затемнених місцях; додайте компактну світлодіодну панель за потреби.
Цикл вдосконалення: записуйте чорнові дублі, потім швидко ітеруйте. Розробіть перевірку, зосереджену на проблемах: вирівнювання лінії погляду, баланс кольору, експозиція та тональність кімнати. Після кожного проходу експортуйте швидку попередню версію та поділіться нею як даними base64 для перегляду офлайн. Переконайтеся, що візуальні елементи відповідають стандартному брендовому колу, зберігаючи логітипи, шрифти та колірну палітру послідовними на всіх кадрах. Якщо ви виявили невідповідність, адаптуйте попередні налаштування та перезапишіть частину, щоб зберегти ритм.
Практичні поради: під час однієї зйомки пробуйте різні співвідношення та ракурси, щоб створити потужну бібліотеку. Використовуйте автоматичне виявлення сцен для позначки вдалих дублів; перевіряйте метадані, щоб знайти найкращі кліпи та ті, що відповідають цілям кампанії. Запишіть один раз, потім трансформуйте послідовність на пост-продакшні та перевірте узгодженість із готовим монтажем. Використовуйте попередні перегляди через http для колег та зберігайте коротку примітку з ідеями щодо вдосконалення, щоб прискорити ітерацію – це створює конкурентну перевагу та забезпечує узгодженість візуальних елементів у всіх матеріалах.
Налаштування звуку: налаштуйте тон голосу, темп, слова-паразити та додайте фоновий шум для природного звучання
Встановіть базовий рівень із теплим, людським звучанням і помірним акцентом; зафіксуйте темп на 120-150 слів на хвилину для кліпів тривалістю 30-60 секунд, щоб максимізувати залучення та комфорт перегляду.
-
Тон голосу та акцент: виберіть тон, який здається розмовним та емоційно достовірним; збережіть акцент достатньо тонким, щоб забезпечити чіткість для різних аудиторій. Використовуйте легкий підйом еквалайзера на високих частотах для повітря, уникаючи різкого свисту. Переконайтеся, що загальний тон відповідає вигляду та відчуттю бренду, щоб слухачі сприймали послідовне рішення у всіх матеріалах.
-
Темп та наголос: використовуйте контрольовані зміни темпу для виділення ключових моментів; вставляйте короткі паузи (0,25–0,5 секунди) після речень, щоб полегшити розуміння. Для критично важливих деталей уповільніть на 5–10%, щоб підвищити запам'ятовуваність та полегшити роботу з контентом для брендів та бізнесу.
-
Слова-паразити та дихання: прагніть менше 3 слів-паразитів на хвилину; замінюйте сегменти зі словами-паразитами навмисними паузами та коротким видихом. Правильно усувайте залишки слів-паразитів, переписуючи підказки та заохочуючи природний ритм дихання; цей зсув підвищує сприйняття професіоналізму та залучення.
-
Фоновий шум та середовище: додайте тонкий фоновий звук, щоб заземлити діалог; використовуйте білий шум або кімнатний тон на рівні приблизно -20 дБ відносно голосу, щоб зберегти розбірливість. Переконайтеся, що фоновий шар ніколи не заглушає голос; тестуйте на різних пристроях, щоб переконатися, що середовище відчувається природним, а не штучним.
-
Тривалість та структура: ціліться на 30-60 секунд на одне згадку для швидкого перегляду; для глибших пояснень зберігайте сегменти до 90 секунд з чіткими гачками та лаконічним висновком. Природно, довші формати повинні змінювати темп, щоб підтримувати увагу та уникати втоми.
-
A/B тести та посилання: порівнюйте базові показники з налаштованими результатами, використовуючи контрольний трек зі стратегії кампанії; відстежуйте такі показники, як відсоток завершення, залучення та час перегляду, щоб кількісно оцінити ефективність. Використовуйте ці дані для вдосконалення підходу та ітерації до передових позицій стратегії контенту.
-
Контроль якості: перевіряйте на надмірні вибухові звуки, ротові шуми та нерівномірний гучність; застосовуйте легке стиснення, щоб зберігати повний, рівномірний рівень, не звучачи роботизовано. Переконайтеся, що виконання залишається природним та емоційно збалансованим на різних пристроях та умовах перегляду.
-
Практичний робочий процес: розробіть повторюваний процес, який починається з швидкої перевірки тону, переходить до коригування темпу, а потім завершується зменшенням кількості слів-паразитів та налаштуванням фонового шуму. Підтримуйте один контрольний файл для узгодженості та документуйте вхідні дані з рекомендацій бренду для підтримки масштабованого виробництва для брендів та бізнесу.
-
Відповідність метрикам: визначайте успіх за цифровими показниками, такими як тривалість прослуховування, точки відсіву та повторні перегляди; забезпечте масштабованість рішення, використовуючи постійний інтервал 30-60 секунд, з відстеженням покращень з часом та узгодженням зі стратегією бренду.
Експорт та тестування: рекомендовані кодеки, співвідношення сторін, файли субтитрів, метадані завантаження та план A/B тестування для вимірювання конверсій
Експортуйте два профілі: 1080p H.264 MP4 для широкої сумісності та версію 4K HEVC для преміальних каналів, з аудіо AAC в діапазоні 128–192 кбіт/с. Використовуйте колірний простір BT.709 та частоту 29,97–30 кадрів на секунду, і зберігайте обидва профілі узгодженими щодо освітлення, візуальних ефектів та тривалості для спрощення порівняння. Дотримуйтесь чіткої політики щодо водяних знаків без відволікань і створюйте окремі статичні кадри як окремі матеріали для мініатюр і демо, що підтримують робочий процес flowhunt.
Керівництво щодо співвідношення сторін: надайте 9:16 для мобільних стрічок та 16:9 для розміщення на робочому столі, плюс опціональні обрізки 1:1 та 4:5 для контексту сітки або історій. Пріоритет надавайте тривалості 15–30 секунд для основних стрічок, з верхньою межею 60 секунд для демо або демонстрацій стилю життя, щоб проілюструвати контекст продукту. Перевірте рекомендації кожної платформи та адаптуйте співвідношення сторін і тривалість, щоб зберегти читабельність тексту на екрані та субтитрів, зберігаючи при цьому вплив кадру на сцени.
Файли субтитрів: одночасно генеруйте SRT та VTT файли-сайдкари, вбудовуючи часові коди, які відповідають розривам рядків не довше двох рядків. Описуйте дії в першому рядку кожного субтитру, уникаючи занадто довгих рядків, і зберігайте пунктуацію для читабельності. Переконайтеся, що субтитри синхронізовані зі статичними зображеннями та відео, включаючи сповіщення про водяні знаки, якщо це вимагається правилами платформи. Використовуйте чітку, лаконічну мову, яка підтримує доступність, зберігаючи при цьому домінування візуальних елементів у кадрі.
Метадані завантаження: створіть описовий заголовок з ключовими термінами, які користувачі насправді шукають, стислий опис, що узагальнює сюжет, та 3–6 тегів, що охоплюють стиль життя, сцени, продукти та переваги. Включіть місцезнаходження та мову, а також встановіть примітки щодо ліцензії або прав, щоб уточнити умови повторного використання. Додайте підказку для зображення мініатюри як статичне зображення, щоб допомогти інтерфейсу під час вибору візуальних елементів. Для автоматизації підключіться до soracom та внутрішнього генератора контенту, щоб забезпечити узгодженість між матеріалами та зменшити затримку публікації.
План A/B тестування: протестуйте кілька вимірювань – наявність субтитрів (з наявності/без), стиль мініатюр (яскравий статичний кадр проти кадру з дією), співвідношення сторін (9:16 проти 16:9) та тривалість (15 с проти 30 с). Гіпотези: субтитри підвищують конверсії на вимірювану величину; портретне співвідношення збільшує CTR на мобільних пристроях; довша тривалість збільшує середній час перегляду, але може зменшити відсоток завершення. Відстежуйте основний показник як конверсії на перегляд, з другорядними показниками, що включають CTR, відсоток завершення та середню тривалість перегляду. Проводьте 2-тижневий цикл з випадковим, рівним представленням різних варіантів, використовуючи фіксовану цільову вибірку (наприклад, 2000–5000 показів на варіант на тиждень) для досягнення статистичної значущості, або коригуйте, як тільки буде виявлено надійну різницю. Використовуйте інтуїтивно зрозумілий інтерфейс для вибору варіантів, призначення тестів та моніторингу прогресу, одночасно підтримуючи чіткий контрольний список завдань, щоб уникнути застарілих налаштувань та забезпечити відповідність експериментів сегментам аудиторії та уподобанням стилю життя. Використовуйте практичний демонстраційний запуск для підтвердження зв'язку між креативним задумом та виміряною реакцією, а також переглядайте результати з міжфункціональною командою, щоб зрозуміти, які зміни стимулюють реальну продуктивність для різних аудиторій та магазинів. Регулярно перевіряйте дані та вивчайте відмінності за регіоном, пристроєм та категорією контенту, щоб виявити варіації в візуальних уподобаннях та тоні мови.


