

Почніть зі збору групи авторів та повного сценарію, щоб перетворити розширений запис на готовий до випуску тизер. Цей практичний підхід легший для користувачів і встановлює чіткий виробничий робочий процес, який з самого початку охоплює колір, настрій та темп.
На етапі перегляду співставте настрій з колірною палітрою та протестуйте варіанти озвучування за сценарієм. Вдало обрана колірна схема повинна відображати бажану драму; настрій може тяжіти до відкритості, залежно від намірів авторів. Система обробляє кілька доріжок і створює переконливий темп для швидкого розповсюдження.
Щоб перетворити години матеріалу на послідовність, яка запускається за кілька кліків, ця конфігурація створює 30-60-секундні нарізки з мінімальним ручним втручанням. Для виробничих команд автоматизація зменшує кількість кліків та обробку повторюваних завдань, звільняючи редакторів для зосередження на чіткості оповіді.
Для вхідних даних, взятих із фільмів, встановіть політику, яка надає пріоритет видатним моментам, зберігаючи права та уникаючи конфліктів між різними платформами. Група може затвердити єдиний сценарій, а отримані нарізки зберігають повну дугу з послідовним кольorem та настроєм.
Щоб максимізувати цінність, проведіть еталонний аналіз за допомогою огляду групою та підготуйте готові до публікації пакети, які вимагають лише кількох кліків. Цей відкритий процес використовує сигнали, керовані даними, для адаптації кожного тизера до поведінки платформи та сегментів аудиторії, одночасно зберігаючи залученість та відповідальність авторів.
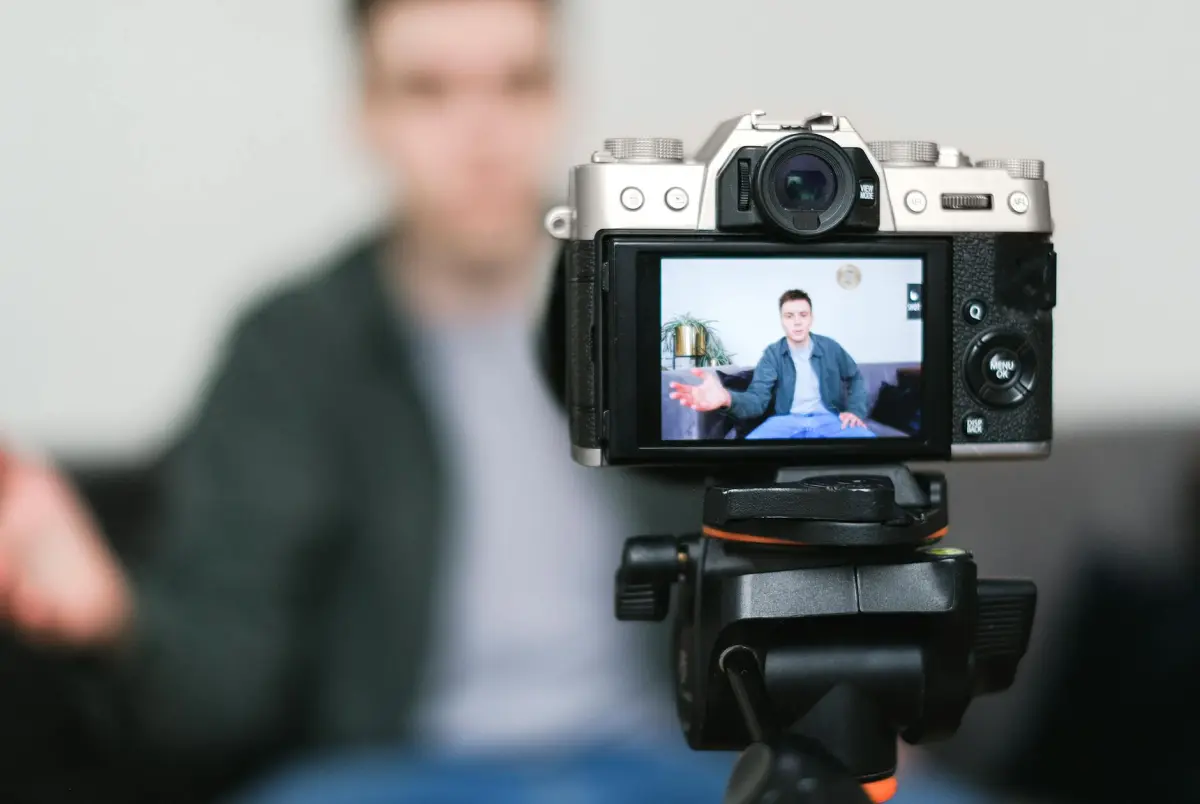
Детальний робочий процес для перетворення тривалого відеоматеріалу на кастомні трейлери з доопрацюваннями, керованими користувачем
Рекомендація: Створіть преміальную бібліотеку, позначивши розширений матеріал за сюжетом, конфліктом та готовністю до озвучення. Використовуйте перший прохід для позначення блоків, а потім запустіть автоматичну генерацію у Filmora або Filmoras, щоб отримати 3-хвилинну нарізку для YouTube, з доопрацюваннями, готовими до швидкого тестування.
Виявлення відображає сюжетний скелет: початковий гачок, поворот у середині, кульмінаційний момент та спокійні ділянки озвучення. Прикріпіть метадані до цих блоків, щоб редакційні команди могли швидко їх перекомбінувати, забезпечуючи, щоб кожна сцена служила сюжетній арці та відповідала бажаним стилям.
Редакційний робочий процес: в редакторі виберіть блоки та розмістіть їх на часовій шкалі у стилі слайд-шоу. Спробуйте кілька стилів (кінематографічний, документальний, промо) та збережіть повну версію для перегляду. Використовуйте автоматичну генерацію для створення варіантів рівномірного темпу, а потім порівняйте результати пліч-о-пліч, щоб вибрати найкращий.
Доопрацювання, керовані користувачем: зберігаючи сюжетну цілісність, налаштуйте темп, тривалість (включаючи довші версії) та рівні озвучення; вирішіть конфліктні моменти та переконайтеся, що перше враження є захоплюючим. Потім заблокуйте монтаж і додайте накладки, текст та промо.
Варіанти виведення максимізують охоплення: створюйте промо-нарізки для YouTube та соціальних мереж; пропонуйте повний пакет з різними тонами, стилями та відповідністю намірам аудиторії. 3-хвилинний формат часто перемагає, але надавайте довші та коротші уривки для тестування утримання та підтримки різноманітних запусків у стилі фільму та варіантів слайд-шоу.
Конкурентна перевага: відстежуйте перетворення конкурентів і випереджайте їх за допомогою вдосконаленого, кастомного конвеєра. Зберігайте потужну бібліотеку вступів, кінцівок та переходів; покладайтеся на автоматичну генерацію для швидкої ітерації, потім доопрацьовуйте, доки виведення не відповідатиме відповідності стилям та аудиторії. Якщо ви відстежували результати, ви можете ітерувати швидше та зберігати свою кіно-роботу захоплюючою, одночасно надаючи ефективні промо.
Обмеження вхідних даних: мінімальна роздільна здатність, частота кадрів та вимоги до тривалості для вилучення трейлерів
Базова рекомендація: вимагайте, щоб вихідний матеріал мав роздільну здатність 1280x720 або вище, частоту кадрів 24–30 кадрів на секунду та мінімальну тривалість 60 секунд, щоб гарантувати достатньо сцен для цілісного трейлера.
Для вищої якості надавайте перевагу 1920x1080 при 30 кадрів/с; якщо матеріал надходить при 60 кадрах/с, зменшіть частоту до 30; зберігайте колірний простір та кодуйте за допомогою H.264 або HEVC; цільовий бітрейт 5–12 Мбіт/с для 1080p та 12–20 Мбіт/с для 2K, коли це підтримує бібліотека джерела.
У межах робочого процесу виявлення діалогів та драматичних моментів керує вибором; транскрипція може використовуватися для визначення ключових моментів, а створення синопсису допомагає структурувати наративну дугу за межами простого списку нарізок; кадр зображення вибирається у вікнах по 6–8 секунд, щоб забезпечити плавність переходів; ви можете витратити час на короткоформатні ресурси або мініатюри, згенеровані з інтервалом 2–3 секунди.
Обмеження тривалості: остаточна тривалість трейлера повинна становити 15–60 секунд, із 30 секундами як поширеною ціллю; прагніть до 3–5 короткоформатних сцен, кожна тривалістю приблизно 6–10 секунд; переконайтеся, що вікно відповідає темпу та сюжетним моментам; для розповіді у стилі інді-фільмів тримайте переходи стислими та уникайте надмірного розтягування будь-якого окремого моменту.
Примітки щодо впровадження: використовуйте шаблони для автоматичного створення альтернативних нарізок; надайте меню з мовними опціями; підтримуйте кілька озвучень за допомогою тексту в мову; від'єднуйте озвучення для локалізації; зберігайте бібліотеку візуальних ресурсів, ключових діалогів та моментів конфлікту; штучний контроль забезпечує сталість темпу; ви маєте життя як інді-творця, балансуючи драматичну напругу з короткоформатною розповіддю.
Оцінка сцен та вилучення ключових моментів: вибір моментів, що викликають залученість
Рекомендація: використовуйте оцінку на основі ШІ для ранжування 2–12-секундних вікон за захоплюючими моментами, а потім експортуйте пакет найкращих моментів, готовий для трейлера. Почніть з 3-ступеневого робочого процесу: визначення сигналів, обчислення оцінок та надання ресурсів, які можуть бути перетворені для різних форматів.
- Визначте сигнали та узгодьте з транскрипцією: запустіть автоматичну транскрипцію для зіставлення діалогів із часовими мітками, потім позначте моменти за щільністю діалогів, чіткістю та наявністю драматичної цитати. Використовуйте ці теги для відокремлення ключових фраз від другорядних розмов, забезпечуючи, щоб кожен момент мав чітку послідовність для глядача. Відстежуйте мітку настрою (вступ, ескалація, розв'язка), щоб допомогти пізніше з рішеннями щодо вигляду.
- Визначайте візуальні піки та рух: застосовуйте виявлення піків руху, колірних варіацій та виразів обличчя; поєднуйте з гучнішим або динамічнішим звуковим сигналом для позначення драматичної зміни. Часові блоки зі швидкими нарізками або сильним візуальним імпульсом як кандидати для захоплюючих моментів, і мінімізуйте час, що витрачається на ручний огляд, зберігаючи кандидатів у відкритій бібліотеці тегів.
- Оцінюйте за допомогою прозорої, композитної моделі: обчислюйте остаточну оцінку як зважену суму залученості (перегляд до кінця, повтори, паузи), зміни настрою (динаміка) та інформативності (чіткість контексту). Віддавайте перевагу вищим вагам для моментів, що просувають основну обіцянку фільму та підтримують темп. Дозвольте користувачам налаштовувати ваги для найкращих результатів у їхніх промо.
- Позначайте настрій та контекст для цільових промо: позначте кожен момент за настроєм (драматичний, надійний, напружений) та за наративною функцією (зав'язка, поворот, розв'язка). Це розділення дозволяє швидше збирати різні трейлери та промо, а також допомагає вибрати вигляд, який відповідає цільовій аудиторії, зберігаючи цілісність.
- Експорт та підготовка ресурсів: створюйте окремі виведення для повних кліпів, швидкої нарізки та слайд-шоу статичних зображень з мінімальною кількістю тексту. Генеруйте субтитри та шар тексту з субтитрами, заснований на транскрипції, плюс стиль субтитрів, орієнтований на шрифт, який залишається читабельним на мобільних пристроях. Включіть пакет трейлерів, що завантажується, з найкращими моментами та обкладинкою для початку процесу завантаження.
Стратегія виведення: створюйте багатоформатний набір ресурсів, який можна завантажити або відкрити безпосередньо в робочому процесі творця. Використовуйте окремий, модульний підхід, щоб найкращі моменти можна було повторно використовувати в інших проектах, змінюючи настрій або темп лише незначними редагуваннями. Переконайтеся, що кінцевий вигляд відповідає рекомендаціям бренду та підтримує відкритий обмін ресурсами між командами та книгами, що кодифікують шаблони оповідання.
- Покроковий робочий процес робить процес швидшим і менш схильним до помилок, зменшуючи час ручного перегляду та дозволяючи редакторам зосередитися на доопрацюванні.
- Ресурси включають повний монтаж, окремі кліпи та промо-слайд-шоу, кожне з яких має субтитри та послідовний стиль шрифту для завершеного вигляду.
- Підтримувані формати варіюються від пакетів, готових до трансляції, до соціальних нарізок, з найкращими практиками, документованими в окремому посібнику як для команд, так і для користувачів.
- Інструменти та робочі процеси розроблені як відкриті, з метаданими, що зберігають часові позначки, статичні зображення та теги настрою для полегшення майбутнього створення та повторного використання.
Поради щодо впровадження: робіть вікна короткими (коротші для соціальних промо, довші для контекстних трейлерів), застосовуйте економний 2-етапний перегляд: автоматична перевірка оцінки та 1-сторінковий людський перегляд для логічності, а також тестуйте різні візуальні стилі, щоб знайти найкращу комбінацію для залучення. Використовуйте дані виявлення, щоб покращити синхронізацію зображення та субтитрів, а потім змініть шрифти та кольори, щоб покращити загальний вигляд. Цей підхід перетворює тривалий процес перегляду на швидкий конвеєр, який забезпечує постійне, вимірюване зростання залучення як для користувачів, так і для промо.
Шаблони стилів і шаблони темпу: жанри, брендинг і цільовий час тривалості
Спочатку зафіксуйте шаблон, прив'язаний до жанру, потім додайте брендинг і встановіть суворий цільовий час тривалості (60 секунд), щоб зберегти послідовність у перероблених кліпах.
Історичні натяки підходять для ретроспектив; шкільний тон додає авторитетності для навчальних роликів. Використовуйте простий, модульний дизайн, який дозволяє відокремлювати сегменти та переробляти їх для різних призначення, зберігаючи стиль сценарію та заголовків.
Брендинг: визначте палітру, розміщення логотипу, типографіку та стиль анімації; зберігайте налаштування в проєктах FlexClip; титри та водяний знак повинні з'являтися послідовно.
У вас є можливість змішувати версії для різних соціальних мереж; додайте субтитри кількома мовами та об'єднайте титри в кінцевому кадрі, щоб згадати джерела, не захаращуючи відео.
Шаблони темпу відповідають важливим моментам: Зачіпка 0–5 с, Розвиток 5–20 с, Пік 20–40 с, Завершення 40–60 с. Для довших тривалостей подовжуйте розділи "Розвиток" і "Пік", зберігаючи переходи; використовуйте простий підхід до анімації, щоб уникнути втоми. Також є спеціальні сегменти, які можна адаптувати до мов та соціальних налаштувань. Зробіть кінцевий кадр потужним, щоб стимулювати перегляд, і підготуйте спеціальний сценарій і набір ресурсів, щоб можна було швидко відокремлювати елементи та збирати їх для різних видань.
| Шаблон | Жанрова атмосфера | Елементи брендингу | Цільова тривалість | Переходи | Визначні особливості |
|---|---|---|---|---|---|
| Історичний пакет | Історична оповідь | Сепія, шрифти із засічками, титри у стилі книги | 60 с | Затухання, анімація перегортання сторінки | Наскрізні накладання; субтитри, готові до локалізації |
| Навчальний брифінг | Академічний, документальний | Чисті шрифти без засічок, легка сітка | 45–60 с | Виріз, зсув | Ключові моменти списком; підказки на основі сценарію |
| Соціальний у фокусі | Енергійний, дружній до молоді | Яскрава палітра, брендовані хештеги | 15–30 с | Швидкі вирізи, віялові панорами | Акцент на зачіпці; субтитри; заклик до дії |
| Знімок виробництва | Промисловий процес | Нижні третини, заставка логотипу | 60–75 с | Ковзання, пульсація | Титри в кінцевому кадрі; послідовність водяних знаків |
Формування звуку: музичні підказки, баланс діалогів і синхронізація звукових ефектів
Рекомендація: встановіть базовий мікс на -18 LUFS інтегрованого рівня, з діалогами на -24 LUFS і музичним фоном, що приглушується на 3 dB під час розмови; тримайте пікові рівні нижче -1 dBFS, щоб зберегти запас для звукових ефектів. Застосуйте швидке бічне ланцюгування, щоб мова залишалася чіткою, особливо під час драматичних моментів. Підготуйте короткий тестовий кліп і перевірте його на живих моніторах та мобільному пристрої; переконайтеся, що результат звучить правильно там і його можна дивитися поза екранами. Збережіть це як шаблон у Filmora, щоб прискорити майбутні переробки.
Музичні підказки повинні відображати створення наративу: динамічні удари на переходах, тривалі тони для пауз і короткі звуки на драматичних репліках. Створіть основну арку з 2–3 варіаціями фонової музики та налаштуйте автоматичне приглушення для реагування на діалоги. Забудьте про ідею одного настрою; існують стилі, що виходять за межі однорідного фону. Використовуйте Filmora для прив'язки підказок до сценаріїв і підготуйте маркери на часовій шкалі, щоб можна було відразу бачити темп. Шляхом узагальнення сценарію вирівняйте музичну арку з основними моментами проєкту; окрім одного настрою, змінюйте стилі відповідно до кожного сегмента життя та уникайте перевантаження слуху. Користувачі з різними звуковими системами почують однакове емоційне навантаження, якщо ви підтримуватимете чистий мікс.
Баланс діалогів: забезпечте, щоб основний голос був розбірливим між усіма спікерами. Застосуйте м'який фільтр високих частот, щоб видалити низькочастотний гул, і тонкий компресор (2:1), щоб утримати ведучого стабільним, дозволяючи другорядним голосам дихати. Прагніть до постійної присутності, щоб не доводилося постійно шукати тональні зрушення; мета — чіткість для всіх слухачів, незалежно від того, чи перебувають вони у тренажерному залі, автобусі чи невеликій студії. Чого слід уникати, так це надмірної компресії, яка позбавляє фрази життя; зберігайте природну динаміку та уникайте стиснення подихів. Редактор повинен рано встановити відносні рівні; інакше мікс може бути зіпсований, а ви не повністю використовуєте талант. Використовуйте вимірювач редактора для моніторингу середнього показника по сценах і підтримуйте стабільність кліпу. Для авторів цей аспект є життєво важливим; ви можете спостерігати результати там і швидше, потім налаштувати в редакторі та натиснути, щоб застосувати криві. Підготуйте кілька альтернативних пресетів діалогів, узгоджених з маркетинговими цілями та сценаріями; це допоможе при переробці для шкільних проєктів і соціального життя, а також полегшить переробку для різних платформ. Аналіз показує, що послідовний баланс діалогів корелює з вищим часом перегляду та потужнішими ключовими моментами.
Звукові ефекти: синхронізуйте кожен перехід із точками вирізу; надавайте пріоритет попаданню в найважливіший склад репліки, а не в точний удар. Використовуйте точну синхронізацію для кроків, дверей, клацань і ударів; тримайте звукові ефекти на -6–-12 dB відносно діалогів, щоб уникнути маскування. Накладайте кілька ефектів, щоб охопити всю тривалість моменту; забезпечте швидке згасання (вхід/вихід), щоб переходи відчувалися природно. Використовуйте підхід на основі кліпу: якщо послідовність повторюється, використовуйте ті самі звукові ефекти та змінюйте час на частку секунди, щоб зберегти ритм. Підготуйте невелику бібліотеку одноразових звуків у Filmora для прискорення робочих процесів; це полегшує підтримання послідовного стилю в проєктах життя чи школи та переробку для різних платформ. Для аналітиків і маркетологів послідовна синхронізація звукових ефектів підвищує утримання аудиторії та ключові моменти; важливо чітко відображати підказки на емоційній арці та створювати ресурси для різних каналів. Натисніть, щоб застосувати зміни, і перегляньте на живих моніторах, щоб бути впевненими перед публікацією.
Цикл вдосконалення: попередні перегляди в реальному часі, збір відгуків і ітераційні редагування
Почніть з триетапного циклу вдосконалення: швидкі попередні перегляди згенерованих кліпів, структурований зворотний зв'язок від користувачів та ітераційні редагування для покращення співвідношення сторін, кольору та напруженості перед фінальним експортом.
Етап 1: попередні перегляди в реальному часі використовують контроль швидкості та порівняння пліч-о-пліч, щоб забезпечити відповідність бажаному вигляду. Генеруйте швидкі проходи, які зберігають співвідношення сторін і ключові сцени. Використовуйте спеціальну панель, як-от ReelMinds, для порівняння оригінальної послідовності з оновленою версією та відстежуйте, які сегменти найбільше впливають на увагу та утримання. Зберігайте довжину попереднього перегляду стислою: 60–90 секунд для швидких ітерацій, з опцією швидкості 2x для грубих перевірок.
Етап 2: збір онлайн-відгуків включає позначені часом нотатки для кожної сцени, а також швидке опитування для глядачів, щоб оцінити чіткість, темп і емоційний вплив. Згенеруйте транскрипцію для створення субтитрів і забезпечте точність між мовами. Зберігайте відгуки окремо від основного журналу та зіставляйте їх із вашою книгою бренду, щоб редагування залишалося послідовним із тоном і колірними стандартами.
Етап 3: ітераційні редагування застосовують оновлення до окремих кліпів у кожній сцені, регулюючи колір, швидкість вирізу та узагальнюючи довгі сегменти, щоб зберегти напруженість, одночасно скорочуючи тривалість. Кожен прохід зменшує зусилля для авторів і прискорює фінальне виробництво. Ведіть журнал змін і перевіряйте, чи відповідають зміни книзі бренду та преміальним рекомендаціям, щоб ви могли надавати аудиторії послідовно відполіровані ресурси.
Метрики та обмеження: відстежуйте найбільш захопливі сцени, коефіцієнти завершення та паузи. Використовуйте онлайн-панелі, щоб визначати, коли увага падає, і які мовні треки працюють найкраще. Після кожного циклу заблокуйте найкращий варіант для фінального виробництва та видаліть решту, щоб підтримувати гігієну робочого процесу.


