
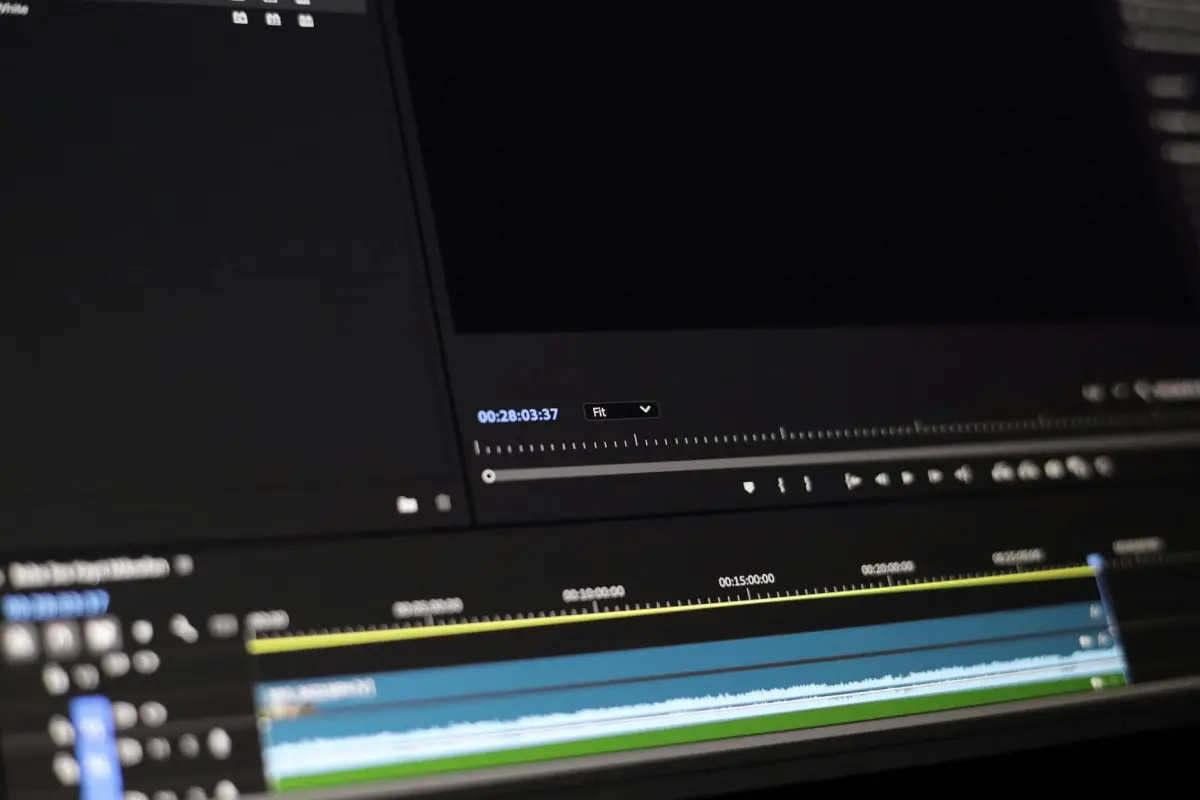

Для начала отрегулируйте временную задержку во встроенном управлении, чтобы синхронизировать звук с кадрами фильма. На большинстве платформ щелкните правой кнопкой мыши по поверхности плеера, чтобы открыть ползунок задержки, установите начальное смещение примерно от -50 мс до +150 мс, затем проверьте снова с несколькими клипами, чтобы подтвердить синхронное воспроизведение.
Существуют различные методы для устранения рассинхронизации в различных случаях: используйте встроенные смещения, применяйте внешнее программное обеспечение или оптимизируйте параметры передачи для интернет-потоков. Если фоновый звук остается несинхронизированным после локального теста, выберите другой метод, который отдает приоритет синхронизации по времени, затем повторите тестирование с клипами, чтобы подтвердить улучшение. Там запишите результаты в простую таблицу, чтобы сравнить рассинхронизацию между методами.
Сначала следуйте пошаговой последовательности, чтобы подтвердить синхронизацию: проверьте время относительно кадров в коротком клипе, затем отрегулируйте с помощью опции щелчка правой кнопкой мыши или сочетания клавиш для применения точного смещения. Если фоновый программный модуль работает в фоновом режиме, приостановите его во время тестирования, чтобы избежать помех, затем повторите тестирование с клипами, чтобы убедиться, что время остается синхронизированным.
На практике различные случаи требуют особого подхода: при потоковой передаче сосредоточьтесь на задержке передачи; при работе в автономном режиме полагайтесь на встроенные элементы управления, программное обеспечение или внешние инструменты. Сначала приостановите другие процессы, которые могут потреблять циклы процессора; затем выберите метод, который минимизирует рассинхронизацию во всех клипах. Если проблемы сохраняются, попробуйте другой кодек или отрегулируйте битрейт потоковой передачи для дальнейшей стабилизации времени.
Там сохраните конфигурацию как профиль для последующего применения; просто выберите стабильную базовую линию для всех клипов; сохраните небольшой набор видеоклипов для проверки сохранения минимальной рассинхронизации. Регулярные проверки обеспечивают согласованность времени между платформами и сеансами.
Практическое руководство по синхронизации звука и видео
Начните с конкретной рекомендации: запишите 5–10 секунд с того же источника; измерьте, совпадают ли удары с визуальными эффектами на экране; если синхронизация не удалась, отрегулируйте задержку в аудио- видеодорожке.
Используйте пошаговый подход для быстрой калибровки, сосредоточившись на наименьшем изменении, которое дает идеальное совпадение.
На этой странице прочитайте краткий контрольный список, который минимизирует количество проб и ошибок; обычно первопричина кроется в различиях часов между источниками.
- Совместите частоту кадров: оба потока должны иметь одинаковую частоту кадров (fps); если нет, перекодируйте один файл в целевую частоту кадров (24, 25, 30, 60).
- Калибруйте задержку: в редакторе смещайте аудио-видео дорожку с шагом 10–20 мс; протестируйте с помощью простого сигнала в тестовом клипе; наблюдайте, совпадают ли визуальные эффекты с ритмом; документируйте изменения.
- Используйте автоматическую синхронизацию, где это возможно; если нет, примените ручное смещение на временной шкале; перепроверьте несколько клипов, чтобы подтвердить согласованность.
- Оцените источники рассинхронизации: если синхронизация губ (липсинк) нарушается во время сцены, обратите внимание на буферизацию, задержки кодека, цепочку воспроизведения; изолируйте один компонент, прежде чем применять коррекцию.
- Предустановки и профили: сохраните предустановку «точного совпадения» для будущих проектов; премиум-настройки: наушники; референсные мониторы дают более надежные результаты.
При работе с более длительными проектами небольшие временные сдвиги обычно накапливаются; незначительное смещение в 30 мс восстанавливает идеальную синхронизацию при воспроизведении; однако постоянные проверки различных визуальных эффектов раскрывают истинное состояние синхронизации.
Советы для быстрой проверки: используйте простой пример клипа с хлопком; сравните хлопок с формой сигнала на левой стороне редактора; если появляется несоответствие, примените измеренную задержку; этот метод является практичным способом подтвердить совпадение аудио и видео.
Распространенные ошибки: дрейф часов от устройств, непоследовательная буферизация, перекрестная задержка между устройствами; когда возникает рассинхронизация между клипами, вернитесь к общей частоте дискретизации плюс одна конвейерная линия; такой подход делает изменения управляемыми и предсказуемыми.
Главное: стремитесь к идеальной непрерывности; если вы заметили изменения в визуальных эффектах во время быстрых ритмов, перепроверьте длину волны и отрегулируйте, пока правая страница визуальных эффектов не отразит точную синхронизацию; так вы сохраните премиальное качество просмотра на различных устройствах.
Сохраните резервный предустановку для вашего следующего проекта, чтобы ускорить будущие настройки и обеспечить согласованность; работа с воспроизведением на различных настройках становится проще, когда вы сохраняете рабочий процесс, соответствующий вашему случаю.
Если они сравнивают с другой настройкой, они подтверждают, остается ли время синхронизированным между конфигурациями.
Определите проблему: воспроизведите проблему синхронизации и соберите сведения об устройстве/приложении
Начните с воспроизведения временной рассинхронизации на основной платформе, где она появляется.
- Потренируйтесь на коротком демо с одним клипом; наблюдайте за синхронизацией; отмечайте моменты запаздывания между клипами; проверяйте, совпадает ли звуковая дорожка с визуальными эффектами во время обработки
- Выполняйте тесты в автономном режиме; изолируйте обработку от сетевых факторов; фиксируйте результаты
- Если вы планируете углубиться, щелкните правой кнопкой мыши по клипу или заголовку проекта, чтобы открыть диагностику; экспортируйте диагностическую копию в папку для справки
- Соберите сведения об устройстве: модель, версия ОС, ОЗУ, ГП; версия браузера в режиме браузера; версии программного обеспечения для imovie, democreator, wondershare, riverside
- Запишите состояние среды: автономный режим, свободное место на диске, фоновые процессы; контролируйте загрузку процессора во время синхронного воспроизведения
- Отметьте спецификации медиа: формат исходного файла, частота кадров, частота дискретизации; настройки проекта; проверьте, способствуют ли операции слияния рассинхронизации
- Документируйте журналы: создайте папку, например sync_logs; уделите время маркировке каждого испытания уникальным тегом; включите временные метки
- Планируйте следующие шаги: тонкая настройка параметров; регулировка скорости; методы слияния для уменьшения задержки; ведите отдельный журнал для каждого испытания
- Попробуйте разные инструменты: democreator, imovie, wondershare; тестируйте через веб-редактор отдельно от автономного рабочего процесса; сравните результаты
- Наконец, протестируйте повторяемость: беспокойтесь о повторном появлении после перезапусков; тогда у нас будет базовая линия для сравнения снова
Найдите элементы управления синхронизацией губ или аудиозадержкой в вашем плеере или приложении
Откройте «Настройки»; найдите «Синхронизация губ», «Смещение» или «Задержка». Установите начальное значение +50 мс для начала выравнивания. Если движения рта опережают произносимую строку, это сдвигает звук назад; если отстают, уменьшите значение. Затем протестируйте с примером клипа; короткая запись подтвердит корректировку.
Вносите корректировки небольшими шагами, обычно 10–20 мс; общий сдвиг должен быть менее 100 мс для большинства контента. Когда вы определитесь со стабильным сдвигом, используйте опцию «Применить», если она доступна; в противном случае запишите значение для будущих сессий, чтобы избежать беспокойства во время записи.
Онлайн-клипы помогают проверить результаты; однако локальные тесты с любимыми репликами обеспечивают более точный контроль. Буферизация или переменная потоковая передача вызвали рассинхронизацию, которую этот метод может устранить. Записи различаются в зависимости от задержки устройства; используйте среднюю базовую линию, чтобы не полагаться на один клип. Когда вы начали тестирование, выберите клип с четким диалогом. Шаги ниже помогают проверить синхронизацию между записями.
Экспортируйте предустановку, если плеер ее поддерживает; слияние предустановок между платформами помогает поддерживать возможности на разных устройствах.
Внутри внутренних настроек вы можете увидеть дополнительные элементы управления задержкой; экспериментирование с несколькими временными линиями расширяет охват типичных сценариев. Информация из тестирования помогает принимать быстрые решения по корректировкам.
| Платформа | Где найти | Ярлык | Быстрый совет |
|---|---|---|---|
| VLC desktop | Настройки → Воспроизведение → Синхронизация губ | Синхронизация губ, Смещение | Начните с +50 мс; протестируйте с диалоговыми репликами |
| YouTube (браузер) | Меню плеера → Воспроизведение → Синхронизация губ | Синхронизация губ | Применяйте шаги по 10–20 мс; проверяйте по известным репликам |
| Netflix mobile | Настройки → Воспроизведение → Синхронизация губ | Синхронизация губ | Попробуйте шаги по 15–25 мс |
| Plex на Smart TV | Настройки → Плеер → Синхронизация губ | Задержка, Синхронизация губ | Перепроверьте после изменений сети |
Настройте задержку воспроизведения или смещение звука на уровне системы или плеера
Рекомендация для быстрого старта: Запустите меню настроек в выбранном плеере или системном микшере; установите фиксированное смещение в миллисекундах, которое синхронизирует звук с изображением на экране; используйте короткий клип для подтверждения результата; этот подход позволяет обрабатывать такие вещи, как задержки, несоответствия, рассинхронизация; если что-то все еще кажется неправильным, повторите тест со свежим клипом; результат остается стабильным со временем.
Тестируйте с такими источниками, как проекты youtube или локальные клипы, созданные в filmora; синхронизация между потоками подтверждает выравнивание; наблюдайте за скрытой рассинхронизацией; если звук отстает, увеличьте смещение; если опережает, уменьшите смещение; повторяйте, пока временная метка не отметит выравнивание; создание согласованности между проектами.
На системном уровне: откройте меню; нажмите ползунок задержки или поле смещения; примените новое значение; запустите быстрый клип проектов; проверьте, соответствует ли время воспроизведения визуальным эффектам; эта настройка не требует внешних инструментов; она устраняет несоответствия, вызванные аппаратной буферизацией, USB-интерфейсами или конвейерами захвата; беспокойство не применяется.
меньше беспокойтесь, когда результаты стабилизируются; премиум-опции предоставляют дополнительные элементы управления; создание рабочих процессов из контента youtube ведет себя надежно в различных проектах; и, самое главное, проверяйте версии, чтобы избежать отклонений из-за обновлений программного обеспечения; эта простая настройка делает результат легко достижимым, обеспечивая более плавные результаты.
Калибровка подключенных устройств (HDMI, Bluetooth, саундбары) для правильной синхронизации

Выберите основной тракт и протестируйте его отдельно, чтобы найти проблему; сосредоточьтесь на самом устройстве и линии, питающей его, затем повторите с другими трактами, если необходимо.
Для подключений на основе HDMI установите вывод звука телевизора на HDMI ARC или eARC, включите CEC и используйте встроенную опцию для маршрутизации звука через выбранную внешнюю приставку. Примените небольшие настройки задержки и повторно проверьте с помощью медиаклипа из YouTube, чтобы измерить выравнивание; если смещение сохраняется, попробуйте другую линию или переключитесь на выделенную внешнюю приставку, которая поддерживает автоматическую обработку задержки. Совместимость pluraleyes может иметь значение на некоторых установках, поэтому проверьте совместимость, если вы используете несколько выходов.
Bluetooth-соединения обычно добавляют больше задержки; предпочитайте устройства с кодеками с низкой задержкой и держите их в пределах прямой видимости. Отключите другие беспроводные устройства, чтобы уменьшить помехи. Протестируйте с отрывком из влога на YouTube или с офлайн-медиа, чтобы увидеть, существует ли проблема; если она сохраняется, рассмотрите возможность использования проводного адаптера или выделенных BT-наушников для критических моментов. Обратите внимание на плюсы и потенциальные проблемы этой настройки.
Для внешних саундбаров убедитесь, что настройки на саундбаре и источнике согласованы; отключите буферизацию коррекции помещения, если она создает задержки, и примените наименьшее возможное смещение, обеспечивающее стабильные результаты. Перед внесением существенных изменений зарегистрируйте серьезность проблемы и проверьте работу с различными медиаформатами; этот подход поможет вам отслеживать прогресс в процессе создания влога или клипа на YouTube.
Ведение журналов попыток, после каждого изменения и отметки, работает ли результат. Если один тракт дает отличные результаты, придерживайтесь его; в противном случае сравните плюсы и минусы каждого пути и решите, стоит ли обновлять компоненты или пробовать другую линейку устройств. На машинах с Windows проверьте существующие опции синхронизации вывода и найдите настройки, которые уменьшают дрейф; если ничего не помогает, вернитесь к исходной конфигурации и снова протестируйте офлайн, затем поделитесь мнением в блоге или на YouTube, чтобы другие могли учиться на вашем опыте. Не дает ли это вам более ясное представление об общем поведении?
Тестирование на различных типах медиа и источниках для подтверждения стабильности
Начните с репрезентативного набора клипов: онлайн-потоки; загруженные файлы; локально созданные записи. Воспроизводите каждый элемент с фиксированной опорной точкой воспроизведения; сравните формы волны с базовым клипом, чтобы проверить синхронизацию.
Удалите кеши, которые могут исказить результаты из-за скрытой проблемы. Это поможет изолировать изменения, которые исходят из контента, а не из настройки.
Запишите формы волны из каждого источника; проанализируйте такие факторы, как фоновый шум; обнаруживайте клиппинг; измеряйте качество по сегментам.
Тестируйте на различном оборудовании: компьютер; выбор микрофона; встроенный микрофон; внешний микрофон; сравните результаты в различных конфигурациях. Ведите журнал только тех факторов, которые влияют на синхронизацию.
Проводите испытания онлайн, офлайн, с созданными клипами; сравнивайте поведение при различной сетевой нагрузке; наблюдайте дрейф или паузы. Отметьте условия, имеющие потенциальное влияние на вариативность результатов.
Отслеживайте результаты по имени файла, источнику, временной метке; храните находки отдельно; создайте журнал базовых и тестовых результатов.
Автоматически корректируйте, изменяйте настройки при необходимости; тестируйте с различными длинами клипов; проверяйте возможные изменения уровня фона. Если появляется нестабильность, беспокойтесь о скрытых аппаратных или программных сбоях.
Вот что стоит подтвердить: есть четкая граница, когда формы волны остаются синхронизированными на онлайн-потоках; офлайн-файлах; созданных клипах. Если это сохраняется, изменения остаются стабильными. Вот почему важна кросс-источниковая проверка.


