

Начните с одного шаблона кадра, который соответствует желаемому настроению, и он проведет вас через все последующие клипы. Благодаря рабочему процессу на базе ИИ вы можете синхронизировать тон с подсказками движения и звука, сохраняя при этом процесс простым. Для пользователей, стремящихся к профессиональным результатам, этот подход эффективен и сокращает количество встреч после начала работы.
Создайте стартовый набор из 3–5 шаблонов и 2–3 пакетов ресурсов, которые регулярно пополняются. Это помогает пользователям быстро создавать последовательные клипы. Видеоклип в разрешении 1080p, отрендеренный на GPU среднего класса, завершается за секунды; более высокие разрешения или более длинные последовательности могут занять больше времени, но цифровой рабочий процесс хорошо масштабируется для команд. Подход остается идеальным для тех, кому нужен быстрый оборот со звуковым балансом и хорошими результатами. Эти клипы можно собрать в видео для социальных сетей.
Чтобы упростить производство, разбейте ваши потребности на 3-этапный процесс: (1) сбор ресурсов (логотипы, шрифты, аудио) (2) настройка стартового шаблона с желаемым темпом и цветовым стилем (3) рендеринг и итерация. Как только вы начали использовать этот поток, он быстро преображает множество вариаций; инструмент не требует кодирования и автоматизирует рутинные проверки синхронизации губ и ритма. Для профессионального результата сохраняйте короткую длину кадров и синхронизируйте движения с нормами платформы.
Аналитика стимулирует оптимизацию: отслеживайте время просмотра, процент пропусков и сегменты повторного просмотра, чтобы направить следующую партию. Запуск 2–3 A/B вариантов может заметно повысить вовлеченность. С каждым добавленным ресурсом опыт становится все более согласованным с целевой аудиторией, а рабочий процесс становится более эффективным для кампаний, которые должны масштабироваться по всем каналам. Это особенно полезно для цифровых команд с ограниченными потребностями.
Реально ли ИИ для преобразования изображений в видео на мобильных устройствах?
Рекомендация: На мобильных устройствах монтаж изображений в видео выполним для повседневного использования; используйте встроенный ИИ с легкой библиотекой предустановок; этот подход дает наилучшие, простые и удобные результаты.
Ограничения оборудования: время автономной работы, нагрузка на процессор/видеопроцессор, оперативная память. Телефоны среднего класса с 6–8 ГБ оперативной памяти могут рендерить последовательность длиной 5–12 секунд с простой темой; для более длинного или богатого контента выгружайте в облако, когда сеть и политика позволяют; тенденции показывают, что создатели предпочитают итеративные циклы; обеспечьте сохранение контекста и энергоэффективность.
Стратегия: сохраняйте небольшие размеры ресурсов, используйте единую тему, размещайте текст и графику для максимальной читаемости; используйте встроенный голос для повествования или добавляйте озвучку; после обрезки ресурсов избегайте тяжелых переходов; визуально четкие результаты часто зависят от освещения и эмоций; может использоваться улучшенное масштабирование.
Рабочий процесс: выберите приложение-создатель с лучшим пользовательским интерфейсом, кураторской библиотекой и простым экспортом; начните с темы праздничного монтажа или другого контекста; просмотрите шаблоны, замените фотографии, настройте время; за считанные минуты превращается в готовый клип.
Доказательства: отзывы подчеркивают простоту, хорошие результаты и быструю итерацию; пользователи часто хвалят легкий обмен и возможность адаптировать тон к аудитории; примеры показывают эмоции через цвет и темп.
Заключение: мобильная осуществимость возрастает, когда вы сочетаете встроенную обработку с интеллектуальным резервным копированием в облаке, оптимизированными шрифтами, размещением и аудио; для быстрых, специальных проектов встроенный путь хорош; для более богатых историй планируйте рабочий процесс создания, который допускает озвучку и голосовые сообщения, и помните о конфиденциальности данных.
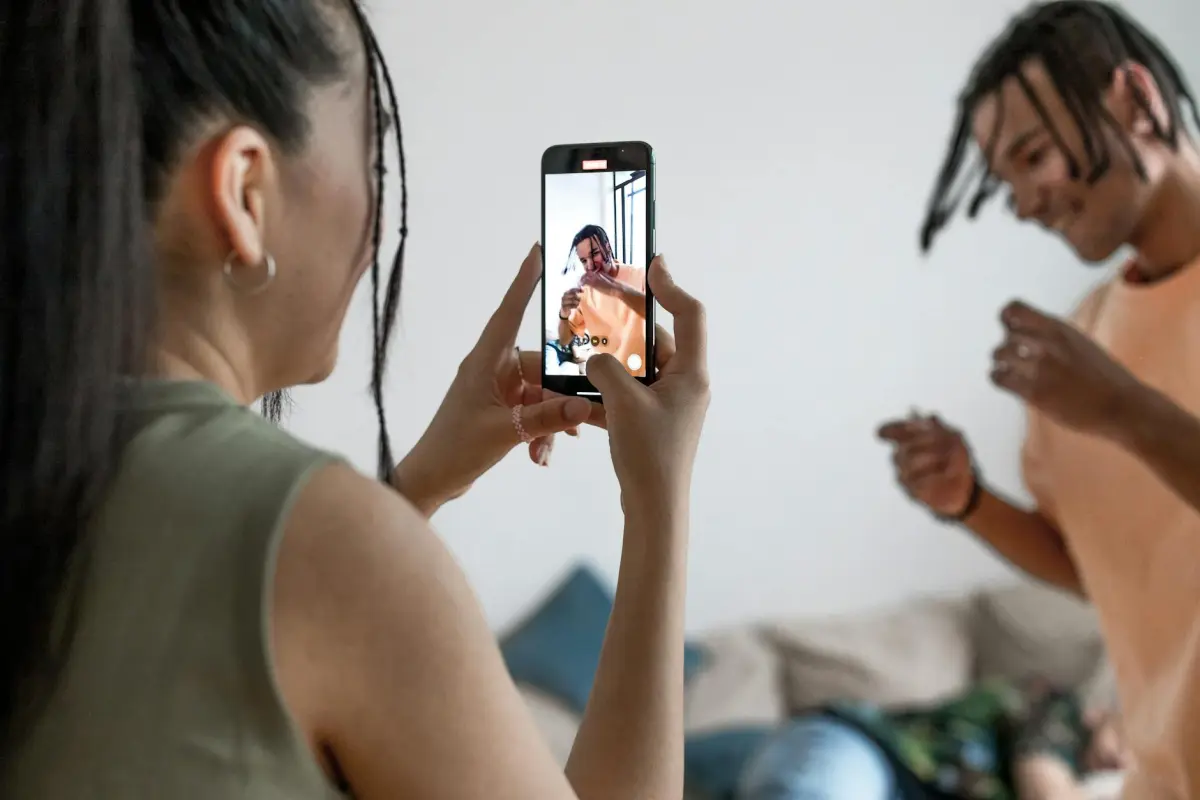
Как ИИ для преобразования изображений в видео интерпретирует визуальные эффекты на смартфонах
Выберите 3–5 ресурсов и 2 простых фона, затем проведите эксперимент на своем смартфоне, чтобы увидеть, как ИИ для преобразования изображений в видео преобразует визуальные эффекты в увлекательные клипы.
Встроенный анализ анализирует носители по точкам: векторы движения, распределение цветов и границы объектов – чтобы он мог выбирать темп и переходы без раскадровки. Система использует непростые подсказки для управления стилем, а фоны сегментируются, чтобы объект оставался в центре внимания. Эти шаги часто выполняются в приложении, и экспорт создаст готовый к обмену клип, а тот же процесс формирует видео, которые появляются на экране.
Чтобы добиться высокого качества вывода, предоставьте невероятно чистые носители, избегайте загроможденных фонов и выбирайте вертикальные кадры для социальных сетей; инструмент часто сохраняет детали и обеспечивает простой сквозной рабочий процесс. Инструменты, встроенные в платформу, упрощают экспорт и уменьшают головную боль, позволяя генерировать анимированные ресурсы непосредственно на устройстве.
Социальные форматы отдают предпочтение лаконичным, привлекательным сегментам; продуктовые команды могут повторно использовать эти ресурсы для тестирования подписей и фонов, что ускорит итерацию для их кампаний и быстрее выведет контент на рынок. Этот подход позволит создавать клипы, которые кажутся естественными, согласованными и готовыми к обмену без дополнительных шагов.
Часть процесса: 1) выбор ресурсов; 2) выбор фона; 3) установка длительности и частоты кадров; 4) экспорт высококачественных носителей; 5) просмотр на устройстве для подтверждения выравнивания кадров и ритма.
Рекомендуемые мобильные приложения и веб-инструменты для создания контента на ходу
CapCut на мобильных устройствах идеально подходит для редактирования на ходу, предлагая форматы, включая 1080p и 4K, наложения изображений, эффекты движения и готовые миниатюры, поддерживая рекламные клипы и позволяя мгновенно делиться.
Кроме того, InShot остается удобным для пользователя, с шаблонами и предустановками, которые преобразуют между форматами (квадратный, вертикальный, 16:9). От iOS до Android, он выдает готовые к продвижению активы для лент социальных сетей, такие как подписи, наложения и музыка, помогая вам учитывать различные соотношения сторон, несмотря на огромное количество вариантов; кроме того, он поддерживает офлайн-редактирование.
Clipchamp, веб-инструмент, предоставляет мощный набор возможностей, включая редактирование с помощью ИИ, стоковые изображения и экспорт в доступных форматах (MP4, MOV, WEBM) с настраиваемыми соотношениями сторон. Он предоставляет готовые миниатюры и рекламные шаблоны, особенно полезные для команд и независимых создателей, чтобы обеспечить согласованность брендинга продуктов на разных платформах.
Kapwing поддерживает совместную работу команд и других лиц, предлагая шаблоны анимации, преобразование текста в речь, автоматические субтитры и преобразование форматов. Он доступен на мобильных устройствах и в Интернете, помогая улучшить брендинг на разных платформах, позволяя быстро итерировать.
На iOS LumaFusion предоставляет профессиональное многодорожечное редактирование, шаблоны анимации и экспорт до 4K. Он поддерживает наложения изображений, ключевые кадры и цветокоррекцию, что делает его идеальным для создателей, которым нужен более глубокий контроль на ходу.
Пошаговый рабочий процесс преобразования изображений в короткие видео
Рекомендация: спланируйте проект с четкой областью применения: вы хотите превратить пакет существующих изображений в компактный слайд-шоу из 60–90 секунд, выбрав широкий кадр 16:9 для YouTube, который соответствует ожиданиям зрителей и обеспечивает профессиональный результат.
Сбор ресурсов: соберите 8–12 изображений, проверьте разрешение, обрежьте до согласованного аспекта и отрегулируйте яркость, чтобы сохранить единообразный вид по всей последовательности.
Набросайте быструю раскадровку по шагам: расположите изображения по частям, рассказывающим историю, спланируйте темп и решите, где будут появляться подписи; это обеспечит плавное развитие.
Откройте pictory в удобном интерфейсе и начните новый проект; установите целевой кадр 16:9, затем импортируйте ресурсы. Это руководство делает шаги простыми для выполнения и помогает вам работать эффективно.
На этом этапе выберите переходы и время: применяйте различные мягкие переходы, движения слайдов и тонкие зумы; держите каждый кадр около 2–4 секунд в зависимости от контента.
Добавляйте наложения экономно: заголовок в начале, необязательные нижние титры и заключительный кадр с указанием создателя; убедитесь, что текст остается привлекательным и читаемым для зрителя.
Добавьте аудио: смешайте бесплатную музыку с последовательностью или добавьте краткую озвучку; сбалансируйте уровни, чтобы не заглушить изображение.
Часто предварительно просматривайте: проверяйте время, выравнивание кадров, согласованность цветов и синхронизацию аудио; итерируйте, пока это не станет легко воспринимаемым.
Завершите план экспорта: выберите MP4, 1080p, 30 кадров в секунду и консервативный битрейт для плавного воспроизведения на YouTube; назовите файл описательно и подготовьте миниатюру.
Где публиковать: загрузите на YouTube или встройте в страницу проекта; отслеживайте производительность через отзывы зрителей, чтобы улучшить активы для будущих частей проекта.
Ключевые настройки качества: разрешение, частота кадров, темп
Базовый уровень: зафиксируйте 1920x1080 при 30 кадрах в секунду; экспорт остается управляемым, а вид остается четким на большинстве устройств. Если вы планируете широкое распространение или портфолио, экспортируйте отдельную версию 4K (3840x2160) и сохраните исходное высококачественное видео для будущих правок.
- Разрешение
- Базовый уровень: 1920x1080 при 30 кадрах в секунду; баланс между четкостью и размером файла, подходит для публикации на большинстве платформ.
- Путь обновления: используйте 2560x1440 или 3840x2160 только в том случае, если ваши ресурсы поддерживают масштабирование; это сохраняет вид на больших экранах и позволяет обрезать, не теряя важного лица или изображений.
- Соотношение сторон: 16:9 — стандарт; для вертикальных лент используйте 9:16 или 1:1; убедитесь, что контент остается в безопасной области, чтобы избежать обрезки краев.
- Частота кадров
- 24 кадра в секунду создают кинематографическое ощущение; 30 кадров в секунду широко поддерживаются и обеспечивают плавное движение; 60 кадров в секунду отлично подходят для быстрой съемки или обучающих видео, требующих четкого движения.
- Последовательность — ключ к успеху: сохраняйте одинаковую частоту кадров во всех сценах, чтобы избежать резких переходов, например, при публикации на нескольких платформах.
- Тестируйте на сценах с интенсивным движением, чтобы избежать задержек; использование правильной частоты кадров улучшает внешний вид и помогает тем, кто хочет получить плавное изображение.
- Плавные переходы между сменами сцен снижают утомляемость и улучшают общее впечатление.
- Темп
- Определите темп по секундам на кадр: 0,8–1,2 секунды для быстрых социальных клипов; 1,5–2,5 секунды для объяснений; 3–4 секунды для подробных шагов.
- Поддерживайте разнообразие: чередуйте быстрые смены кадров с более длительными паузами, чтобы поддержать повествование и снизить утомляемость.
- Улучшайте с помощью анимации и заголовков; эти инструменты могут более эффективно представлять идеи и легко поддерживать творческий поток.
- Избегайте распространенных ошибок: слишком быстрые смены кадров упускают информацию; слишком медленный темп кажется скучным; корректируйте итеративно перед экспортом.
- Убедитесь, что темп соответствует музыке и ключевым словам, на которых вы хотите сделать акцент; темп, который ощущается естественно, улучшает результаты публикации.
- Для специальных кампаний адаптируйте темп к истории и аудитории, чтобы максимизировать эффект.
- Усилия = меньше, когда пресеты руководят таймингом; найдите ритм, который уменьшает ручную корректировку и сохраняет увлекательность контента.
Совет: выберите основу, соответствующую вашим потребностям и тенденциям, а затем адаптируйте ее к требованиям публикации. Найдите баланс между простотой и разнообразием движений; используйте пресеты для легкой работы. При экспорте создайте несколько версий для различных сценариев публикации. Следите за тенденциями в вашей нише, чтобы оставаться креативными и добиваться стабильных результатов с помощью инструментов для анимации сюжетных линий и подписей, соответствующих вашим ключевым словам.
Ограничения и советы по оптимизации производительности на мобильных устройствах
Уменьшите выходное разрешение до 1280x720 и ограничьте частоту кадров до 24 или 30 кадров в секунду; это напрямую снижает нагрузку на ЦП/ГП и использование памяти на большинстве мобильных устройств, сохраняя при этом читаемость для привлекательных результатов. Никогда не начинайте с максимальных настроек; всегда тестируйте поэтапно.
Выбирайте форматы и кодеки, которые не перегружают устройство: используйте пресеты, совместимые с H.264/AVC или HEVC; обратите внимание, что некоторые форматы плохо работают на старых устройствах. Для широкой совместимости выбирайте популярные форматы, разработанные для широкой поддержки, и поддерживайте библиотеку активов в компактном виде.
Никогда не загружайте все активы одновременно; избегайте загрузки из удаленных источников; предварительно загружайте их из памяти, используя тщательно подобранную библиотеку цифровых активов с множеством популярных элементов; такая конструкция обеспечивает более плавное время и снижает энергопотребление на мобильных устройствах.
Используйте масштабирование и приближение только при необходимости; избегайте частых взаимодействий с масштабированием; предварительно рендерите масштабированные кадры в редакторе; это помогает использовать ресурсы ЦП и сохраняет четкость краев для привлекательных разделов; убедитесь, что элементы пользовательского интерфейса не перерисовываются в каждом кадре; кэширование может помочь.
Отключите скрипты распознавания лиц, если они не используются; эти алгоритмы, выполняющиеся в каждом кадре, могут перегрузить процессор; планируйте такие скрипты во время простоев; используйте маски с низким разрешением для отслеживания лиц; никогда не запускайте все задачи на полную мощность.
Тестируйте на различных устройствах; измеряйте время кадрирования, расход батареи и тепловое дросселирование; ориентируйтесь на 24 кадра в секунду на оборудовании среднего класса и корректируйте, чтобы поддерживать привлекательный вывод, не перегружая ресурсы; обязательно охватите популярные профили устройств и соответствующим образом настройте пресеты.


