

Use clipes de 5 a 15 segundos e selecione um estilo de destino: contornos limpos, sombreamento plano e uma paleta animada, porém controlada. Garanta que a transição entre os quadros permaneça *suave*, para que o movimento pareça natural em vez de tremido. Confie num modelo integrado, ajustado para a diversidade de mídia, para oferecer resultados consistentes em 1080p e superior.
Para implementar isto rapidamente, reúna as ferramentas adequadas: um modelo integrado treinado em mídia diversificada, um extrator de quadros, um editor para gestão do tempo e um gestor de cores. Precisará de mídia de ação real como entrada; se não tiver dados emparelhados, use aprendizagem auto-supervisionada para descobrir o alinhamento entre os quadros. Esta abordagem permite-lhe iterar até ver arestas consistentes e um estilo de cartoonização, entregando sem esforço um visual coeso que suporta indicações de *música*.
Na fase de edição, monitore os artefatos: cintilação temporal, desvio de cor e suavização excessiva das arestas. Ajuste a ponderação para que os tons de pele permaneçam *realistas* e as texturas continuem legíveis. Isto *vai* parecer coeso quando escalar de um único clipe para um projeto *completo*, dando aos editores espaço para refinar os detalhes sem sacrificar a vibe de cartoon. O processo ajuda a desenvolver competências enquanto o pipeline trata da maior parte do trabalho.
Olhando para o futuro, adote uma abordagem modular: mantenha o passe base separado dos ajustes de textura e iluminação. Pode descobrir novos visuais apenas trocando os pesos de estilo e reexecutando o pipeline. Os resultados serão *suaves* e *estilizados* em formatos de mídia, de clipes para *redes sociais* a edições mais longas; para equipas que procuram uma estética consistente, isto permitirá publicações mais rápidas e experimentação contínua.
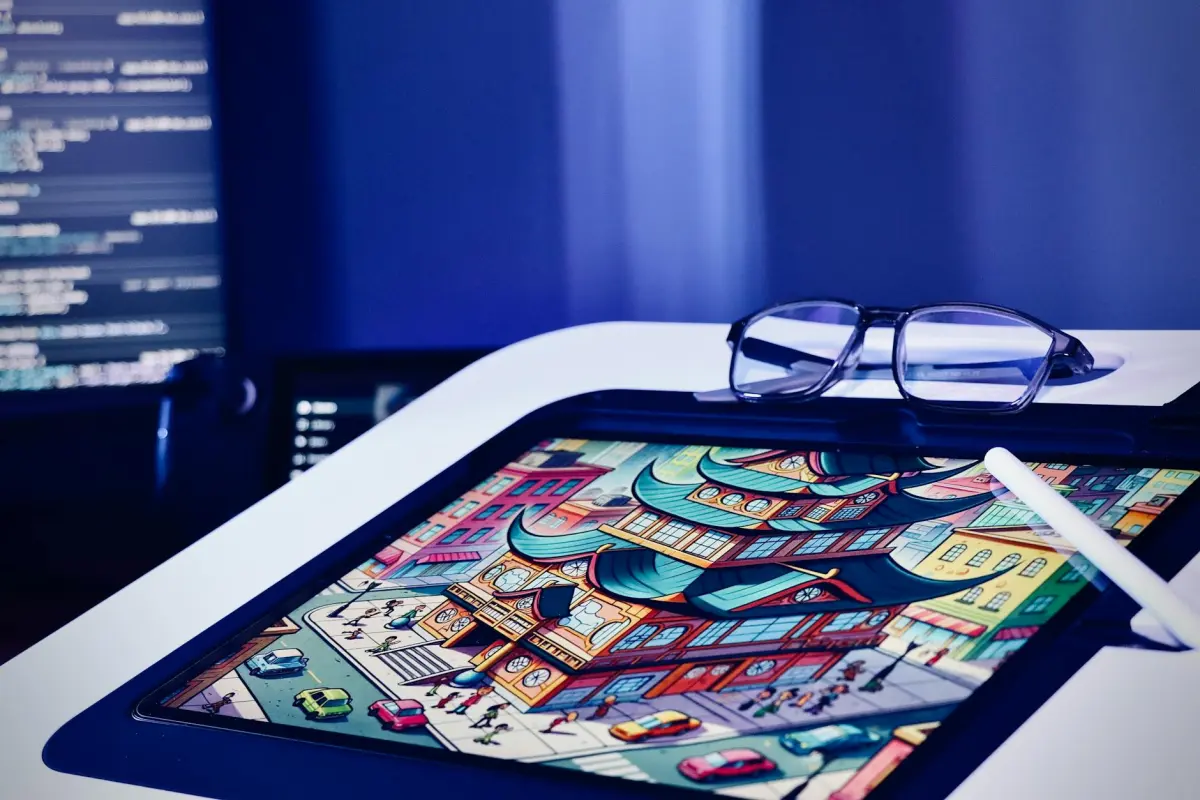
Vídeo-para-Vídeo IA: Cenas Reais em Desenhos Animados – Revisão Prática do Gerador
Recomendação: escolha um gerador baseado em GPU com pré-visualizações rápidas, um vasto conjunto de modelos de estilização e predefinições de exportação com um clique que se alinhem com a entrega final. Execute vários clipes curtos através da ferramenta e compare a fidelidade do movimento, o tratamento das arestas e o manuseio da textura em todos os estilos. Esta base informa o pipeline que escalará para produção sem iterações desperdiçadas, e pode refinar facilmente o visual para se ajustar sem esforço ao público-alvo.
O que testar primeiro: preservação do movimento, nitidez das arestas e realismo da textura entre as opções. Use múltiplas *demos* fornecidas pela plataforma, compare a saída com os quadros de origem e julgue se a *estilização* se mantém em tomadas mais longas. Verifique a estabilidade da exportação para evitar tremores e consulte modelos de *renderforests* e outras *ferramentas* confiáveis para garantir visuais consistentes.
Dicas de *fluxo de trabalho de produção*: defina uma taxa de quadros fixa (24–30 fps), aplique uma abordagem de duas passagens (estilização base, depois refino de cor e arestas) e processe clipes em lote para manter a sincronização consistente. Esta abordagem preserva as indicações de movimento e produz um fluxo final coerente numa sequência, ao mesmo tempo que escala facilmente de um único vídeo para uma biblioteca de episódios.
Diretrizes prontas para criadores: para clipes de vlogs ou de marketing, procure um visual que seja envolvente, mas legível em ecrãs de telemóvel. Comece com três predefinições, produza um rolo de teste de 30 a 60 segundos e compare em diferentes dispositivos. Exporte em 1080p ou 4K, escolhendo codecs (H.264 ou H.265) com base nas necessidades da plataforma. Um fluxo de trabalho simplificado de clique para visualização pode reduzir dramaticamente o tempo de produção, mantendo intacto o seu distinto toque realista.
Artefatos e gestão de risco: espere artefatos ocasionais com movimento rápido ou texturas densas; reduza a força da estilização ou ajuste a compensação de movimento para minimizar a cintilação. Se as cores desviarem entre as cenas, aplique uma passagem global de correspondência de cor antes de renderizar o corte final. Documente as configurações utilizadas para cada projeto para simplificar o trabalho futuro e manter a consistência visual que preserva a vida.
Custo, licenciamento e fluxos de trabalho: muitas opções oferecem um nível gratuito com resolução limitada ou marcas d'água; para projetos comerciais, invista numa licença que cubra o uso de produção. Prefira modelos que se atualizam regularmente e fornecem estilos diversos. Certifique-se de que a exportação inclui a sua resolução, taxa de bits e espaço de cor preferidos. Use *demos* para calibrar o visual antes de se comprometer com uma produção e acompanhe o impacto do marketing com vídeos curtos e medidos.
Como preparar o material de origem para cartoonização
Estruture o seu material em clipes concisos e orientados para a ação: 6–12 segundos cada, com sujeitos claros e movimento previsível para suportar uma estilização limpa. Capte material de ação real a 24–30 fps para preservar o timing natural e, em seguida, alinhe as edições com o tempo alvo para um resultado cinematográfico. Mantenha a câmara estável usando um tripé ou um gimbal para reduzir o tremor, o que complica o controlo durante a estilização posterior.
Estabilização e enquadramento: garanta uma velocidade do obturador e exposição consistentes, evite o desfoque de movimento extremo e bloqueie o balanço de brancos para preservar a continuidade da cor. O enquadramento deve minimizar os cortes abruptos entre transições, permitindo a aplicação fácil de modelos e templates.
Iluminação e cor: filme sob iluminação controlada ou use preenchimento difuso para obter uma iluminação uniforme. Defina um perfil de cor fixo ou um balanço de brancos neutro; gradue com uma paleta limitada para suportar a consistência estética para estilização. Isto ajuda o algoritmo a aplicar um visual coeso ao material criado, para que o resultado final fique mais próximo do visual de destino.
Áudio e indicações de movimento: isole o diálogo quando necessário e prepare indicações de tempo para a sincronização labial, se aplicável. Mantenha o movimento da câmara previsível para que as animações e referências de movimento se traduzam de forma limpa no estilo final.
Resolução, formato e proxies: exporte em 1080p ou 4K e proporção 16:9; defina uma taxa de bits alta, preserve a profundidade de cor e mantenha o áudio separado para re-ligação. Crie versões proxy para iteração rápida; quando estiver pronto, re-ligue para alta resolução para a renderização final, garantindo um fluxo de trabalho escalável e repetível que suporta testes iterativos.
Ativos e fluxo de trabalho: construa uma estrutura de elementos reutilizáveis – modelos de fundo, formas de silhueta, referências de movimento. Reúna templates, modelos e paletas estéticas de renderforests ou outras fontes gratuitas para acelerar a configuração. Planeie ideias de estilização e teste com animações curtas para verificar o quão bem os modelos escolhidos se traduzem no visual de destino.
Iteração e QA: execute testes rápidos num clipe curto para avaliar o timing e o controlo; enquanto refina, ajuste o ritmo, a sincronização labial e o detalhe das arestas até atingir uma sensação cinematográfica. Mantenha um registo de controlo com notas sobre quais configurações produziram os resultados mais fortes para cada modelo, permitindo ciclos facilmente repetíveis durante a produção.
Melhores formatos e resoluções de entrada para resultados de qualidade
Comece com 4K60 MP4 (H.265) ou ProRes 422 HQ para a máxima qualidade; profundidade de cor de 10 bits, se o material o permitir. Isto preserva detalhes finos e timing para transferências de estilo potenciadas por IA. Se houver limitações de orçamento ou hardware, 1080p60 MP4 (H.264) continua aceitável, embora os detalhes e a fidelidade do movimento possam ser reduzidos.
Formatos de entrada que evitam artefatos: MP4 em H.265/HEVC a 4K60 (ou 1080p60) e Apple ProRes 422 HQ ou ProRes 4444 para fluxos de trabalho de pós-produção em Mac; mantenha a taxa de bits alta em ambos os casos; evite fontes de 480p severamente comprimidas, pois degradam os detalhes em animações e estilização.
Resoluções e proporções: prefira o nativo 16:9; para conteúdo vertical para telemóvel, 9:16; mantenha 3840x2160 ou 4096x2160 como entrada quando possível; 1920x1080 como fallback. Mantenha as taxas de quadros fixas em 24, 30 ou 60 fps; 60 fps para ação, 24 fps para uma sensação cinematográfica. Se não tiver certeza, consulte os metadados de origem e garanta que o destino escolhido corresponde ao seu dispositivo de saída; em seguida, unifique entre clipes para evitar transições bruscas. Esta abordagem ajuda a corresponder o visual entre as tomadas.
Profundidade de cor: 10 bits recomendado; 8 bits comum; defina o espaço de cor para Rec.709; para projetos HDR, Rec.2020; evite graduação pesada na entrada; mantenha a saturação e o contraste para suportar transformações estéticas posteriores. Exporte pelo menos 8 bits por canal em MP4 ou MOV, mas 10 bits preservam gradientes mais facilmente; utilize log gamma apenas se a sua cadeia o suportar.
Recipiente e áudio: Recipientes de ficheiro: MP4, MOV; evite misturar múltiplos fluxos que confundam o pipeline. Mantenha o áudio a 48 kHz, 16 bits ou 24 bits; separe o áudio do vídeo na exportação para simplificar o manuseio da linha temporal. No editor, clique em exportar para aplicar a predefinição escolhida. Para equipas de produção, exporte um master de alta qualidade e um proxy leve para poupar tempo durante a edição e revisão; isto ajuda os fluxos de trabalho do seu vlogger a manterem-se dentro do cronograma, poupando tempo.
Verificações de qualidade e reutilização: execute renderizações de teste numa clip de amostra, verifique o tempo, a cor e o movimento; se procura escalar, crie predefinições para que as suas equipas possam reproduzir resultados facilmente. Ao exportar, guarde o master em variantes sem perdas ou de bitrate elevado, e depois gere entregas para pipelines de produção. Se usar pacotes de recursos de renderforests, verifique a compatibilidade 4K e a consistência de cor. Quer seja um criador individual ou parte de uma equipa pequena, entradas limpas reduzem retrabalho e aceleram a vida do projeto. Predefinições criadas para géneros comuns aceleram a configuração.
Processo passo a passo para converter uma cena em estilo de desenho animado
Passo 1 – Avalie a origem e defina o conceito alvo: escolha um frame live-action, observe os batimentos de movimento e defina a estilização desejada. Isto cria uma estrutura para o fluxo de trabalho e adiciona proteção contra o processamento excessivo.
Passo 2 – Analise o movimento e a pose: rastreie os vetores de movimento, exagere as poses chave e mapeie-as para silhuetas simplificadas. Isto ajuda a corresponder o aspeto final em todos os frames e a manter o ritmo.
Passo 3 – Desenhe personagens e adereços: esboce silhuetas claras, defina características distintivas e construa um pequeno conjunto de formas repetíveis para o herói e as figuras de apoio. Isto reforça a consistência no conceito e torna o processo de criação eficiente.
Passo 4 – Aplique camadas de estilização: escolha um ambiente inspirado em anime ou um estilo de tinta ousado. Crie uma estrutura de camadas: cor base, sombras, brilhos e line art nítida para alcançar um aspeto incrível e coeso.
Passo 5 – Tratamento de cor e bordas: escolha uma paleta restrita que suporte o conceito. Use blocos de cor plana, depois adicione sombreamento suave para implicar profundidade sem quebrar a sensação de desenho animado. Este passo mantém as bordas limpas e torna o resultado instantaneamente exportável.
Passo 6 – Reveja, ajuste e exporte: renderize um vídeo curto ou uma sequência para revisão rápida. Verifique a coerência do movimento, a fidelidade das bordas e o equilíbrio das cores. Se necessário, ajuste a espessura da linha ou a saturação e exporte novamente para preservar a qualidade.
Passo 7 – Guarde um modelo reutilizável para educação e projetos futuros: armazene a estrutura e as regras como um recurso gratuito para a comunidade de criadores. O modelo armazenado oferece um caminho direto para criar ativos de vídeo estilizados a partir de novo material instantaneamente.
Como comparar geradores de animação AI: funcionalidades que importam
Recomendação: Escolha um gerador com um fluxo de trabalho guiado por guiões, forte proteção de ativos e um loop de pré-visualização rápido para poupar tempo, mantendo-o no controlo do aspeto. Prefira ferramentas concebidas para criadores para entregar resultados polidos de forma rápida e fiável, apoiando o seu trabalho em todas as fases.
Suporte de entrada importa: verifique a compatibilidade ampla de origem, incluindo vídeo live-action, sequências de imagens e prompts de texto. Prefira produtos que suportem importação drag-and-drop, processamento em lote e tratamento de cor consistente para reduzir edições manuais dentro do seu pipeline existente.
Qualidade vs velocidade: avalie a fidelidade, o realismo do movimento e o comportamento da iluminação. Procure predefinições cinematográficas, iluminação ajustável, detalhe de textura e a capacidade de definir resolução e taxa de frames sem desestabilizar a saída. Uma opção forte oferece um fluxo de trabalho de transformação que permanece incrível sob pressão.
Personalização e edição: inspecione como a estrutura está organizada e se as predefinições são modulares. Verifique controlos de granularidade fina para line art, sombreamento e curvas de movimento, além de um sistema de scripts ou macros acessível que lhe permite automatizar edições repetitivas com esforço mínimo.
Controlo e automação: assegure uma UI limpa com controlo visível sobre os parâmetros, a capacidade de guardar e reutilizar predefinições, e opções de reversão fiáveis. Procure hooks de automação que permitam a integração dentro do seu fluxo de trabalho baseado em scripts, automação suficiente para acelerar a produção.
Proteção e licenciamento: confirme opções de marca d'água, termos de licenciamento e direitos de reutilização para pipelines de produtos comerciais. A renderização baseada em GPU ou na nuvem deve incluir termos claros para que possa planear o marketing e a distribuição sem surpresas.
Colaboração para vlogger e trabalho de marketing: avalie a edição multiutilizador, o compartilhamento de projetos e as funcionalidades de pré-visualização em tempo real que suportam feedback just-in-time. Estas capacidades ajudam a transformar briefs em conteúdo pronto para publicação e a manter um aspeto consistente em todos os episódios.
Hardware e desempenho: compare os requisitos de computação, opções de nuvem vs. no dispositivo, e se a solução é baseada em GPU. Certifique-se de que a sua configuração cumpre os requisitos necessários de RAM e GPU para evitar gargalos durante a produção.
Preços e retorno do investimento: mapeie níveis para volume de saída esperado, qualidade de exportação e suporte contínuo. Prefira produtos com custos previsíveis, limites de teste generosos e licenciamento claro para que a sua equipa possa escalar sem surpresas, especialmente para campanhas de marketing.
Lista de verificação para avaliar rapidamente: formatos de entrada, controlos de fidelidade, estrutura, profundidade de personalização, ferramentas de edição, suporte de script, opções de proteção, formatos de exportação e hooks de integração para o seu fluxo de trabalho. Use este rubro para escolher um produto que corresponda às suas necessidades.
Dicas para evitar artefatos e manter a consistência do movimento
Comece com uma passagem offline de 2–4 segundos numa tomada simples usando o seu kit de ferramentas de vídeo-para-vídeo com IA. Renderize na resolução alvo após uma rápida verificação de qualidade, ajuste os campos de movimento e verifique os artefatos numa segmento em loop. Mantenha esta amostra de teste representativa do seu conceito final para que possa ajustar os parâmetros antes da produção final.
- Deriva de movimento e alinhamento de frames: aponte para ≤1.5 px de translação por frame e ≤0.2° de rotação. Use alinhamento de fluxo ótico e uma passagem de suavização temporal de 3 frames (0.65–0.8) para manter a coerência em segundos.
- Estabilidade de bordas e contornos: aplique denoising suave que preserva bordas; limite o sharpening para evitar halos; mantenha os contornos dos personagens limpos para evitar cintilação durante transições de movimento.
- Orientação por modelos para preservar o estilo: selecione um pequeno conjunto de modelos para o estilo de movimento e assegure que as transformações preservam a integridade da silhueta. Reutilize predefinições para evitar deriva e simplificar a produção, ajudando-o a transformar ideias sem perder a identidade do personagem.
- Consistência de cor e iluminação: bloqueie o balanço de brancos num ponto de referência fixo; imponha uma paleta de cores estável. Monitore o deltaE entre frames (alvo ≤3) para manter um aspeto uniforme em toda a sequência.
- Profundidade de resolução e cor: trabalhe em cor de 10 bits sempre que possível; escolha uma taxa de bits alta o suficiente para evitar banding; mantenha a amostragem de croma consistente com o seu pipeline (4:2:2 ou 4:2:0) para gradientes suaves durante o movimento.
- Privacidade e fluxo de trabalho offline: processe localmente durante a educação e as etapas iniciais de produção; evite exportações para a nuvem até à passagem final para preservar a privacidade do material de origem.
- Verificações de qualidade e métricas: execute benchmarks SSIM e PSNR em 3–5 intervalos curtos por clip; mire em SSIM ≥ 0.92 e PSNR ≥ 28 dB; sinalize frames com grandes diferenças temporais para correções direcionadas.
- Loop de revisão iterativo: mantenha um registo das alterações de parâmetros e resultados; transforme configurações bem-sucedidas em modelos reutilizáveis para que qualquer pessoa possa reproduzir o resultado instantaneamente.
- Deteção de artefatos durante a revisão: ative um detector de artefatos simples para marcar cintilação, mudanças de cor e artefatos de borda; resolva os frames sinalizados antes de passar para a produção final.
- Ciclo de vida e alinhamento narrativo: assegure que os ajustes preservam o conceito do criador e a consistência dos personagens, de modo que a narrativa permaneça envolvente enquanto os visuais permanecem suaves entre as tomadas.


