単一で明確なナラティブキューでシーン、アクション、トーンを定義し、AIクリップツールでテストして即時出力の効果を得ましょう。
多言語チームの場合、翻訳により、標準化されたタグスキームを使用して、キューをモデルが自動的に解釈できる構造化された命令セットに変換でき、混乱を減らし時間を節約できます。
コンパクトなファイルパッケージを用意しましょう。パッケージには、画像、オーディオ、短いメモが*含まれて*おり、すべてを共有フォルダにまとめておくことで、*編集*と共同作業が簡素化されます。
率直でデータに基づいたアプローチでバリアントをテストしましょう。各実行から得られる*洞察*は、魅力的な結果と成功を何が推進しているかをマッピングします。
パーソナライズされたナラティブ、調整されたペース、視覚スタイルの調整により、**アピール**を高めることができます。
ストーリー主導のフォーマットは*Vlogger*に最適です。簡単なストーリーボードを作成し、*キーボード*で練習し、リップシンクを確認して信頼性を維持しましょう。
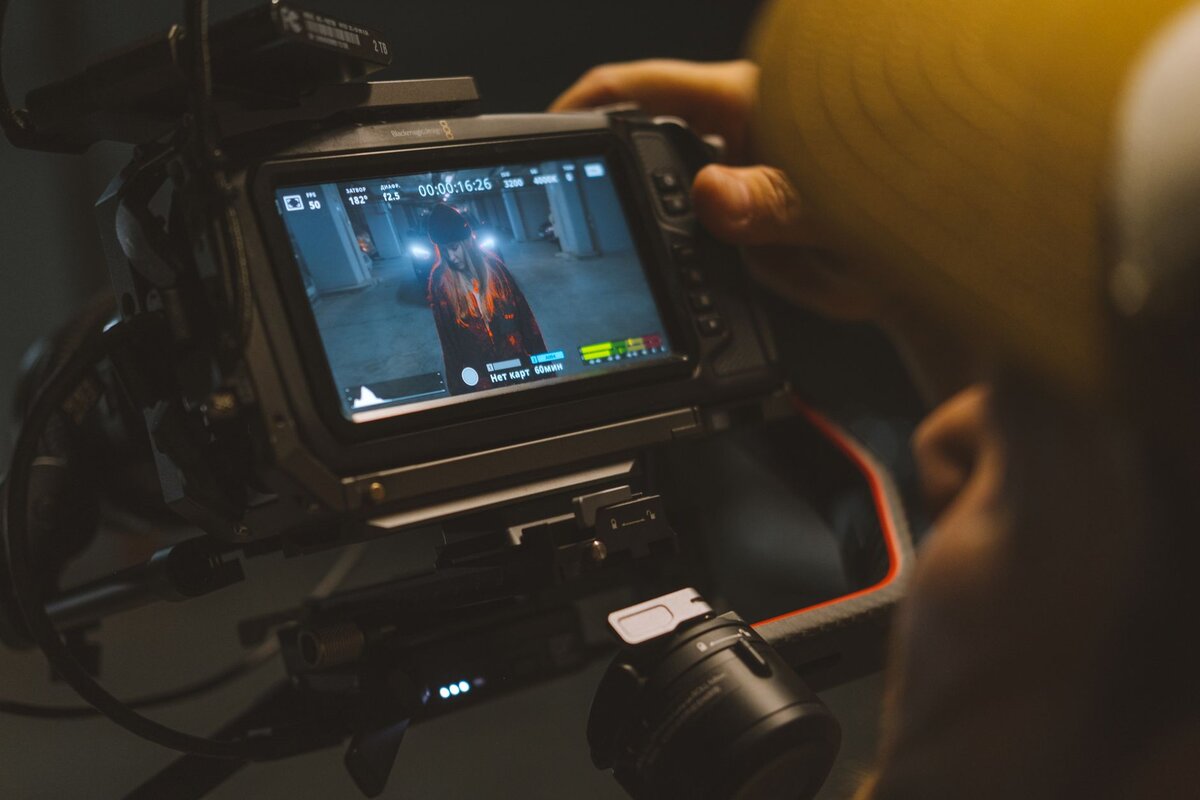
一般的なワークフローは、スムーズな*編集*プロセスを重視します。計画、反復、ネイティブ*プレイヤー*でのプレビューを行い、最終製品が*魅力的*であることを確認しましょう。
最終段階では、プラットフォーム全体での配信をサポートするために、字幕、メタデータ、ライセンスノートを**含んだ**共有パッケージを作成します。
視聴時間、完了率、共有などの指標で*成功*を追跡しましょう。これらの洞察を使用して、*ワークフロー*を調整し、将来の制作を向上させましょう。
テキストプロンプトからビデオへ: 実践的なロードマップ
1文のビジュアルブリーフと一致するショットリストから始めましょう。コアストーリーアークがそのまま維持されるように、利用可能なすべての資産を整理してください。
コアコンポーネントを特定します。簡潔な説明、ストーリーボード、照明計画、AI駆動のレンダリングエンジンです。テクスチャ、モーション、サウンドの役割を割り当て、ワークフローの一部にマッピングします。
直感的なインターフェイスを選択し、キーボードショートカットを有効にしてイテレーションをスピードアップしましょう。3層のタイムラインを設定します。開始、中間、最終。ストーリーアークに合わせてペースを調整します。
短いクリップを生成し、各カット後に監査を実行し、カットトランジションをビジュアルに合わせて調整することで、迅速にイテレーションしましょう。レンダリングを監視し、洞察を収集して、次の試みを改善しましょう。
シーン間の照明の一貫性を監視しましょう。色、露出、ムードを調整して、全体的な感覚を統一させましょう。監査を使用して、コアコンセプトとの整合性を検証します。
出力をカスタマイズします。解像度、フレームレート、アスペクトを選択します。ファイルサイズが管理可能であることを確認します。クリックしてバリアントをエクスポートし、クイックプレビューを比較します。
1か月のサイクルを計画し、アイデア出し、洗練、検証に日を割り当てます。イテレーションをハンズオンで触れるものにするために、ガレージスタイルのワークスペースを維持しましょう。
プロセスを監査可能に保ちます。決定を記録し、変更をタグ付けし、バージョン管理されたアーカイブを維持しましょう。各月からの洞察は、将来のサイクルを導き、AI駆動のビデオ作成における専門知識を向上させます。
パイプライン全体は、強力な開始、ビジュアルとナラティブの一致、そして監査と調整の規律あるルーチンにかかっています。このアプローチにより、結果は直感的で再現可能になります。
ビデオの目的、対象者、プラットフォームを定義する

単一の具体的な目的とコアの対象者を設定します。例: 特定のアクションを促進するために、60秒で理想的な視聴者にXについて教育する。視聴時間、維持率、コメントでの質問に目標を結び付けます。目的に合った形式を選択します。簡単なヒントにはショート、より深いストーリーには長い形式。制作と翻訳のコストと価格設定への影響を考慮し、チームが完全に利用できるツールを選択します。このアプローチは、地域全体で完全にスケーラブルです。
さまざまなセグメントのペルソナを定義します。年齢、興味、コンテンツが解決する問題。視聴者がよく尋ねる質問をマッピングし、適切な場合は簡潔に回答するようにメッセージを調整します。地域的なリーチが計画されている場合は、翻訳オプションを計画します。正確さとトーンのために手動で翻訳するか、速度が重要な場合は自動化されたツールを使用します。このアプローチは、さまざまなデバイスやコンテキストで視聴するユーザーと一致します。
プラットフォームの選択は、形式と配信を決定します。ショートの縦型クリップは、ショート、TikTok、Reelsに適しています。長い作品は、プライマリチャンネルとより広いオーディエンスに適しています。ボイスオーバーを使用するか、サウンドデザインと画面上のテキストでストーリーを配信するかを決定します。ボイスオーバーなしで公開する場合は、ビジュアルとキャプションに頼ってコミュニケーションします。サウンドとキャプションがブランドと一致していることを確認し、ターゲット視聴者のエンゲージメントを最大化する設定を選択します。お気に入りのプロバイダーからの価格設定とサービスオプションを確認して、プランをブランドに合わせ、予算内に収めます。
一貫した出力を確保するために具体的なプロンプトとテンプレートを作成する

固定のマスターテンプレートと再利用可能なコマンドセットを使用して、すべての制作で一貫したビジュアルとペースを保証します。これは毎週推測する必要はありません。毎回照明、オーディオ、キャプションを再調整し、最も信頼性の高い結果が得られるようにします。各アセットタイプのショートフォームブループリントから始め、一貫性を損なうことなくプロジェクトごとにカスタマイズします。
- マスターテンプレート構造
- コアフィールド: シーン、環境、アクション、期間、照明、オーディオ、音楽、キャプション、字幕、固定クレジットブロック。
- 出力メタデータ: 解像度 (1080x1920)、フレームレート (30fps)、アスペクト (縦)、ファイル命名規則。
- アセットの安全性: 開発開始前にすべてのコンポーネントのライセンスノートとソース。
- 再現可能な結果のための具体的なコマンド形式
- スケルトンコマンド: scene=[シーンの説明], tone=[ニュートラル/エネルギッシュ], length=[短い], lighting=[ソフト/フル], audio=[ボイスオーバー/なし], music=[ジャンル], captions=[オン/オフ], subtitles=[オン/オフ], types=[アニメーション/ライブ], credits=[ブランドリンクを含む], output=[1080x1920]。
- 再利用するテンプレートブロック:
- 照明プリセット: 明るいキー、フィル、バックライト; カラーグレード: クール/ウォーム;
- キャプションスタイル: フォント、サイズ、位置;
- 字幕タイミング: 0〜100 ms オフセット、最大2行。 - テストフック: レンダリング後に分析ウィンドウを指定して洞察をキャプチャし、調整を推進します。
- 出力タイプ別のテンプレートバリアント
- アニメーション解説: 短く、パンチがあり、12〜15秒、ループ可能。明確なキャプションと簡単なステップフローを強調します。
- 製品デモ: リアルな照明、穏やかな動き、18〜24秒。ブランドと音楽のクレジットを含むクレジットブロックを含めます。
- スクリーンキャストチュートリアル: クリーンなUI、高コントラストのキャプション、常にオンの字幕。期間 20〜28秒。
- テンプレートコンポーネントと制約
- 照明: 一貫したキーライト比 (2:1 または 3:1) を使用して、クリップ全体でリアルな外観を維持します。
- キャプションと字幕: 常にオン、オーディオに同期、読みやすいサンセリフフォント。キャプションごとに2行の制限を提供します。
- オーディオと音楽: ムードのためにベッドトラックを割り当て、出力の20〜40%にボイスオーバーを予約します。編集に時間を予算化します。
- アニメーション対実写: モーションキー (イーズイン、イーズアウト)、トランジションセット、ロゴリビールの期間を事前に定義します。
- クレジットとブランディング: ブランド名、ハンドル (TikTok)、軽量なコールトゥアクションを含む終了フレームを常に含めます。
- コンポーネント: ロゴ、オーバーレイテキスト、プログレスバー、オプションのコールトゥアクションカード。
- 再利用可能な具体的な例
- テンプレートA (TikTokフレンドリーなアニメーション): scene="オフィスデスクの起動: クイック製品表示"; tone="フレンドリー"; length="12秒"; lighting="ソフトキー+フィル"; music="アップビートポップ"; captions="オン、角丸"; subtitles="オン"; types="アニメーション"; credits="最後にブランドクレジット"; output="1080x1920"。
- テンプレートB (リアルな製品デモ): scene="シーン内での製品使用"; tone="情報提供"; length="20秒"; lighting="バランス"; audio="ボイスオーバーオプション"; music="なしまたは微妙"; captions="オン"; subtitles="オン"; types="ライブ"; credits="ブランドと音楽のクレジット"; output="1080x1920"。
- テンプレートC (スクリーンキャストガイド): scene="アプリウォークスルー"; tone="クリア"; length="24秒"; lighting="ニュートラル"; audio="ナレーション"; captions="オン"; subtitles="オン"; types="ライブ"; credits="ブランド、リンク"; output="1080x1920"。
- 品質チェック、分析、イテレーション
- 公開前に、短いルーブリックを使用して目標との整合性を分析します:明確さ、ペース、ブランドの一貫性。必要に応じて照明、キャプション、音楽を調整します。
- インサイト収集:どのテンプレートが最もエンゲージメントを生み出しているかを追跡します。編集にかかる時間と追加コンポーネントの必要性を記録します。
- 週次レビュー(週)と月次計画(月)のサイクルの設定により、テンプレートを改良し、出力の種類を拡大します。
- 速度と信頼性のための運用上のヒント
- ライブライブラリを維持します:タイプごとに6〜12個のコマンドブロックを保存します。ムード、視聴者、プラットフォーム(TikTokなど)でタグ付けします。
- 編集は簡潔に:編集ステップをプリセットして、不要なフレームをカットし、コアメッセージを保持します。
- コストと効果のバランス:最も強力なテンプレートは、初期費用が高いかもしれませんが、後での手戻りを減らします。迅速なイテレーションのために、費用対効果の高いバリアントをいくつか計画します。
AI動画生成設定の選択:解像度、フレームレート、長さ
推奨:1080p解像度、16:9アスペクト比、30fps、60秒の長さで設定し、ほとんどのプラットフォームで適切に機能する、明確でブランドに合った動画を提供します。
これらのコントロールは、効率的なエディタワークフローのために構築されており、既存のプロジェクト全体で利用可能で、一時停止、ストーリーのペース、およびスケールをサポートする一貫した形式に直接変換されます。このアプローチは、視聴者の期待を理解し、エンゲージメントを促進します。
- 解像度とアスペクト比:広範な互換性のために1080pと16:9アスペクト比。プラットフォームで再生可能な再生とブランドに合ったビジュアルのために構築。単一のエクスポート全体で一貫性を維持。縦向きまたは正方形の出力が必要な場合は、メインファイルをそのままにして、専用のバリアントを作成します。
- フレームレート:デフォルトは30fps。24fpsはシネマティックな雰囲気を提供。60fpsはデモの動きを改善します。ストーリーを安定して進めるために、一時停止とトランジションに合わせてフレームレートを調整します。モーションジャダーなしでプラットフォームで再生可能な形式を維持します。
- 長さとペース:基本は60秒。ティーザーやマイクロ広告の場合は15〜30秒に短縮。詳細な説明の場合は90秒に延長します。明確な開始と終了を計画します。単一のナラティブアークを維持し、リズムを破る長すぎる一時停止を避けます。
エクスポート形式とワークフロー:MP4として、H.264ビデオとAACオーディオでエクスポートします。この形式は広く利用可能で、エディタフレンドリーです。カラースペース、ビットレート、オーディオレベルがポリシー要件と一致していることを確認します。単一ファイルのエクスポートは、プラットフォームでの直接配信をサポートし、制作ニーズに合わせてスケールします。
- 制作準備チェックリスト:プラットフォームの制限(長さ、ファイルサイズ)を確認し、デバイス全体での再生をテストし、一時停止がスライドトランジションと一致しているか確認し、ブランドに合ったスタイリングを確認し、選択したプラットフォームでの配信用の単一ファイルを準備しておきます。
- 実装ノート:視聴者を理解するアセットには、チュートリアルで再利用できるプリセットを使用します。エディタの機能を使用してインサイトを一致した出力に変換します。これにより、効率が向上し、プラットフォームの有効化がサポートされます。
1600万以上のライブラリからストックアセットをキュレーションし、ライセンスを管理する
メタデータフィルターを使用して1600万以上のライブラリをスキャンし、プロフェッショナルな照明を備えた、ブランドに合ったAI生成アセットを見つけます。
ライセンスの種類には、ロイヤリティフリー、権利管理、編集用が含まれます。組織のポリシーに合わせて、ライセンスステータスタグと有効期限を付与します。
クリーンなインターフェイスを使用して、スクリプト、キャプション、YouTube、再利用の可能性などのキーワードでアセットにタグ付けします。クリップ全体で簡単かつスムーズな再利用を保証します。
ClipAnythingなどのツールを使用して、キュレーションの初期段階を加速し、技術的なオーバーヘッドを削減しながら、魅力的な出力を可能にします。
評価済みアセットカタログとライセンス台帳を維持します。YouTubeでの販売やその他のチャネルで、ブランドに合ったコンプライアンスを維持するために、有効期限、再利用権、ライセンス更新を追跡します。
チェックポイントを備えた再現可能な制作ワークフローをセットアップする
固定された再現可能なサイクル(計画、事前チェック、制作、レビュー、配信)をロックし、バージョン管理されたアセットライブラリとエディタ向けの明確な引き継ぎを備えます。
すべてのアセットに単一の信頼できる形式と共通のレイアウトテンプレートを採用して、ポストプロダクションをスピードアップします。これには、標準化されたカラールール、背景要素、およびAI生成出力に対するポリシーに沿ったアプローチが含まれます。一貫性を保つためにアセットの種類(サムネイル、Bロール、オーバーレイ)を含めます。
制作では、エディタが再利用できる出力テンプレートを割り当てます。スクリプト作成やカラー決定のためのDaVinciなどのモデルを統合し、手動での再作業なしに一貫したベースラインにフィルターとエフェクトを適用します。
自動化を促進するチェックポイントのサイクルの設定:事前チェックで入力を検証し、制作でAI生成クリップをレンダリングし、グレーディングでカラーと背景効果を調整し、配信で最終アセットをショー用にフォーマットします。フローを自動的に進めるか一時停止するためのシグナルが存在します。
YouTuberやショーのために、信頼できるポリシーと利用可能なテンプレートを維持して、ブランドとボイスを維持しながらサイクルを短縮します。
| チェックポイント | 焦点 | 担当者 | 出力 | シグナル |
|---|---|---|---|---|
| 事前チェック | テキスト入力、アセットチェック、フォーマット準拠 | エディタ | 検証済みの計画+アセット | 制作OK |
| 制作 | AI生成クリップでレンダリング、フィルター適用 | エディタ | 生のレンダリング | グレーディング準備完了 |
| グレーディング | カラー、背景、点滅キュー、エフェクト | グレーダー | カラーグレーディング済み、準拠したクリップ | 承認済み |
| 配信 | フォーマット、レイアウト、パッケージング | エディタ | ショー用の最終アセット準備完了 | 公開済み |