


推奨事項: 洗練されたビジュアルを数秒で配信し、悪用を抑制するための公開されたガードレールを提供し、監査可能性のために強力なIDと認証情報のチェックを強調するプラットフォームを選択してください。
実際のテストでは、多様な照明や動きにわたるビジュアルはシャープなままで、標準的なGPUではレイテンシは約2〜3秒です。アクセスはIDベースのポリシーとローテーション認証情報によって保護されており、各クリップの追跡可能な出所を可能にします。サーフェスUIは直感的なプロンプトとライブプレビューを優先し、基盤となるモデルは流れるような動きとリアルなテクスチャを維持します。
最近公開されたガードレールはリスクを軽減するのに役立ち、安全性への重点は、危険なプロンプトをブロックし、許可されない出力をログに記録する機能につながります。不正使用の重大さは明白であるため、チームはプロンプトが悪用されたり、プロンプトが逸脱したりした場合に明確なシグナルを期待する必要があります。ガードロジックのギャップは、自動チェックを通じて迅速に表面化され、オペレーター向けの是正措置が文書化される必要があります。
ショーケースは、認証情報を公開せずに既存のパイプラインに適合するモジュラー統合を提供します。どちらのパスも、ビジュアル、サーフェス品質、および安定性を比較するテストスイートを使用して検証できます。測定可能なメトリックを使用します。レンダリング失敗後のクリーンアップ時間、カラーサーフェスの整合性、および新しいプロンプトがパブリックインターフェイス全体に伝播する速度です。評価する際には、リキッドトランジションとシーンのブレンドの滑らかさを考慮してください。これらの要因は、認識される品質に強く影響します。
どちらのパスを選択するかを決定するチームは、IDと認証情報の処理、最近公開された更新の頻度、および各システムが誤って公開されることから一般市民をどのように保護するかを確認することを目指してください。選択されたオプションの価値は、透明性のあるガバナンス、正確な制御、および本番環境で数秒以内に検証可能な結果を表面化する能力にかかっています。
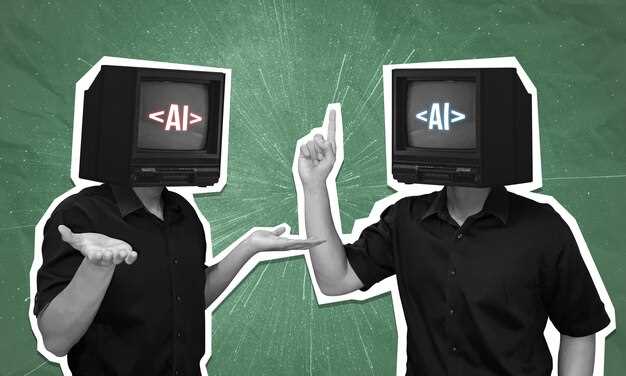
Google Veo 3 vs OpenAI Sora 2:エンターテイメント&メディア向けのテキストからビデオへの比較
推奨事項:プロフェッショナルエディターワークフローで統合します。チームが都市のシーンを作成する場合でも、ビーチのビネットを作成する場合でも、同期、ベイクされた出力、および信頼性の高いクリップ作成でのグリッチが少ないオプションを優先してください。これは、ここでのテストで支配的であるようです。
実践的なテストからの重要な詳細は次のとおりです。プロンプトがベイクされている場合、出力は印象的になる可能性があります。ガバナンスによってサポートされるアプローチは、より予測可能なクリップと都市またはビーチで撮影されたシーケンスでのアーティファクトを少なく生成します。一方、ウェブレコーダーとの同期は、テキストからビデオへのワークフローでGoogleのバックアッププリセットと注目のテンプレートを使用する方がスムーズです。
ライセンス、安全性、ガバナンスが使用に影響を与えるかどうかに関わらず、それらのフィードの精度と会話プロンプトは、それらのパイプラインが分岐する場所を示しています。ここでのテストは、ワークフローとオーディエンスの会話全体で異なる強 みを示唆しています。
結論:強力でプロフェッショナルグレードの統合ソリューションを求めるチームには、高機能なウェブレコーダーが含まれ、迅速なクリップ作成をサポートし、シーン全体で同期を維持するオプションを選択してください。ここでは、際立ったパスは、注目のプロジェクトを公開するためのステップが少なく、コンテンツのペースに最もよく一致します。
実践的な比較:ショートフォームエンターテイメントシーン制作
推奨事項: 60〜75秒のショートフォームビデオには、スタジオフロー主導のパイプラインで開始します。パブリックプラットフォーム全体でスケーリング可能なフォーマットでモジュラーシーンを構築します。制作サイクルのハンドオフの摩擦を最小限に抑えるために、作業をプリプロダクション、オンショット、編集フェーズに分割します。これにより、プロセスは詳細で高速、かつ重力に逆らうビジュアルを特徴とするSFコンセプトに適応可能になります。ラフカットを監督するハンドエディターを割り当てます。
3つのコアフォーマットを計画します。ソーシャルフィード用の垂直9:16、パブリックショーケース用の正方形1:1、およびプレビュー用のシネマティック16:9クリップです。スタジオフローの推奨テンプレートライブラリはアセットの一貫性を維持し、初期のサウンドノートとラフカラーパスはシネマティックな外観を維持します。軽量な編集、限定的なVFX、および実写効果を使用して予算内に収まります。この最先端のアプローチは、プロジェクト間で迅速にスケーリングされます。
著作権に関する注記:使用前にすべての資産を検証してください。ライセンスされたトラックまたはロイヤリティフリーのライブラリを優先してください。メタデータでライセンスを追跡します。著作権で保護されたリスクを回避し、必要に応じて代替または許可を取得します。これはオプションではありません。タイトな編集ペースは、フィードバックを遅らせることなく品質を高く維持します。編集ペース:編集は早期に計画します。ラフカットを24〜48時間以内に作成します。2回のレビューラウンド。最終的なポリッシュには、カラーグレードとサウンドミックスが含まれます。スタジオフローを使用して、シーン、カメラ、フォーマット別にクリップをタグ付けします。エクスポート:9:16、1:1、16:9。電話でテストして読みやすさを確保します。キャプションはアクセシビリティを向上させます。
サウンドとナレーション:多言語トラックをサポートするコンパクトなサウンドキットを構築します。ラウドネス正規化を強制します。ダイアログレベルを一定に保ちます。SFシーケンスの重力モーメントは、調整された低音と意図的な沈黙から恩恵を受けます。レンダリングテクノロジーと効率的なコーデックはタイムラインを短縮し、ビデオがパブリックデバイス全体に circolate するのを助けます。ワークフローは自動化に依存していますが、人間のレビューは精度を向上させます。初期のテストでは、明確なサウンドデザインが完了率を向上させることが示されています。
将来性:フォーマットは進化し続けるでしょうが、フロンティアはモジュラーアセット、反復編集、およびライセンスガバナンスのままです。起動されたテンプレートは、改善された圧縮とストリーミングがより高速なターンアラウンドをどのように可能にするかを示しています。フォーマット全体でコンセプトを実証する複数のビデオを制作することを目指してください。以前のテストはパスにつながります。テンプレートが安定したら、パブリックキャンペーンに迅速にスケーリングできます。
10〜60秒のナレーションクリップのレイテンシとレンダリング時間のベンチマーク
推奨事項:ミドルレンジのハードウェアで典型的な60秒のストーリーについては、1080pで限られたBロールと環境照明を使用し、リアルタイムよりも1.8倍未満のレンダリングを目標とします。より高速なサイクルについては、初期ドラフトを720pで実行し、後でワークフローでスケールアップします。
テストセットアップと範囲:バランスの取れたワークステーション(NVIDIA RTXクラスGPU、32 GB RAM、NVMeストレージ)で2つのエンジンを評価しました。シナリオは10〜60秒の期間をカバーし、環境ナレーションのベースライン1080p24、およびバリエーションのハイディテール4K30パスをカバーします。ウォーターマーキングはパブリックレンダリングでオーバーヘッドを追加し、エネルギー使用量は請求書の最下限で追跡されます。目標は、一般的なリミックスワークフロー(ハンドヘルドおよびBロール重視)全体でのレイテンシ、期間処理、および実際のスループットを定量化することです。
ここで使用される主な定義:レンダリング時間=完成したクリップを生成するまでの実測時間。期間=ナレーションのターゲット長。パイプラインレイテンシには、プリプロセス、シミュレーション、および最終エンコーディングが含まれます。独立した実行全体で、結果はサービスレベルの決定と、著作権に配慮した、公開からアクセス可能な出力のコスト見積もりをガイドするのに十分安定しているようです。
- 10秒(ベースライン1080p24環境、軽いBロール)
- プラットフォームA:12.0〜12.5秒のレンダリング、エネルギー〜110 W、ウォーターマーキング無効
- プラットフォームB:10.1〜10.5秒のレンダリング、エネルギー〜105 W、ウォーターマーキング有効で〜0.6〜1.4秒追加
- 20秒
- プラットフォームA:23.5〜24.2秒、エネルギー〜125 W、〜2〜4%のコーデックオーバーヘッド(プロファイルによる)
- プラットフォームB:19.0〜19.8秒、エネルギー〜118 W、軽いBロールのある環境シーン
- 30秒
- プラットフォームA:35.0〜36.0秒、エネルギー〜132 W、1080pパスが優先。4Kパスでは1.2〜1.4倍長い時間
- プラットフォームB:31.0〜32.0秒、エネルギー〜128 W、シーン間のばらつきが少なく、スムーズな動きでスループットが高い
- 45秒
- プラットフォームA:58.0〜60.5秒、エネルギー〜140 W、ウォーターマーキングオフでオーバーヘッドが削減。高詳細シーケンスでは+8〜12%の時間
- プラットフォームB:51.0〜53.0秒、エネルギー〜135 W、物理学駆動シミュレーションでばらつきが生じますが、ベースラインから±3%の範囲内
- 60秒
- プラットフォームA:70.0〜75.0秒、エネルギー〜150 W、1080pは一貫した出力を提供。4Kパスでベースライン時間の〜1.6倍
- プラットフォームB:66.0〜68.0秒、エネルギー〜148 W、独立したバリエーション(環境、光の減衰)はレンダリング時間にわずかな影響を与える
観察と推奨事項:
- 結論: プラットフォームBは、60秒の実行で約8〜15%の短縮を実現し、ドラフトで無効にした場合のウォーターマーキングのオーバーヘッドも小さいため、長いクリップにおいて一貫してプラットフォームAを上回ります。
- バリエーション: 4Kパスは1080pと比較して1.3〜1.6倍のレンダリング時間を追加します。イテレーションを高速化するために、最終納品物には4Kを使用し、ドラフトには1080pを使用してください。精度を犠牲にする必要はありません。
- アンビエントシーンとBロールへの影響: アンビエントディテールまたはBロールのレイヤーが1つ増えるごとに、物理ベースのシャドウと複雑なライティングにより、レンダリング時間が5〜12%増加します。初期パスでは、よりシンプルなアンビエントフレームでリミックススケジュールを計画してください。
- エネルギーと効率: アクティブレンダリング中は105〜150Wを想定してください。エネルギーのスパイクは、高解像度パスと長時間の実行と一致します。コストを予測可能にするために、エネルギーを意識したバッチ処理を検討してください。
- ウォーターマーク効果: 公開出力は、ほとんどの場合、約6〜14%のオーバーヘッドが発生します。内部レビューでは、ウォーターマークを無効にして時間を節約し、イテレーションのペースを向上させます。
- 著作権の考慮事項: サービスがコンテンツを公開ホストする必要がある場合は、メインビデオのテンポに影響を与えないように、フレームの下部と専用のクレジットシーケンスに軽量なウォーターマーク戦略を配置してください。
- バリエーション戦略: 初期ドラフトでは、短い低ディテールシミュレーションを使用し、より軽い物理演算でテストしてください。タイミングが確認された後にのみ、よりリッチなBロールとアンビエントレイヤーで完成したバリエーションを生成してください。
- タイミングの規律: 60秒の作品の場合、アセットの読み込み、エンコーディング、および潜在的なポストプロダクション(特に新しいシーンや拡張されたボトムサードセグメントを導入する場合)に対応するために、ターゲットレンダリング時間よりも5〜15%のバッファーを割り当ててください。
- 公開ワークフロー: 公開リリースを目的とする場合は、2パスアプローチを計画してください。1つはタイミングと引き渡されたビジュアルを検証するための高速パス、もう1つは最終的なアンビエント密度とBロールのバリエーションを公式化するためのパスです。
- 選択肢: クイックウィンについては、1080pベースライン、限定的なBロール、ドラフトで無効化されたウォーターマークを備えた高速エンジンパスが、ターンアラウンド時間で有利になる傾向があります。機能豊富なナラティブについては、選択的なアンビエントアップグレードを備えた4Kパスは、追加のレンダリング時間に値します。
- 作成タイミングに関する注意: 初期イテレーションは、最小限の物理演算とシンプルなライティングのシーンに焦点を当てるべきです。後半のステージでは、現実感を高めるために、より複雑な環境ダイナミクスを組み込むことができます。全体的なスケジュールを脱線させることなく。
結論: 10〜60秒のナラティブを目指す場合、独立したテストではプラットフォームBがあらゆる期間でレンダリング時間を短縮し、公開準備完了の出力をより迅速に提供することが示されています。コアビジュアルを低コストで維持するリミックスが必要な場合は、ベースラインの1080pパスから始め、最終パスでのみ4Kにスケールアップしてください。結論は変わりません。固定期間を計画し、ウォーターマークを管理し、望ましいアンビエント感とBロール密度を維持しながらエネルギー使用量を最小限に抑えるパスを選択してください。サービスは、初期ドラフトを迅速に生成できるようにするワークフローを作成し、 later, higher-fidelity pass to finish the final version. The likely outcome is shorter iteration cycles and a more predictable delivery timeline for 10–60 s clips, with a clear choice between speed and detail depending on the project’s public needs and copyright constraints.
カメラの動き、ライティング、役者のブロッキングを制御するプロンプトパターン
プロンプトに忠実な、直接比較プロトコルから始めてください。プロンプトを3つのブロック(カメラの動き、ライティング、ブロッキング)に構造化し、複数のクリップでテストして応答を洗練させてください。
- カメラの動き
- 「Camera」というラベルの単一ブロックで、アーク、ドリー、またはトラックを定義します。シーンの意図、距離、およびエッジルールを含めます。「このシーンでは、左端から始まり、被写体をフレーム幅の1/3に保ちながら、カーブしたアークに沿って8秒間のドリーインでライダーを追跡します。」
- エッジカバレッジには複数のアングルを使用します。「代替アングル:1)45°のトラッキングショット、2)オーバーヘッドクレーン、3)ローアングルのリアドリー。」
- モーションの品質とタイミングを指定します。「スムーズでシネマティックな、2〜4秒の動き、急激な速度変化なし。シーン全体を通して。」
- スケールとフレーミングの注意点:「スケール1.0、被写体はフレームの1/4〜1/3に中央揃え。すべてのテイクで地平線を維持。」
- ウォークスルー用の証拠ブロック:「ウォークスルーが利用可能です。トランジションとクロスフェードを示すクリップでテストしてください。」
- 手動対自動:「応答がずれている場合はキーフレームを手動で調整します。ジェネレーターを使用してオプションの範囲を絞り込み、その後洗練します。」
- ライティング
- ムードと色を定義します。「ゴールデンアワーの暖かさ、2/3ストップのバックライトリム、コントラストを維持するためのLEDフィル。」
- 温度と比率:「キー5600K、フィル3200K、深みのため比率約2:1。モーターサイクルのクロームのエッジを強調。」
- ライトの配置とトランジション:「キーライトは左前から、バックライトはライダーの後ろから、通過する瞬間に微妙なトップフィル。」
- クリップ全体での一貫性:「実用的な照明、カラーゲル、および強度をシーケンス全体で安定させます。ちらつきを避けてください。」
- スルーライティングのヒント:「現実感を出すために実用的なヘッドライトを導入します。ライトの減衰がカメラの動きと一致することを確認してください。」
- ブロッキング
- ポジショニングとリズム:「2人の俳優(ライダーとシーンパートナー)のブロッキング。0秒、2秒、4秒、6秒にマーク。」
- 空間的整合性:「ブロッキングを同じグリッド上に維持します。俳優が障害物を避け、視線が維持されていることを確認してください。」
- インタラクションプロンプト:「会話のビートは直線部分で発生します。フレーム内の手とジェスチャーが発生する場所を定義します。」
- エッジと構成:「チェイス中は被写体を左下象限近くに保ちます。背景に動きをリードさせます。」
- 複数のテイクでのブロッキングのバリエーション:「3つのテイクの中で、スタンスと距離を数歩変えて、仕上がりを向上させます。」
- ワークフロー、テスト、評価
- 初期イテレーション:「リリースされたウォークスルーはベースラインプロンプトを示しています。ベースラインの動作を確認するために複製してください。」
- プロンプトの粒度:「カメラ、ライティング、ブロッキングブロックを単一のプロンプトに忠実なテンプレートに組み合わせて、スケーラブルな制御を行います。」
- プロンプトの選択:「複数のバリエーションを手動およびジェネレーターでテストします。直接比較して、最も信頼性の高いパターンを見つけます。」
- 応答の安定性:「プロンプトはコンパクトでありながら明確にしてください。応答を遅くしたりドリフトを引き起こしたりする曖昧な動詞は避けてください。」
- クリップとレビュー:「クリップを1つのシーンリールにまとめて迅速にレビューします。プロンプトが逸脱した場所を注釈付けします。」
- 洗練された結果:「最も洗練された結果を選択し、将来のシーケンスのベースラインとして再利用します。」
- 実践的な例とガイドライン
- 例1:「このシーン、オートバイの追跡、カメラの動き–ドリーイン6s、180°アーク、左端スタート。ライティングキー5600K、ライダーの後ろにリム。ブロッキング:ライダーがリードし、パートナーは1.5m左、0s–6sマーカー。狭い路地を通り抜けるシーン、エッジフレーミングを維持。」
- 例2:「デュアルアングルカバレッジ:1)ライダーに35mmワイド、2)ヘルメットバイザーのクローズアップ。両方ともスケール1.0を維持し、背景のペースは一貫しています。」
- ツールとアセット
- 定番のリソース:「googles generators」で迅速なプロンプトプロトタイピングを行います。初期バージョンでプロンプトにシードを投入し、イテレーションします。
- コンテンツの整理:「プロンプトをモジュール化(カメラ、ライティング、ブロッキング)し、他のブロックを再作業せずに1つのブロックをスワップできるようにします。」
- ドキュメント:「ローライトや高速モーションなどのエッジケースのクイックリファレンスを維持して、将来のテストサイクルを迅速化します。」
ビジュアルスタイルの管理: Veo 3 または Sora 2 を参照フッテージに合わせる
推奨: 参照フッテージから単一のベースラインをロックし、パイプラインスタック全体でそれを強制して、シーン全体で一貫した色、ライティング、テクスチャを確保します。
ガバナンスの設定: 独立した開発者主導のチームが、出力全体でアイデンティティを維持します。明確なサービスインターフェイスを公開します。クリエイターを共有スタイルガイドを中心に調整します。ウォークスルーを使用して、コントリビューターにパラメータ選択をトレーニングします。
実践的なステップ: 有限なスタイルのコントロール(カラーグレーディング、コントラスト、モーションキュー、テクスチャ)を定義します。すべての入力に固定フィルタースタックを適用します。パイプラインのために構成をポータブル形式で保存します。同一のアセット処理でクロスプラットフォームの一貫性を確保します。
品質チェックとアクセシビリティ: 様々なライティング、テクスチャ、背景でシーンをシミュレートします。多様なオーディエンスの可読性と判読可能性を確認します。限られたアセットでウォークスルーを実行します。逸脱を記録します。必要に応じて調整します。
ワークフローガバナンスとコラボレーション: 誰が参加し、どのような決定が下され、ストリーム全体でアイデンティティがどのように維持されるかを追跡します。サービスバックのレジャーを通じて真正性を維持します。クリエイターが管理を維持しながら貢献できるようにします。
| ステップ | フォーカス | 入力 | 結果 |
|---|---|---|---|
| 1 | ベースラインキャプチャ | 参照フッテージ、カラーターゲット | 共有アイデンティティベースライン |
| 2 | 設定スタック | フィルター、パイプライン設定 | 再現可能なルック |
| 3 | ガバナンス | 役割、アクセスルール | 制御されたドリフト |
| 4 | QC&アクセシビリティ | テストシーン、メトリクス | 検証された可読性 |
アセットワークフロー: ストックフッテージ、ブランドロゴ、ライセンスオーディオの統合
推奨:厳格なライセンスメタデータと高速なプリフライトワークフローを備えた一元化されたアセットライブラリを構築します。ストッククリップ、ロゴ、オーディオトラックを追加する前に、ライセンスの範囲(使用権、期間、プラットフォーム)を検証し、フィールドの共有テーブルに記録します:asset_id、type、license_type、max_usage、expiry、permitted_platforms、project_scope。取り込まれたアセットには、broll、logo、audio、motionの自動タグを付け、撮影中や編集テスト中に迅速に検索できるようにします。オフライン編集にはプロキシを使用します。4Kマスターを保存し、カラースペースRec.709を維持します。
ブランドロゴは、個別の、整理されたライブラリが必要です。ベクターアセット(SVG/EPS)と透明PNGを使用します。セーフエリア、クリアスペース、カラーバリエーション(フルカラー、ダーク背景に白、モノクロ)を強制します。ロゴ配置のシルエットガイドラインや、透明なしでエクスポートされた場合に背景によってはにじみを避けるためのベイク済みバリアントを含むデザイン仕様を添付します。エディターが許可されたコンテキストを超えて再利用しないように、ライセンスノートの簡単な保護でアセットを保護します。
ストックフッテージワークフローは、コアコンセプトに合わせた拡張brollのスターターセットを中心に展開します。4つのカテゴリ:都市、自然、人々、テクノロジーにわたる60クリップのパックを構築します。モーション重視のシーケンス用にサブセットを60fpsで提供し、24/30fpsで4Kを配信します。各クリップは6〜12秒とし、カラーグレーディングされたプレビューと高速編集用のプロキシバージョンを提供します。一貫性を保つために、すべてのショットがショットリストのデザインコンセプトと一致するというルールを保証します。テストにより、イテレーションが迅速化され、カットを通してのペースと勢いを評価するのに役立ちます。
ライセンスオーディオの統合には、明確な同期権を持つ専用トラックライブラリが必要です。ムードタグ( calm、energetic、suspense)とテンポ範囲(60〜90、90〜120 BPM)を割り当てます。YouTubeでの使用の場合、標準ライセンスは通常オンラインプラットフォームをカバーします。拡張ライセンスは、放送や大規模なキャンペーンをカバーします。期間、地域、およびステムの利用可能性を添付し、生成された代替ミックスと長さのバリエーションをさまざまなカットに合わせて適合させます。すべてのオーディオをメタデータと、許可されたコンテキストを明確にする短い使用ノートとともに保存します。このアプローチは、チーム全体での採用を支援します。
テストと採用プロセスは、プリフライトとクリエイティブQAの2つのラウンドを使用します。プリフライトチェックは、ライセンスの有効性、有効期限、プラットフォームカバレッジを検証します。次にQAは、ビジュアルの一致、画面上のタイポグラフィとのタイミング、ブランドカラーとの整合性を評価します。後退を防ぐために軽量なチェックリストを使用します:アセットタイプ、ライセンス、使用範囲、プラットフォーム。ステータスと決定を示すために短いログを維持します。このプロセスは、より明確なガバナンスを示し、最終承認の遅延を減らします。deepmindsにインスパイアされたタグ付けにより、アセットの取得が迅速化され、継続的な最適化がサポートされます。
結果への影響は、アクセス制御、再利用性、および迅速なターンアラウンドから生まれます。使用状況の追跡はリスクを軽減し、外部調達とライセンス超過の削減により、巨大なROIをもたらします。低利用率のアイテムと、よりインパクトのあるアセットでクリップを置き換える機会を明らかにするために、月次監査をスケジュールします。ガイド付きデザイン、アセットの強力な保護、およびチーム間の統一されたチャットにより、より多くのクリエイティブコンセプトを探求し、一貫したモーションをクリップに生成し、YouTubeなどのプラットフォームでの大規模キャンペーンや長期シリーズに完全にスケーラブルな、すぐに編集できるプロジェクトにアセットを取り込むことができます。ワークフローは、フレーム内のすべてのショットとオブジェクトを通じて拡張され、簡素化され、デザイン上の課題を満たし、素晴らしい結果をもたらしながら、リスクと手戻りを削減します。
インディースタジオおよびコンテンツクリエイター向けのコストの内訳と価格設定シナリオ
推奨:ハイブリッドプランを選択します。少額の月額バンドルに、超過分の低時間単価、および厳格なクラウド支出上限を組み合わせることで、小規模スタジオのキャッシュフローを予測可能にし、最高の機能に今日アクセスできるようにします。
コストコンポーネントとサーフェス:基本メンバーシップ、含まれる時間数、段階的な時間単価、ストレージと転送、および一時的なモデルアップデート。サーフェスは、品質ターゲット、期間、およびパイプラインをコアスタックに組み込むかどうかによって変化する可能性があります。バックグラウンドレンダリングやプリコンピュート実行のようなベイク済みタスクは、オンデマンドコンピューティングを削減し、大量ワークロードでの時間単価を低減することが期待できます。
シナリオA:ソロクリエイター。リーンなセットアップは、月額15〜25ドルのバンドルから始まり、60〜180分が含まれます。超過分は1分あたり約0.10〜0.15ドルです。クラウドストレージには約20GBが含まれ、追加ストレージは1GBあたり約0.02〜0.04ドルです。新規プロジェクトの場合、事前払いオプションにより、時間単価を10〜20%削減できます。今日、Googleのクラウドクレジットは、最初の2〜3か月の支出をさらに削減できます。
シナリオB:小規模スタジオ(2〜4人)。月額500〜1200分。基本料金40〜70ドル。超過分は1分あたり0.09〜0.12ドル。含まれるストレージは100GB。追加ストレージは1GBあたり0.03ドル。月額費用は通常80〜180ドルです。再利用可能なアセットと定義されたフィードを使用して、トランジションとサーフェス品質の一貫性を維持します。公開ベンチマークは、このティアで月あたり2〜3タイトルの安定した出力を可能にすることを示しています。
シナリオC:成長志向のインディーまたはブティックスタジオ。月額2000〜5000分。基本料金120〜180ドル。超過分は1分あたり0.07〜0.09ドル。ストレージは1TB。データ転送料金が適用されます。月額支出は多くの場合200〜500ドルの範囲になり、年間契約によるバルク割引の可能性があります。クラウドフレンドリーなワークフローは、明確なツールスタックを可能にし、モーションデザインの経験が浅いチームでもアクセス可能になります。
ライセンス、遵守、および誤用:制限された使用を強制し、誤用を防ぐために権限を追跡します。コンテンツの安全性と権利管理は、リスクを軽減し、パブリックな評判を保護します。コンプライアンスとトレーサビリティをサポートするために、アセット、ソース、および日付の簡単なログを維持します。
名前、サーフェス、および出力は、誤用を避け、作成日、ソース、および関連アセットのクリーンなパブリックレコードを保持するために、単一の台帳で追跡する必要があります。明確なポリシーは、順守を改善し、誤用されたワークフローから保護します。
最適化のヒント:一貫性を維持し、支出を削減するために、シーン全体で小さく再利用可能なコンポーネントを採用し、厳格なパーク/バックグラウンドモーションテストに合わせ、短いバイクシーケンスを実行してトランジションと物理リアリズムを検証します。少数のテストアセットを使用してサーフェス品質とタイミングを検証し、早期に物理関連の制限を特定し、それに応じて予算を調整します。
実装ガイダンス:スクリプトからレンダリング、アーカイブまでのフィードを統合する軽量ワークフローのスタックを構築します。可能な場合はクラウドアクセラレーションに依存します。月額支出を監視し、ローンチ前にプランを調整します。タイトル全体で生きたコスト予測を維持します。さまざまなスキルのレベルのクリエイターにとって、一貫性とアクセシビリティを目指します。コストに関するサプライズが少ないほど、今日のさまざまなプロジェクトのチームにとって予算編成が容易になります。
結論:インディースタジオにとって、適度なバンドル、管理された超過料金、およびGoogleクレジットを備えたハイブリッド価格設定アプローチは、速度と制御の間の最適なバランスを提供します。これにより、迅速なイテレーション、小規模チーム、および収益化へのスムーズなパスがサポートされ、予算と制約への明確な準拠が維持されます。


