


Commencez par une recommandation concrète : réutilisez vos clips téléchargés dans un récit cohérent qui résonne auprès de vrais clients.
Définissez des rôles dans votre flux de production en ligne, en établissant une boucle d'itération prête à construire qui s'exécute une fois le matériel capturé et qui traverse votre pipeline.
Une fois que vous identifiez un thème central, créez un spectacle autour avec une touche personnelle qui parle aux entreprises et à leur langage, en utilisant des éléments concis comme des clips en bouchées, des légendes et des appels à l'action clairs.
Grâce à une structure de tâche ciblée, identifiez une solution rapide et répétable : extrayez un moment qui brille, associez-le à un langage lisible et à des éléments à l'écran, et présentez-le comme un petit spectacle partageable pour les canaux en ligne.
Utilisez des histoires personnelles pour établir la confiance ; alignez le récit sur le langage de la marque et les rôles humains derrière la production, de sorte que le résultat semble authentique sur les points de contact en ligne pour les entreprises de toute taille.
L'itération compte : suivez les clips téléchargés qui fonctionnent le mieux, identifiez quels éléments narratifs suscitent l'engagement, trouvez des opportunités pour affiner le script et les visuels en conséquence, en vous éloignant des suppositions.
Grâce à une production cohérente, vous créez une bibliothèque en ligne de spectacles qui peuvent être réutilisés, ce qui permet de gagner du temps et aux équipes de répondre rapidement aux tendances et aux questions des clients.
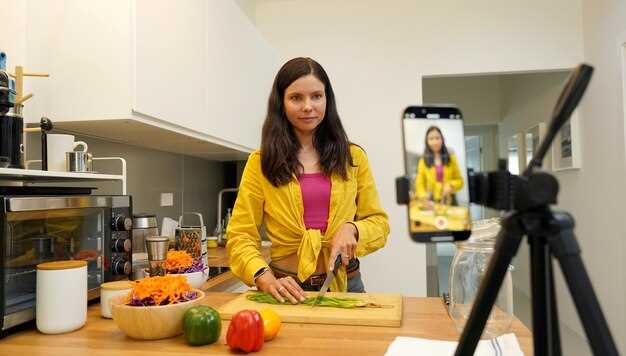
Pipeline de production UGC Sora 2 : du brief à la publication Vidéo
Commencez par un brief précis et un enregistrement d'essai pour fixer la direction avant un tournage complet. Définissez le sujet, le public, le responsable et une métrique de succès liée au profit. Préparez des contenus qui correspondent aux formats et définissez vos attentes.
Plan de contenu : assignez l'équipe, déterminez les formats et assemblez la liste des tâches. Enregistrez des plans larges en format paysage et des gros plans focalisés pour capturer l'émotion. Des images fixes fournissent un contexte entre les segments, formant une séquence de type livre.
Pendant le tournage, maintenez la cohérence du contexte : alignez la direction de l'éclairage et la balance des blancs ; choisissez un style visuel qui soutient le sujet et la voix du responsable. Le porte-parole doit porter le message complètement, comme une voix de marque.
Approche de montage : appliquez un étalonnage des couleurs standard ; coupez en blocs serrés ; ajoutez des légendes ; insérez des images fixes pour le rythme ; renforcez les compétences en cadrage et en rythme ; exécutez un essai pour comparer les versions et choisir le montage le plus efficace ; le résultat apporte un bénéfice clair au contenu et à l'efficacité.
Publication et mesure : diffusez dans des formats adaptés au streaming ; conservez les mêmes formats et les autres rapports d'aspect ; surveillez les métriques et l'augmentation des bénéfices. Les informations tirées de la première ébauche montrent ce qu'il faut ajuster après chaque publication.
| Étape | Actions clés |
|---|---|
| Brief & Contexte | Définir le sujet, le responsable, le public ; lier au profit ; esquisser les formats ; établir le flux des tâches. |
| Enregistrement & Tournage | Assigner l'équipe ; planifier les sujets ; capturer des plans larges (format paysage) et des gros plans ; collecter des images fixes pour le contexte ; construire une séquence de type livre. |
| Montage & Révision | Appliquer un étalonnage standard ; couper en blocs ; ajouter des légendes ; effectuer un essai pour comparer les versions ; garder le contenu ciblé et efficace. |
| Publication & Mesure | Distribuer dans des formats de streaming ; prendre en charge les mêmes rapports d'aspect et d'autres ; surveiller l'impact sur le profit ; ajuster après les retours. |
Ciblage : rédiger un brief UGC de 15 à 30 secondes pour TikTok vs Instagram Reels avec des éléments de prompt exacts
Recommandation : deux clips de 15 à 30 secondes, vertical 9:16, 30-60 ips. Commencez immédiatement par un gros plan du produit ; des chiens apparaissent pour un moment convivial ; puis des mouvements rapides et des coupes rapides. Utilisez un éclairage vif et un décor épuré, que ce soit en magasin ou aménagé sur un plateau compact. Après l'accroche, décrivez le bénéfice essentiel en termes concis ; maintenez des moments statiques pour l'emphase ; incluez un sur-impression de panneau et une invite finale "visiter le magasin". Utilisez des vidéos existantes ou des images sur site ; itérez après la première prise et apprenez de chaque génération de montages ; connaissez les directives pour les deux formats et adaptez le cadrage en conséquence.
Éléments de prompt TikTok : intérieur, construit autour d'une équipe de 1 à 2 personnes ; inclure une apparition de chiens pour booster l'énergie ; gros plan sur les mains tenant le produit, puis pointant vers une fonctionnalité ; les mouvements sont rapides mais contrôlés avec 3 à 4 coupes rapides ; l'éclairage est vif et à contraste élevé ; décrivez les avantages en deux lignes courtes ; surimposez du texte avec "quoi de neuf" et un simple panneau de stock/offre ; vitesse 1,0–1,2x, visez 15–30 secondes au total ; terminez par un CTA clair pour visiter le magasin ; utilisez une prise de vue de stock si disponible pour soutenir la prise principale ; une fois démarré, exécutez des cycles d'itération pour améliorer la compréhension et le flux.
Éléments de prompt Instagram Reels : commencez par un gros plan, puis transitionnez vers une vue plus large montrant le contexte ; rythme plus lent que TikTok, mais toujours serré à 15–30 secondes ; incluez des surimpressions descriptives et une courte narration décrivant ce qui est dans le cadre ; l'éclairage doit être uniforme, avec un léger remplissage pour éviter les ombres dures ; mettez l'accent sur la texture et le mouvement en utilisant une approche stable et délibérée ; présentez une apparition de chien ou un accessoire subtil pour ajouter du charme tout en gardant l'accent sur le produit ; affichez "quoi de neuf" en texte lisible et incluez une ligne de bénéfice concise ; terminez par une visite du magasin et un rappel pour en savoir plus ; maintenez 30-60 ips pour une lecture fluide ; assurez-vous que chaque image soutient le message essentiel et que l'angle concurrentiel est clair.
Directives communes aux deux formats : gardez la séquence serrée avec une accroche forte dans les 2 premières secondes ; utilisez des plans rapprochés pour décrire les détails clés, puis élargissez à un plan fixe ou moyen pour établir le contexte ; pointez du doigt ou de la main vers la fonctionnalité pour guider l'attention du spectateur ; intégrez un bref mouvement de l'équipe ou d'ambiance pour transmettre l'authenticité ; gardez les vidéos de stock disponibles en sauvegarde pour maintenir la vitesse de production ; signez le post avec un panneau clair et une invite de visite directe ; après chaque itération, analysez les baisses de temps de visionnage et ajustez la génération des prompts en conséquence ; testez toujours les deux formats pour voir quels éléments convertissent mieux, et ajustez le rythme et les mouvements pour rester compétitif dans les flux.
Ingénierie de prompt : prompts prêts pour l'IA pour générer des témoignages authentiques à la première personne et des démos de produits
Recommandation : concevez des prompts avec une structure à deux couches : voix de base et tâche de scène. La voix de base écrit à la première personne et génère du contenu qui semble traditionnel et crédible. La tâche de scène définit où se trouve le spectateur, ce qui est montré et le bénéfice. Cette approche comble le fossé entre les textes scénarisés et la parole réelle, produisant des éléments qui semblent naturels lorsqu'ils sont filmés comme des mouvements de bouche et qui s'adaptent aux plateformes. La séparation rend également plus facile la compréhension de leur objectif et l'ajustement rapide pour différents flux de travail.
Les prompts doivent être concrets et éviter les demandes vagues. Spécifiez le public, le contexte et le scénario du produit pour réduire le temps d'itération. Entre les prompts, adaptez le ton à chaque plateforme et à la langue cible. Cela élargit la vision de ce qui peut être capturé, et aide l'écrivain à éviter les formulations génériques. Utilisez des métriques ou des résultats spécifiques afin que le spectateur puisse imaginer immédiatement l'impact réel.
Prompt de témoignage : "Vous êtes une [persona client]. Vous avez récemment utilisé [produit]. Décrivez le problème, le moment où vous avez réalisé qu'il répondait à votre besoin, et le résultat en termes concrets. Écrivez comme si vous parliez à un ami, en utilisant des phrases avec 'Je', un rythme naturel et un langage simple. Incluez un résultat quantifiable et une seule mise en garde. Généralement, cela devrait durer environ 60 à 90 secondes de parole. Commencez par expliquer pourquoi vous l'avez essayé et terminez par une recommandation franche."
Prompt de démonstration : "Montrez le produit en action dans un plan unique et clair. Concentrez-vous sur l'affichage et le résultat. Narrez ce que vous voyez pendant que vous effectuez les étapes, décrivez le flux, et évitez les affirmations vagues. Utilisez un langage simple et un rythme naturel ; s'il s'agit d'un logiciel, décrivez chaque clic et transition. Incluez un CTA rapide avec 'cliquez'."
Prompt d'adaptation de plateforme : "Réécrivez le témoignage pour [plateforme], en conservant les points clés mais en adaptant le langage, la durée du plan et le rythme aux plateformes. Remplacez le langage vague par des visuels concrets et des points de preuve. Adaptez le ton à la plateforme et assurez-vous que le contenu semble crédible et immédiat."
Configuration visuelle : sélectionner le cadrage de la caméra, les préréglages de mouvement du smartphone et les profils d'éclairage dans Sora 2
Configuration de base : utiliser un rapport 9:16 pour les shorts, un rapport 16:9 pour les actifs finis, un rapport 1:1 pour les bobines de marque. Cadrer de la poitrine à la couronne, en laissant de l'espace pour que les visages restent centrés pendant le mouvement. Placer les sujets sur le tiers supérieur et composer un cercle clair d'éléments d'arrière-plan pour renforcer la marque. Lire les instructions dans l'application pour confirmer la compatibilité du format, puis affiner le cadrage jusqu'à ce que les visuels restent stables lors des panoramiques.
Préréglages de mouvement du smartphone : choisir entre trois styles pour créer des visuels cohérents : discours stable pour les bases, dynamique léger pour l'engagement, et un effet de caméra portée subtil avec stabilisation pour un look décontracté. Conserver une longueur focale fixe ; éviter les zooms agressifs. Définir les courbes de mouvement sur une rampe douce pour que les transitions soient naturelles ; répéter une courte boucle avec quelques lignes, puis enregistrer plusieurs prises pour comparer les angles, en choisissant rapidement les meilleures images.
Profils d'éclairage : trois modes couvrent la plupart des pièces : lumière du jour neutre (5200–5600K) pour la clarté du produit ; ambiance chaude (3000–3500K) pour établir la confiance ; éclairage de contraste élevé (5600K avec un fort contre-jour) pour les moments de marque. Lumière principale à 45° par rapport au sujet, à 0,8–1,2 m de distance ; lumière de remplissage 1 à 1,5 diaphragmes plus douce ; lumière de contour pour séparer de l'arrière-plan. Adapter l'intensité à la luminosité ambiante de la pièce et vérifier le écrêtage des blancs ; utiliser un réflecteur pour uniformiser les ombres sur les visages. Ne jamais se fier uniquement à l'ambiance dans les espaces sombres ; ajouter un panneau LED compact si nécessaire.
Cycle de raffinement : enregistrer des prises brutes, puis itérer rapidement. Concevoir une vérification axée sur les problèmes : alignement du regard, équilibre des couleurs, exposition et tonalité de la pièce. Après chaque passage, exporter un aperçu rapide et le partager sous forme de données base64 pour une revue hors ligne. S'assurer que les visuels correspondent au cercle de marque standard, en maintenant les logos, les polices et la palette de couleurs cohérents sur toutes les images. Si une incompatibilité est constatée, adapter le préréglage et réenregistrer la partie pour maintenir le rythme.
Conseils pratiques : lors d'une seule prise, échantillonner différents rapports et angles pour constituer une bibliothèque solide. Utiliser la détection automatique de scène pour étiqueter les bonnes prises ; vérifier les métadonnées pour localiser les meilleurs clips et trouver ceux qui correspondent aux objectifs de la campagne. Enregistrer une fois, puis transformer la séquence en post-production et vérifier la cohésion avec le montage final. Utiliser des aperçus basés sur HTTP pour les coéquipiers, et enregistrer une note rapide avec des idées de raffinement pour accélérer l'itération – cela crée un avantage concurrentiel et maintient la cohérence des visuels sur tous les actifs.
Ajustement audio : ajuster le ton de la voix, le rythme, les mots de remplissage et ajouter du bruit ambiant pour une livraison d'apparence native
Définir les paramètres de base avec une livraison chaleureuse et humaine et un accent modéré ; bloquer le rythme à 120-150 mots par minute pour des clips de 30 à 60 secondes afin de maximiser l'engagement et le confort de visionnage.
-
Ton de la voix et accent : choisir un ton qui semble conversationnel et émotionnellement crédible ; maintenir l'accent suffisamment subtil pour préserver la clarté auprès de différents publics. Utiliser une légère égalisation en fréquence haute pour l'air, tout en évitant les sibilances dures. S'assurer que le ton global reste dans l'esthétique de la marque, afin que les auditeurs perçoivent une solution cohérente sur tous les actifs.
-
Rythme et emphase : employer des changements de tempo contrôlés pour mettre en évidence les points clés ; insérer de brèves pauses (0,25–0,5 secondes) après les phrases pour guider la compréhension. Pour les détails critiques, ralentir de 5 à 10 % pour améliorer la rétention et rendre le contenu plus facile à suivre pour les marques et les entreprises.
-
Mots de remplissage et respirations : viser moins de 3 mots de remplissage par minute ; remplacer les segments remplis par des pauses intentionnelles et une courte respiration. Supprimer efficacement les mots de remplissage persistants en réécrivant les instructions et en encourageant une respiration naturelle ; ce changement améliore le professionnalisme perçu et l'engagement.
-
Bruit ambiant et environnement : ajouter un son ambiant subtil pour ancrer le dialogue ; utiliser un bruit blanc ou le son de la pièce à environ -20 dB par rapport à la voix pour préserver l'intelligibilité. S'assurer que la couche ambiante ne masque jamais la voix ; tester sur différents appareils pour vérifier que l'environnement semble naturel plutôt qu'artificiel.
-
Durées et structure : viser 30 à 60 secondes par actif pour un visionnage rapide ; pour des explications plus approfondies, maintenir les segments en dessous de 90 secondes avec des accroches claires et une conclusion concise. Naturellement, les formats plus longs devraient modifier le rythme pour maintenir l'attention et éviter la fatigue.
-
Vérifications A/B et références : comparer les sorties de base par rapport aux sorties ajustées à l'aide d'une piste de référence de la stratégie de campagne ; suivre des métriques telles que le taux d'achèvement, l'engagement et le temps de visionnage pour quantifier l'efficacité. Utiliser ces données pour affiner l'approche et itérer vers le premier plan de la stratégie de contenu.
-
Contrôles qualité : vérifier la présence de plosives excessives, de bruits de bouche et de volumes incohérents ; appliquer une compression douce pour maintenir un niveau plein et uniforme sans paraître robotique. S'assurer que la livraison reste naturelle et émotionnellement équilibrée sur différents appareils et conditions de visionnage.
-
Flux de travail pratique : développer un processus répétable qui commence par une vérification rapide du ton, passe par des ajustements de rythme, puis se termine par une réduction des mots de remplissage et un réglage du bruit ambiant. Maintenir un seul fichier de référence pour la cohérence et documenter les entrées des directives de marque pour prendre en charge la production évolutive pour les marques et les entreprises.
-
Alignement des métriques : définir le succès par des métriques numériques telles que la durée d'écoute, les points de chute et la rediffusion ; s'assurer que la solution reste évolutive en utilisant une image constante de 30 à 60 secondes, avec des améliorations suivies au fil du temps et alignées sur la stratégie de la marque.
Exportation et test : codecs recommandés, rapports d'aspect, fichiers de sous-titres, métadonnées de téléchargement et plan de test A/B pour mesurer les conversions
Exporter deux profils : H.264 MP4 1080p pour une large compatibilité et une variante HEVC 4K pour les chaînes haut de gamme, avec un audio AAC dans la plage de 128 à 192 kbps. Utiliser l'espace colorimétrique BT.709 et 29,97–30 ips, et maintenir les deux profils alignés sur l'éclairage, les visuels et la durée pour simplifier les comparaisons. Maintenir une politique de filigrane propre et sans distraction et produire des images fixes comme actifs séparés pour les miniatures et les démonstrations qui prennent en charge le flux de travail de recherche.
Guide de rapports : fournir du 9:16 pour les flux mobiles et du 16:9 pour les placements sur ordinateur, plus des recadrages optionnels 1:1 et 4:5 pour les contextes de grille ou d'histoire. Prioriser une durée de 15 à 30 s pour les flux principaux, avec un plafond de 60 s pour les démonstrations ou les démonstrations de style de vie afin d'illustrer le contexte du produit. Vérifier les recommandations de chaque plateforme et adapter le rapport et la durée pour maintenir la lisibilité du texte à l'écran et des sous-titres tout en préservant l'impact du plan dans toutes les scènes.
Fichiers de sous-titres : générer des fichiers compagnons SRT et VTT en parallèle, en intégrant des horodatages qui s'alignent sur des sauts de ligne de deux lignes maximum. Décrire les actions dans la première ligne de chaque sous-titre, en évitant les lignes trop longues, et préserver la ponctuation pour la lisibilité. S'assurer que les sous-titres sont synchronisés avec les images fixes et les plans en mouvement, y compris les avis de filigrane si les règles de la plateforme l'exigent. Utiliser un langage clair et concis qui soutient l'accessibilité tout en laissant les visuels dominer le cadre.
Métadonnées de téléchargement : rédiger un titre descriptif avec des mots clés que les audiences recherchent réellement, une description concise résumant le scénario, et 3 à 6 tags couvrant le style de vie, les scènes, les produits et les avantages. Inclure la localisation et la langue, et définir les notes de licence ou de droits pour clarifier les conditions de réutilisation. Ajouter une suggestion de miniature sous forme d'image fixe pour guider l'interface lors de la sélection des visuels. Pour l'automatisation, se connecter à Soracom et au générateur de contenu interne générateur pour maintenir la cohérence entre les actifs et réduire la latence de publication.
Plan de test A/B : tester plusieurs dimensions - présence de sous-titres (avec ou sans), style de miniature (image fixe lumineuse ou plan d'action), rapport (9:16 ou 16:9), et durée (15 s ou 30 s). Hypothèses : les sous-titres augmentent les conversions d'une marge mesurable ; le rapport portrait améliore le CTR mobile ; une durée plus longue augmente le temps de visionnage moyen mais peut réduire le taux d'achèvement. Suivre la métrique primaire comme les conversions par vue, avec des métriques secondaires incluant le CTR, le taux d'achèvement et la durée moyenne de visionnage. Exécuter un cycle de 2 semaines avec une exposition aléatoire et égale entre les variantes, en utilisant une taille d'échantillon cible fixe (par exemple, 2 000–5 000 impressions par variante par semaine) pour atteindre une signification statistique, ou ajuster dès qu'un delta fiable est observé. Utiliser une interface intuitive pour sélectionner les variantes, attribuer les tests et suivre les progrès, tout en maintenant une liste de tâches claire pour éviter les paramètres obsolètes et maintenir les expériences alignées sur les segments d'audience et les préférences de style de vie. Employer un déploiement de démonstration pratique pour confirmer la ligne entre l'intention créative et la réponse mesurée, et examiner les résultats avec une équipe interfonctionnelle pour comprendre quelles modifications entraînent une réelle performance pour les audiences et les magasins distincts. Vérifier régulièrement les données et explorer les différences par région, appareil et catégorie de contenu pour capturer les variations des préférences visuelles et du ton de la langue.


