


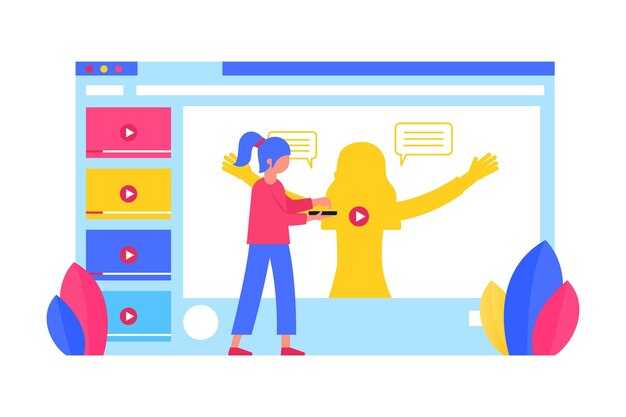
Planifica tu historia en cuatro pasos y carga plantillas prefabricadas en el editor para producir escenas generadas automáticamente. Este enfoque ayuda a cautivar a una audiencia con una narrativa cohesiva y una voz *personal* en toda la marca de tu empresa. El tiempo ahorrado aquí permite a tu equipo centrarse en la planificación, no en la manipulación de la configuración.
Elige plantillas diseñadas para contar historias rápidamente, asigna actores o avatares, selecciona escenas de fondo y organiza la secuencia de tomas. Mantén un flujo de edición activo mapeando el arco narrativo a la lista de pasos; define la forma y el ritmo de cada paso para que el resultado sea fluido en lugar de entrecortado. El editor debe ajustar la iluminación y el color a un estado de ánimo consistente, alineándose automáticamente con tu marca.
Busca la sincronización perfecta: dedica más tiempo a pulir el guion que a los ajustes técnicos y utiliza un ángulo personal para fortalecer la resonancia. Utiliza el tiempo de la empresa de manera eficiente agrupando la producción: esquematiza, genera, revisa, publica. Este enfoque reduce el tiempo de ciclo manteniendo la narración nítida y auténtica.
Almacena los recursos de origen en tu fuente y consulta material de fondo. Mantén un suministro constante de recursos y plantillas generados para que tu equipo pueda escalar, ya seas una pequeña empresa o una empresa con múltiples marcas. Utiliza pasos para mapear tu progreso: ideación, guion, lista de tomas, montaje, revisión, publicación.
Al planificar, apóyate en el editor para ensamblar escenas a partir de indicaciones claras, luego prueba con un grupo focal personal rápido. Si el primer corte no cautiva, revisa las plantillas, las opciones de actores y el fondo para que se ajusten mejor a la historia. Seguir estos pasos transforma un concepto inicial en un clip animado pulido en cuestión de momentos.
Aclarar formatos de entrada: texto plano, esquemas e indicaciones
Elige uno de los tres estilos de entrada para el flujo de trabajo: una copia simple y concisa; un esquema estructurado; o una indicación enfocada. Esto mantiene el *proceso* a alta velocidad y alineado con los hitos de marca, lo que facilita la *traducción* de ideas en recursos consistentes.
La prosa simple debe exponer el mensaje central en una sola pasada. Incluye la intención de la audiencia, los movimientos deseados y el tono. Adjunta notas para el uso del logotipo, la presencia del avatar y cualquier recurso de marca *ya* aprobado. Especifica el ángulo explicativo, el estilo de locuciones requerido y un breve plan de *audio*. Esta entrada puede *traducirse* en plantillas y, con ajustes menores, reutilizarse en múltiples publicaciones, garantizando la consistencia.
El formato de esquema debe enumerar secciones como objetivo, indicación de audiencia, acciones escena por escena y referencias de marca. Cada elemento actúa como un punto de control para el pipeline de *transformación*; asegúrate de tener puntos de referencia claros. Si tienes una biblioteca de plantillas, las secciones se mapean a las plantillas para una replicación rápida. Con un esquema organizado, puedes *crear* rápidamente variantes personalizadas y publicaciones que se mantengan alineadas con la marca, y realizar ediciones rápidas.
Las indicaciones deben ser precisas: especifica la persona del avatar, el tono de voz, el ritmo y las indicaciones exactas para guiar el motor del creador. Incluye detalles como el uso del color, la colocación del logotipo y los movimientos del avatar. Una indicación bien elaborada combina copias, indicaciones y referencias a recursos existentes; puede *traducir* la intención en una salida de estilo explicativo *al instante* y *transformar* ideas en escenas personalizadas. Usa plantillas para garantizar la consistencia entre canales y aplica *ajustes* rápidamente a las publicaciones *que hayas* publicado, de modo que cada versión se mantenga alineada con la marca.
Establecer estilo visual: tema, paleta de colores y tipografía
Recomendación: bloquea un solo tema y aplícalo a todos los clips para mantener la atención centrada. Aquí hay un enfoque preciso *utilizado* por los generadores en guías de inicio de blogs: establece una paleta controlada, establece una escala tipográfica estática y adjunta un flujo de trabajo impulsado por un convertidor que mapea colores y pesos de manera consistente, además de una rampa de color específica para guiar las conversiones. Utiliza controles estrictos para hacer cumplir la paleta y la tipografía. Crea una pequeña biblia de estilo sobre el diseño y el uso del color, luego aplícala a sus recursos para que cada publicación se sienta cohesiva, no incidental. Si necesitas ajustar, no reescribas cada recurso; en cambio, transforma las decisiones en pasos repetibles que el generador pueda reutilizar, una vez que bloquees las salvaguardas.
Paleta de colores: comienza con una tríada (primario, secundario, acento). Si necesitas un estado de ánimo más fuerte, agrega un color destacado para evitar escenas planas. Mantén un contraste accesible en todas las pantallas para respaldar la legibilidad durante largas sesiones y en diferentes dispositivos. Utiliza un *convertidor* para traducir las selecciones de color en LUTs o constantes de sombreado para las superposiciones. Rastrea el uso con una tabla básica: escena, rol, color y justificación. Esto ayuda al equipo de la empresa a alinear la creación y llegar a su público objetivo en su publicación y otras plataformas de manera completamente cohesiva.
Tipografía: establece una jerarquía tipográfica: encabezado, subencabezado, cuerpo; elige una o dos tipografías como máximo. Utiliza una cuadrícula de línea base consistente, una altura de línea precisa y un kerning; aplica una rampa de peso separada para enfatizar. Asegura la legibilidad a escalas de movimiento; usa solo dos fuentes como máximo para evitar el desorden. Documenta los tamaños de fuente exactos, las alturas de línea y el tono de color para cada rol, de modo que el aura de los colosianos no se filtre. En caso de duda, favorece la simplicidad y mantén su identidad en todo el proceso de creación.
Pasos prácticos: ejecuta una prueba en tres clips de diferentes longitudes para verificar la legibilidad y el ritmo. Mantén una barra de encabezado estática y las indicaciones de color para orientar al espectador y mantener la coherencia. Usa la nota aquí para guiar a los editores y mantener la guía alineada en el flujo de generación del blog. No olvides actualizar la biblia de estilo después de cada iteración y aplicar los cambios en otros proyectos para que el enfoque siga siendo coherente, completamente alineado con los objetivos iniciales. El objetivo no es un resultado único, sino un sistema reutilizable que transforma la materia prima en una secuencia cohesiva para su audiencia, lista para publicar como una publicación en otros lugares según sea necesario.
Definir especificaciones de video: resolución, velocidad de fotogramas, duración y relación de aspecto

Recomendación: Empieza con 1920x1080 a 30 fps como línea base principal; para formatos móviles o sociales, usa 1080x1920 (9:16) o 1080x1080 (1:1). Mantén los clips cortos (15 s, 30 s, 45 s, 60 s o 90 s), exporta los medios listos como MP4 con H.264 y audio AAC.
Opciones de resolución: basa en 16:9 para el flujo de trabajo del blog y del estudio, con 1280x720 como alternativa ligera y 3840x2160 para producciones de alta gama. Asegúrate de que los archivos seleccionados se alineen con el canal principal y evita el letterboxing no deseado; esto mantiene el fondo limpio y el personaje del primer plano nítido.
Velocidad de fotogramas: 24 fps ofrece una sensación cinematográfica, 30 fps se adapta a la mayoría de los flujos de trabajo, 60 fps es mejor para escenas con mucha acción. La opción que elijas debe equilibrar la fluidez del movimiento con el tamaño de la exportación; usa 30 fps como predeterminado y reserva 60 fps para secuencias que requieran realismo adicional.
Duración: Diseña introducciones de 15 s - 30 s, tutoriales de 30 s - 60 s o explicaciones de 90 s. Las piezas más largas se pueden dividir en una serie en el blog, manteniendo un ritmo de edición rápido; cada segmento debe tener un fotograma clave claro en una transición para mantener todo ajustado.
Estrategia de relación de aspecto: Comienza con 16:9 como marco principal; para los feeds sociales, prepara versiones 1:1 y versiones 9:16 para las historias. Prueba las previsualizaciones en diferentes dispositivos para asegurarte de que los elementos críticos permanezcan dentro de los márgenes seguros; si es necesario, usa un convertidor para traducir recursos y exportar variantes rápidamente.
Notas del flujo de trabajo: mantén el fondo mínimo para que el personaje y el mensaje resuenen; cuando edites, un enfoque básico que comenzó a ser realmente eficiente se basa en recursos listos y un ritmo constante de fotogramas clave. Esto combina medios, superposiciones de texto simples y cortes rápidos para producir una narrativa fluida en clics. Usa una carpeta de medios en el estudio para organizar archivos, asegúrate de que existan todos los recursos necesarios y exporta archivos listos que superen a las exportaciones antiguas.
Construir un mapa de escena: convertir texto en un storyboard y señales de escena
Recomendación: cree un guión gráfico de 6 a 8 paneles que capture el arco principal y luego bloquee el último cuadro como una llamada a la acción (CTA). Cada panel debe presentar un plano distinto, un fondo, un avatar y una indicación de acción concisa. Este enfoque mantiene el proyecto alineado, requiere atención a la calidad y acelera la producción al usar Colossyan Studio y activos premium. Tener un mapa claro en un solo documento lo convierte en un plano de trabajo vivo para el equipo, fácil de editar y compartir.
Flujo de trabajo y entregables
- Defina el objetivo: identifique la audiencia, las restricciones de la plataforma y la intención del último cuadro. Establezca un presupuesto de tiempo por toma (6-12 segundos) y reúna archivos de fondo, opciones de avatar y variantes de voz para que coincidan con el tono.
- Elabore la cuadrícula de escenas: 6-8 paneles, cada uno con una etiqueta de plano, fondo, pose de avatar, acción y una indicación de subtítulo o diálogo. Etiquete los cuadros claramente para simplificar la edición y mantener la selección cohesiva.
- Paso de conversores: mapee las notas narrativas en elementos visuales usando conversores; asigne una escena de fondo, elija un avatar y aplique indicaciones de movimiento; ajuste el tiempo para mantener los elementos visuales atractivos en todas las plataformas.
- Gestión de activos: recopile y organice imágenes de fondo, archivos de audio y activos de avatar; guarde en una carpeta de proyecto con nombres consistentes para acelerar el manejo durante el trabajo de etapa. Utilice activos ya creados para acelerar la producción.
- Selección de planos y ritmo (Consejos): seleccione de 5 a 7 planos principales: introducción, interacción, momento cumbre y primer plano; siga las prácticas de encuadre tradicionales y las transiciones sencillas para cautivar a la audiencia.
- Controles de calidad: verifique la gradación del color, la iluminación, la legibilidad de los subtítulos y la claridad del audio; asegúrese de que la secuencia apoye la voz y se alinee con el estado de ánimo del fondo.
- Entregables: produzca un PDF del guión gráfico y una hoja de indicaciones de escenas; mantenga una versión premium para revisión y una versión ligera para compartir en todas las plataformas y con la audiencia en Colossyan Studio.
Mantenga los archivos organizados y accesibles; compartir un mapa bien estructurado acelera la colaboración y garantiza que los elementos visuales finales permanezcan completamente alineados con la idea original, listos para ser aplicados al proyecto en cualquier plataforma compatible.
Integre audio: narración TTS, música y efectos de sonido
Recomendación: seleccione una voz TTS personalizada con cadencia natural y combínela con una pista de música breve y con licencia amigable; agregue uno o dos efectos de sonido sutiles para enfatizar los momentos clave, luego bloquee la mezcla antes de los carretes.
Los editores que transforman activos deben comenzar con una sola pista de narración y un breve resumen de audio. Utilice indicaciones para controlar el ritmo, el énfasis y las pausas. Utilice indicaciones de texto para controlar el ritmo, el énfasis y la pronunciación. El generador puede renderizar automáticamente, pero aún deberá revisar la precisión de la pronunciación, especialmente para los nombres de personajes y los términos de marca.
Asegure la consistencia entre los clips: establezca un volumen objetivo (por ejemplo, -16 LUFS) y aplique una compresión suave; use conversores para normalizar las frecuencias de muestreo a 44.1 kHz o 48 kHz. Un ligero corte de ecualización para ruidos graves y un suave realce de estantería alta en la voz ayuda a mantener la inteligibilidad cuando la música suena de fondo. Mantenga la pista de música entre 10 y 20 dB por debajo del diálogo.
Traduzca guiones a otros idiomas introduciendo texto en el mismo generador de narración y renderizando variantes de idioma. Esto preserva el carácter y el tiempo al tiempo que amplía el alcance. Cuando comience el trabajo multilingüe, mantenga una familia de voces para todas las localidades para preservar la consistencia de la marca.
Las pronunciaciones difíciles deben manejarse con una guía fonética y indicaciones explícitas para cada término. Puede aplicar una breve nota de pronunciación en la indicación y usar comprobaciones cortas y frecuentes durante la edición. Simplemente, mantenga un equilibrio que permita que el diálogo permanezca al frente y al centro mientras los sonidos complementan la acción en sí.
Consejos para evitar problemas comunes: audicione en los dispositivos de destino, reduzca el rango dinámico si los clips se reproducen en entornos ruidosos y confirme que los subtítulos se alinean con la narración. Los beneficios incluyen una producción más rápida, una marca consistente y un flujo de trabajo escalable para carretes que pueden traducirse a demostraciones sociales, de marketing y de productos.


