


Comienza con una recomendación concreta: reutiliza tus clips subidos en un hilo narrativo coherente que resuene con los clientes reales.
Define los roles en tu flujo de trabajo de producción en línea, estableciendo un bucle de iteración listo para construir que se ejecuta una vez que el material es capturado y viaja a través de tu canal.
Una vez que identifiques un tema central, crea un espectáculo a su alrededor con un toque personal que hable a las empresas y su lenguaje, utilizando elementos concisos como clips en pequeños fragmentos, subtítulos y llamadas a la acción claras.
A través de una estructura de tarea enfocada, identifica una solución rápida y repetible: extrae un momento que brille, combínalo con lenguaje legible y elementos en pantalla, y preséntalo como un espectáculo pequeño y compartible para canales en línea.
Utiliza historias personales para generar confianza; alinea la narrativa con el lenguaje de la marca y los roles humanos detrás de la producción, de modo que el resultado se sienta auténtico en todos los puntos de contacto en línea para empresas de cualquier tamaño.
La iteración importa: haz un seguimiento de qué clips subidos funcionan mejor, identifica qué elementos narrativos impulsan la participación, encuentra oportunidades para refinar el guion y las imágenes en consecuencia, alejándote de las conjeturas.
A través de una producción constante, creas una biblioteca en línea de espectáculos que pueden ser reutilizados, ahorrando tiempo y permitiendo a los equipos responder rápidamente a las tendencias y preguntas de los clientes.
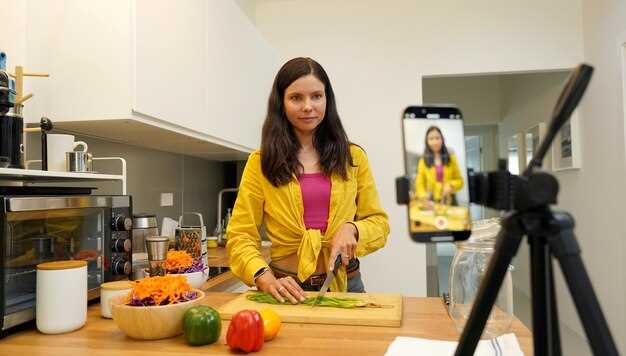
Pipeline de Producción UGC de Sora 2: Desde el Brief hasta el Publicado Vídeo
Comienza con un brief preciso y un registro de prueba para fijar la dirección antes de un rodaje completo. Define el tema, la audiencia, el responsable y una métrica de éxito vinculada a los beneficios. Prepara contenido que coincida con los formatos y establece tus expectativas.
Plan de contenido: asigna el equipo, determina los formatos y elabora la lista de tareas. Graba planos generales en formato panorámico y momentos de primer plano enfocados para capturar la emoción. Las imágenes fijas proporcionan contexto entre los segmentos, formando una secuencia similar a un libro.
Durante el rodaje, mantén el contexto coherente: alinea la dirección de la iluminación y el balance de blancos; elige un estilo visual que apoye el tema y la voz del responsable. El portador debe transmitir el mensaje por completo, como una voz de marca.
Enfoque de edición: aplica una gradación de color estándar; recorta a bloques ajustados; añade subtítulos; inserta imágenes fijas para el ritmo; fortalece la habilidad en el encuadre y el ritmo; realiza una prueba para comparar versiones y elegir el corte más efectivo; el resultado aporta un claro beneficio al contenido y a la eficacia.
Publica y mide: entrega en formatos compatibles con streaming; mantén las mismas relaciones de aspecto y las alternativas; monitoriza métricas y el aumento de beneficios. Las ideas extraídas del borrador inicial muestran qué ajustar después de cada lanzamiento.
| Etapa | Acciones Clave |
|---|---|
| Brief y Contexto | Define tema, responsable, audiencia; establece vínculo de beneficios; describe formatos; establece flujo de tareas. |
| Grabación y Rodaje | Asigna equipo; planifica temas; captura planos generales (panorámico) y de primer plano; reúne imágenes para contexto; crea secuencia similar a un libro. |
| Edición y Revisión | Aplica gradación estándar; recorta bloques; añade subtítulos; realiza prueba para comparar versiones; mantén el contenido enfocado y eficaz. |
| Publicación y Medición | Distribuye en formatos de streaming; admite relaciones de aspecto iguales y alternativas; monitoriza el impacto en los beneficios; ajusta después de recibir feedback. |
Segmentación: escribe un brief UGC de 15-30 segundos para TikTok vs Instagram Reels con elementos de prompt exactos
Recomendación: dos clips de 15-30 segundos, vertical 9:16, 30-60 fps. Comienza inmediatamente con un primer plano del producto; aparecen perros para un momento amigable; luego movimientos enérgicos y cortes rápidos. Utiliza iluminación brillante y un set limpio, ya sea en la tienda o construido en un set compacto. Después del gancho, describe el beneficio esencial en términos concisos; mantén momentos estáticos para énfasis; incluye una superposición de señal y una indicación final de "visitar tienda". Utiliza metraje de stock disponible o en locación; itera después de la primera toma y aprende de cada generación de ediciones; conoce las pautas para ambos formatos y adapta el encuadre en consecuencia.
Elementos de prompt para TikTok: ingresa al interior, construido alrededor de un equipo de 1-2 personas; incluye una aparición de perros para aumentar la energía; primer plano de las manos sujetando el producto, luego señalando una característica; los movimientos son rápidos pero controlados con 3-4 cortes rápidos; la iluminación es brillante y de alto contraste; describe los beneficios en dos líneas cortas; superpone texto con "novedades" y una señal simple de stock/oferta; velocidad 1.0-1.2x, objetivo de 15-30 segundos en total; termina con una llamada a la acción clara de visitar la tienda; utiliza una toma de stock si está disponible para apoyar la toma principal; después de comenzar, ejecuta ciclos de iteración para mejorar la comprensión y el flujo.
Elementos de prompt para Instagram Reels: comienza con un primer plano, luego transiciona a una vista más amplia que muestre el contexto; ritmo más lento que TikTok, pero todavía ajustado a 15-30 segundos; incluye superposiciones descriptivas y una narración corta que describa lo que se ve en el marco; la iluminación debe ser uniforme, con un relleno suave para evitar sombras duras; enfatiza la textura y el movimiento utilizando un enfoque constante y deliberado; presenta la aparición de un perro o un accesorio sutil para añadir encanto manteniendo el enfoque en el producto; muestra "novedades" en texto legible e incluye una línea de beneficio concisa; termina con una visita a la tienda y un recordatorio para obtener más información; mantén 30-60 fps para una reproducción fluida; asegúrate de que cada fotograma apoye el mensaje esencial y el ángulo competitivo sea claro.
Pautas comunes para ambos formatos: mantén la secuencia ajustada con un gancho fuerte en los primeros 2 segundos; utiliza primeros planos para describir detalles clave, luego expande a un plano estático o medio para establecer contexto; señala con un dedo o una mano hacia la característica para guiar la atención del espectador; incorpora un breve movimiento del equipo o ambiental para transmitir autenticidad; mantén el metraje de stock disponible como respaldo para mantener la velocidad de producción; firma la publicación con una señal clara y una indicación directa de visita; después de cada iteración, analiza las caídas de tiempo de visualización y ajusta la generación de prompts en consecuencia; siempre prueba ambos formatos para ver qué elementos convierten mejor, y ajusta el ritmo y los movimientos para mantenerte competitivo en los feeds.
Ingeniería de prompts: prompts listos para IA para generar testimonios auténticos en primera persona y demostraciones de productos
Recomendación: diseña prompts con una estructura de dos capas: voz base y tarea de escena. La voz base escribe en primera persona y genera contenido que se siente tradicional y creíble. La tarea de escena define dónde está el espectador, qué se muestra y el beneficio. Este enfoque cierra la brecha entre el guion escrito y la conversación real, produciendo piezas que se ven naturales cuando se filman como movimientos de boca y encajan en todas las plataformas. La separación también facilita la comprensión de su objetivo y permite ajustes rápidos para diferentes flujos de trabajo.
Los prompts deben ser concretos y evitar peticiones vagas. Especifica la audiencia, el contexto y el escenario del producto para reducir el tiempo de iteración. Entre prompts, adapta el tono a cada plataforma y al idioma objetivo. Esto amplía la visión de lo que se puede capturar y ayuda al escritor a evitar frases genéricas. Utiliza métricas o resultados específicos para que el espectador pueda imaginar el impacto real de inmediato.
Prompt de testimonio: "Eres una [persona cliente]. Recientemente usaste [producto]. Describe el problema, el momento en que te diste cuenta de que resolvía tu necesidad y el resultado en términos concretos. Escribe como si estuvieras hablando con un amigo, usando declaraciones en primera persona, ritmo natural y lenguaje sencillo. Incluye un resultado cuantificable y una sola advertencia. Típicamente, esto debería durar entre 60 y 90 segundos de habla. Comienza declarando por qué lo probaste y termina con una recomendación sincera."
Prompt de demostración: "Muestra el producto en acción en un solo plano claro. Enfócate en la pantalla y el resultado. Narra lo que ves allí mientras realizas los pasos, describe el flujo y evita afirmaciones vagas. Usa lenguaje sencillo y un ritmo natural; si es software, describe cada clic y transición. Incluye una llamada a la acción rápida con 'clic'."
Prompt de adaptación a plataforma: "Reescribe el testimonio para [plataforma], manteniendo los puntos centrales pero ajustando el lenguaje, la duración del plano y el ritmo para las plataformas. Sustituye el lenguaje vago por imágenes concretas y puntos de prueba. Adapta el tono a la plataforma y asegúrate de que el contenido se sienta creíble e inmediato."
Configuración visual: seleccione encuadres de cámara, ajustes preestablecidos de movimiento de smartphone y perfiles de iluminación dentro de Sora 2
Base: utilice una relación de aspecto de 9:16 para shorts, 16:9 para activos terminados y 1:1 para reels de marca. Enmarque desde el pecho hasta la coronilla, dejando espacio superior para que las caras permanezcan centradas durante el movimiento. Coloque los sujetos en el tercio superior y componga un círculo limpio de elementos de fondo para reforzar la marca. Lea las pautas en la aplicación para confirmar la compatibilidad de la relación de aspecto y luego refine el encuadre hasta que las imágenes permanezcan estables durante los movimientos de paneo.
Ajustes preestablecidos de movimiento de smartphone: elija entre tres estilos para crear imágenes coherentes: conversación estable para lo fundamental, dinámica ligera para la participación y temblor sutil con estabilización para un aspecto informal. Mantenga la distancia focal fija; evite los zooms agresivos. Establezca las curvas de movimiento en una rampa suave para que las transiciones se sientan naturales; ensaye un bucle rápido con algunas líneas y luego grabe varias tomas para comparar ángulos, eligiendo rápidamente los mejores fotogramas.
Perfiles de iluminación: tres modos cubren la mayoría de las habitaciones: luz diurna neutra (5200–5600 K) para la claridad del producto; ambiente cálido (3000–3500 K) para generar confianza; luz de acento de alto contraste (5600 K con una fuerte luz de fondo) para momentos de marca. Luz principal a 45° del sujeto, a 0.8–1.2 m de distancia; luz de relleno 1–1.5 pasos más suave; luz de borde para separar del fondo. Adapte la intensidad a la luminosidad de la habitación y compruebe si hay recortes en las luces; utilice un reflector para unificar las sombras en las caras. Nunca confíe solo en la luz ambiental en espacios tenues; añada un panel LED compacto si es necesario.
Ciclo de refinamiento: grabe tomas preliminares, luego itere rápidamente. Diseñe una verificación enfocada en el problema: alineación de la línea de visión, balance de color, exposición y tonalidad de la habitación. Después de cada pasada, exporte una vista previa rápida y compártala como datos base64 para revisión sin conexión. Asegúrese de que las imágenes se alineen con el círculo de marca estándar, manteniendo logotipos, fuentes y paleta de colores consistentes en todos los fotogramas. Si encuentra una discrepancia, adapte el ajuste preestablecido y vuelva a grabar la parte para mantener el ritmo intacto.
Consejos prácticos: en una sola toma, muestre varias relaciones de aspecto y ángulos para crear una biblioteca sólida. Use la detección automática de escenas para etiquetar buenas tomas; revise los metadatos para localizar los mejores clips y encontrar los que se alinean con los objetivos de la campaña. Grabe una vez, luego transforme la secuencia en posproducción y verifique la cohesión con el corte final. Use vistas previas respaldadas por http para compañeros de equipo y almacene una nota rápida con ideas de refinamiento para acelerar la iteración. Esto crea una ventaja competitiva y mantiene la coherencia visual en todos los activos.
Ajuste de audio: ajuste el tono de voz, el ritmo, las muletillas y añada ruido ambiental para una entrega con sonido nativo
Establezca la base con una entrega cálida y humana y un acento modesto; bloquee el ritmo a 120-150 palabras por minuto para clips de 30-60 segundos para maximizar la participación y la comodidad de visualización.
-
Tono de voz y acento: elija un tono que se sienta conversacional y emocionalmente creíble; mantenga el acento lo suficientemente sutil como para preservar la claridad entre audiencias. Use una ligera elevación de EQ en las altas frecuencias para dar aire, al tiempo que evita sibilancias duras. Asegúrese de que el tono completo se mantenga dentro de la apariencia y la sensación de la marca, para que los oyentes perciban una solución coherente en todos los activos.
-
Ritmo y énfasis: emplee cambios de tempo controlados para resaltar puntos clave; inserte pausas breves (0.25–0.5 segundos) después de las oraciones para guiar la comprensión. Para los detalles críticos, reduzca la velocidad en un 5-10% para mejorar la retención y facilitar el seguimiento del contenido tanto para marcas como para empresas.
-
Muletillas y respiraciones: apunte a menos de 3 muletillas por minuto; reemplace los segmentos con muchas muletillas por pausas intencionales y una respiración corta. Elimine adecuadamente las muletillas persistentes reescribiendo las indicaciones y fomentando una respiración natural; este cambio mejora la profesionalidad percibida y la participación.
-
Ruido ambiental y entorno: agregue un sonido ambiental sutil para anclar el diálogo; use ruido blanco o tono de sala a aproximadamente -20 dB en relación con la voz para preservar la inteligibilidad. Asegúrese de que la capa ambiental nunca enmascare la voz; pruebe en diferentes dispositivos para verificar que el entorno se sienta natural en lugar de artificial.
-
Duraciones y estructura: apunte a 30-60 segundos por activo para una visualización rápida; para explicaciones más profundas, mantenga los segmentos por debajo de 90 segundos con ganchos claros y una conclusión compacta. Naturalmente, los formatos más largos deben cambiar el ritmo para mantener la atención y evitar la fatiga.
-
Comprobaciones A/B y referencias: compare los resultados base con los ajustados utilizando una pista de referencia de la estrategia de campaña; rastree métricas como la tasa de finalización, la participación y el tiempo de visualización para cuantificar la eficacia. Utilice estas entradas para refinar el enfoque e iterar hacia la vanguardia de la estrategia de contenido.
-
Controles de calidad: compruebe si hay plosivas excesivas, ruidos bucales y volumen inconsistente; aplique una compresión suave para mantener un nivel completo y uniforme sin sonar robótico. Asegúrese de que la entrega se mantenga natural y emocionalmente equilibrada en diferentes dispositivos y condiciones de visualización.
-
Flujo de trabajo práctico: desarrolle un proceso repetible que comience con una comprobación rápida del tono, pase por ajustes de ritmo, luego termine con la reducción de muletillas y el ajuste del ruido ambiental. Mantenga un único archivo de referencia para la coherencia y documente las entradas de las guías de marca para respaldar la producción escalable para marcas y empresas.
-
Alineación de métricas: defina el éxito por métricas digitales como la duración de la escucha, los puntos de abandono y la repetición de visualizaciones; asegúrese de que la solución siga siendo escalable utilizando un marco constante de 30-60 segundos, con las mejoras rastreadas con el tiempo y alineadas con la estrategia de marca.
Exportación y prueba: códecs recomendados, relaciones de aspecto, archivos de subtítulos, metadatos de carga y un plan de prueba A/B para medir conversiones
Exporte dos perfiles: H.264 MP4 de 1080p para una amplia compatibilidad y una variante HEVC 4K para canales de alta gama, con audio AAC en el rango de 128-192 kbps. Utilice el espacio de color BT.709 y 29.97–30 fps, y mantenga ambos perfiles alineados en iluminación, imágenes y duración para simplificar las comparaciones. Mantenga una política de marca de agua limpia y sin distracciones y produzca fotogramas fijos como activos separados para miniaturas y demostraciones que respalden el flujo de trabajo de flujo continuo.
Guía de relaciones de aspecto: proporcione 9:16 para feeds móviles y 16:9 para ubicaciones de escritorio, además de recortes opcionales de 1:1 y 4:5 para contextos de cuadrícula o historias. Priorice una duración de 15 a 30 segundos para los feeds principales, con un techo de 60 segundos para demostraciones de productos o demostraciones de estilo de vida para ilustrar el contexto del producto. Verifique las recomendaciones de cada plataforma y adapte la relación de aspecto y la duración para mantener la legibilidad del texto en pantalla y los subtítulos, al tiempo que preserva el impacto de la toma en todas las escenas.
Archivos de subtítulos: genere sidecars SRT y VTT en paralelo, incrustando códigos de tiempo que se alineen con saltos de línea de no más de dos líneas. Describa las acciones en la primera línea de cada subtítulo, evitando líneas demasiado largas y conserve la puntuación para mejorar la legibilidad. Asegúrese de que los subtítulos estén sincronizados con imágenes fijas y en movimiento, incluidas las notificaciones de marca de agua si así lo exigen las reglas de la plataforma. Utilice un lenguaje claro y conciso que admita la accesibilidad y al mismo tiempo mantenga las imágenes dominantes en el encuadre.
Metadatos de carga: redacte un título descriptivo con términos clave que las audiencias realmente busquen, una descripción concisa que resuma la historia y 3-6 etiquetas que abarquen estilo de vida, escenas, productos y beneficios. Incluya la ubicación y el idioma, y establezca notas de licencia o derechos para aclarar los términos de reutilización. Agregue una indicación de miniatura como imagen fija para guiar la interfaz al seleccionar imágenes. Para la automatización, conéctese con soracom y el generador de contenido interno para mantener la coherencia en todos los activos y reducir la latencia en la publicación.
Plan de prueba A/B: pruebe múltiples dimensiones: presencia de subtítulos (con vs. sin), estilo de miniatura (foto fija brillante vs. toma de acción), relación de aspecto (9:16 vs. 16:9) y duración (15 s vs. 30 s). Hipótesis: los subtítulos aumentan las conversiones en un margen medible; la relación de aspecto vertical mejora el CTR móvil; una mayor duración aumenta el tiempo de visualización promedio pero puede reducir la tasa de finalización. Rastree la métrica principal como conversiones por vista, con métricas secundarias que incluyen CTR, tasa de finalización y duración promedio de visualización. Ejecute un ciclo de 2 semanas con exposición aleatoria e igual entre variantes, utilizando un tamaño de muestra fijo objetivo (por ejemplo, 2000-5000 impresiones por variante por semana) para alcanzar la significancia estadística, o ajústelo tan pronto como se observe una delta confiable. Utilice una interfaz intuitiva para seleccionar variantes, asignar pruebas y monitorear el progreso, al tiempo que mantiene una lista de tareas clara para evitar configuraciones obsoletas y mantener los experimentos alineados con los segmentos de audiencia y las preferencias de estilo de vida. Emplee una implementación de demostración práctica para confirmar la línea entre la intención creativa y la respuesta medida, y revise los resultados con un equipo multifuncional para comprender qué cambios impulsan el rendimiento real para audiencias y tiendas distintas. Consulte los datos regularmente y explore las diferencias por región, dispositivo y categoría de contenido para capturar variaciones en las preferencias visuales y el tono del lenguaje.


