
Por dónde empezar: mapea tomas a un storyboard, elige las relaciones de aspecto de salida (las más comunes: 16:9, 9:16, 1:1) y elabora un breve resumen conciso que ancle la iluminación, el ambiente y el movimiento.
Esta fusión beneficia a aficionados y profesionales: la alineación temprana entre cineastas e ilustradores asegura la continuidad, mientras que la IA se encarga de la animación y la profundidad, permitiendo pases de style3d que preservan la lógica espacial entre escenas.
Define indicaciones específicas: iluminación, direcciones de cámara, giros de movimiento y cambios de perspectiva, luego ejecútalas a través del flujo de IA sin desviarte, mientras que esos controles virtuales te ayudan a verificar cada fotograma para limitar las preguntas más adelante en el proceso.
Para escalar, simplifica el bucle: los activos modulares y una biblioteca de prompts reutilizables reducen el tiempo de iteración, manteniendo la mayor parte del aspecto central en todas las bobinas. Utiliza una línea de producción style3d para mantener la profundidad constante y confía en cámaras virtuales cuando corresponda para simular movimientos complejos sin agotar los recursos.
Creación de vídeos cinematográficos con IA a partir de bocetos: guía práctica
Comienza con un boceto claro como fuente de entrada y un prompt de alcance limitado para dirigir el movimiento, la iluminación y el sonido generados por IA; esto permite la personalización y prepara el escenario para prototipos que puedes validar antes de la producción completa.
Mapea el lenguaje visual listando estilos y personajes desde el principio; almacena prototipos en una biblioteca para un acceso rápido, permitiendo renders repetibles con un solo prompt. Utiliza una línea de producción generada por IA que pueda integrar activos, movimiento y sonido para mantener el flujo de trabajo personalizable.
Adopta una mentalidad de "diseño sí" para acelerar la iteración en elementos visuales, ritmo y estilos, de modo que puedas reemplazar un motivo rápidamente sin desestabilizar la estructura de la escena. Itera sobre el equilibrio de color utilizando un flujo de trabajo simulado similar a un aerógrafo para aumentar el realismo y preservar la creatividad.
Establece la elección del modelo comparando pruebas a pequeña escala con una línea base para cuantificar los resultados de visualización; esto revoluciona la forma en que los equipos traducen bocetos a ambiente y acción. Ofrece resultados predecibles, luego añade refinamientos según sea necesario, donde el equilibrio entre control y espontaneidad es importante. Mantén un flujo de trabajo que opere sin estancamiento y que abrace bucles de retroalimentación continuos.
Mantén una biblioteca flexible de activos personalizados, con etiquetas de metadatos para estilos, ubicaciones y personajes. Crea conectores a puntos finales de API para poder integrarte con líneas de producción existentes para una iteración rápida, asegurando que los resultados generados por IA se alineen con el ambiente y el ritmo objetivo. Rastrea los resultados en un panel de visualización ligero para detectar desviaciones y mantener la sincronización del sonido bajo control.
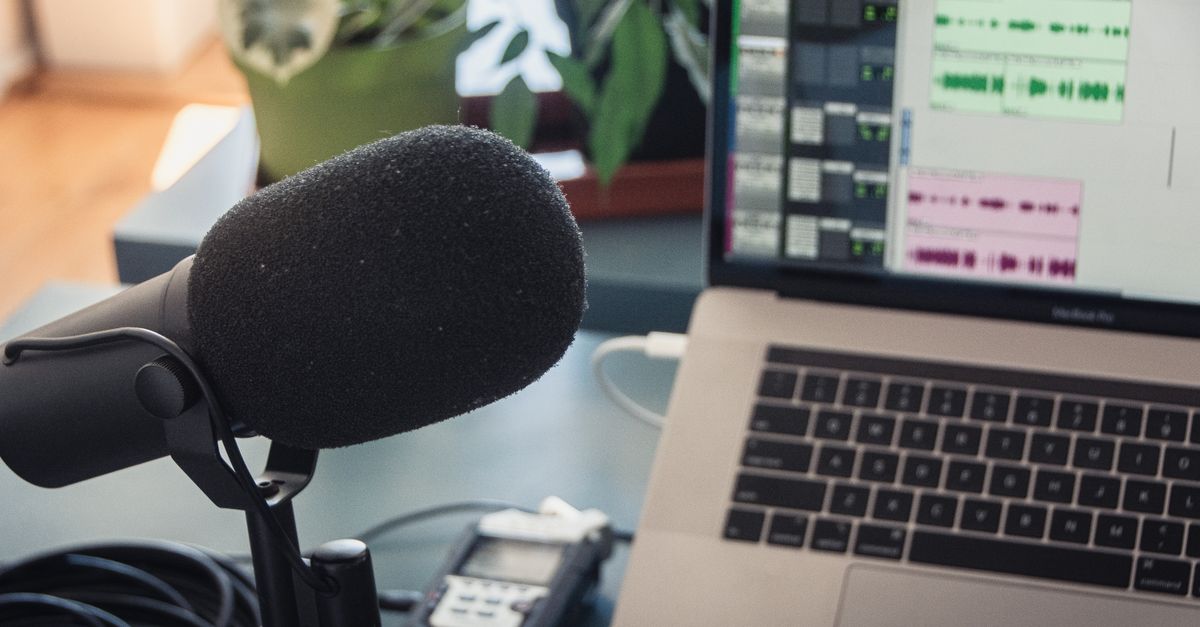
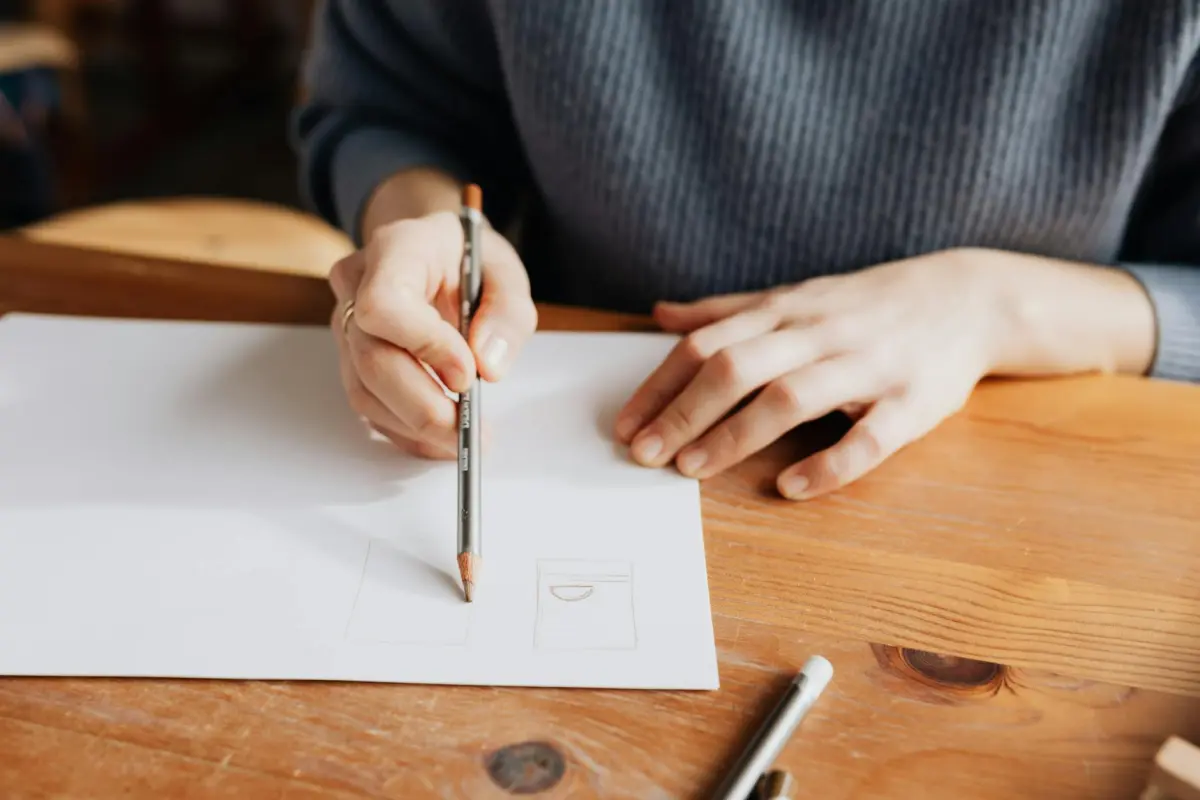
Prepara entradas de boceto claras y selecciona un generador de vídeo de IA compatible
Elige una herramienta que acepte líneas de entrada nítidas y admita la transferencia inmediata a movimiento. Para resultados del mundo real, verifica que el motor pueda mapear los trazos a primitivas de movimiento sin distorsión.
Asegúrate de que las entradas de línea base sean limpias: trazos audaces, espaciado consistente y alto contraste para simplificar el reconocimiento por el modelo de IA. Evita el sombreado que pueda confundir la detección de bordes.
Las opciones de exportación deben incluir PNG y SVG o contornos vectoriales para que los elementos visuales escalen en todas las opciones de relación de aspecto. Esto mantiene los elementos visuales nítidos al cambiar entre formatos de 16:9, 9:16 o cuadrados.
Selecciona un generador con vista previa en tiempo real y sincronización de labios. Aceleran las iteraciones y reducen las conjeturas para medios que necesitan la alineación del habla con las bocas de los personajes.
Explora flujos de trabajo preconstruidos alrededor de firefly y doodly como punto de partida. Permiten la transferencia rápida de conceptos de bocetos a secuencias animadas, manteniendo el control a través de prompts.
Elabora prompts que describan el color, la iluminación, el ángulo de la cámara y el movimiento, anclando los elementos visuales a un punto específico del boceto. Utiliza plantillas en la herramienta para guiar la redacción y escribe prompts concisos para simplificar el proceso creativo.
Piensa en niveles: las opciones orientadas a la educación ofrecen resoluciones más bajas y prompts limitados, mientras que los niveles profesionales abren salida de mayor resolución, más prompts y procesamiento más rápido, manteniendo la velocidad en las iteraciones.
Integra el audio desde el principio: alinea el tempo de la música con los ritmos del movimiento y habilita la sincronización de labios para que las líneas de diálogo se sigan de forma natural. Esto reduce el posprocesamiento y mantiene el ritmo con el entregable final de los medios.
Considera la alineación de la relación de aspecto y los elementos visuales: decide la relación de aspecto desde el principio, establece la velocidad de fotogramas y planifica las exportaciones para los canales de distribución. Los prompts preconstruidos se pueden ajustar para adaptarse a 16:9, 9:16 o 1:1 sin tener que replantear el concepto.
Piensa con antelación con una hoja de ruta de 10 meses para un proyecto: mapea hitos a resultados educativos y reutiliza el flujo de trabajo en múltiples escenas. Transfieren conocimiento entre equipos de cineastas y animadores, abriendo posibilidades.
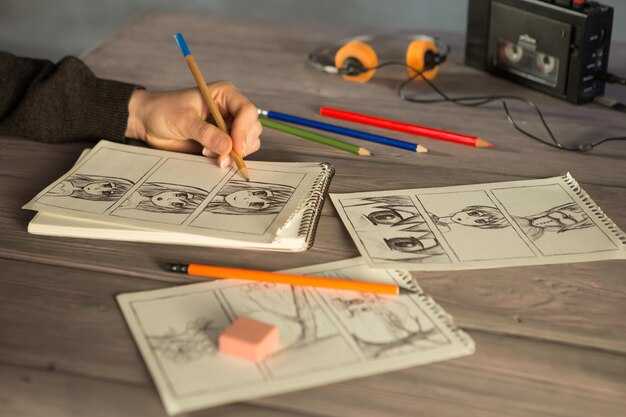
Convierte bocetos en una lista de planos y un storyboard para la renderización de IA
Recomendación: Comienza extrayendo bocetos en papel y mapeando cada indicación a una lista de planos, luego ensambla un storyboard que empareje los elementos visuales con los prompts. Esta transferencia de ideas del papel a los cuadros acelera la renderización de IA y mantiene intacta la intención creativa.
Define parámetros centrales antes de redactar los cuadros: relaciones de aspecto (16:9, 9:16, 1:1), tamaños de cuadro y lenguaje de movimiento, incluida la velocidad. Para cada elemento, anota el objetivo de la escena, el ángulo de la cámara y el tipo de transición. Construye un bucle de prototipado: prueba renders de boceto a vídeo, ajusta los prompts y ajusta la alineación con tu visión. Este enfoque apoya especialmente la creatividad bajo plazos ajustados.
Desarrolla una plantilla de lista de planos que el generador de IA pueda leer: campos para escena, descripción, tipo de cuadro (primer plano, plano medio, plano general), relaciones de aspecto, velocidad, trayectoria de movimiento, notas de iluminación y prompts. Mantén una columna de variaciones separada para capturar tomas surrealistas. Utiliza esto como la columna vertebral para compartir medios y activos de marketing.
Utiliza variaciones: para cada cuadro, explora paletas de colores, texturas y curvas de movimiento para crear variaciones surrealistas. Ideas de prompt: cambios de iluminación, superposiciones oníricas y transiciones inesperadas. Itera en un bucle de prototipado y elige los mejores resultados para el storyboard.
Los entregables incluyen un storyboard final, una lista de planos cuadro a cuadro y un paquete de prompts listo para el generador de IA. Utiliza el flujo de trabajo reelmind para almacenar medios, rastrear iteraciones y permitir compartir con equipos de marketing y medios. Si pruebas con firefly, adapta los prompts por toma para comparar los resultados. Esto apoya activos de marketing más rápidos y consistencia de marca, al tiempo que permite que la creatividad fluya a través de la transferencia de papel a pantalla.
Establece una línea de producción repetible: boceto → vídeo con IA → edición y gradación de color
Adopta una plantilla fija y repetible: convierte el boceto en un vídeo con IA utilizando una biblioteca de prompts única, manteniendo la consistencia en el color y el ritmo, luego comienza la edición y la gradación de color en una línea de tiempo limpia y consistente. Además, almacena los activos en una estructura de archivos dedicada con una carpeta de entrada y una de salida para evitar desviaciones.
- Andamiaje de entrada
- Establece la velocidad de fotogramas (24 o 30 fps) y la relación de aspecto (16:9 o vertical); define la duración base y los fotogramas clave para anclar el storyboard.
- Compila una lista de ideas con tonos cómicos y caprichosos; especifica referencias de movimiento, ángulos de cámara y indicaciones de iluminación para guiar tanto la generación de IA como las ediciones posteriores.
- Organiza los prompts y activos en un archivo base; separa los bocetos en una carpeta claramente etiquetada para una reutilización rápida.
- Generación de vídeo con IA
- Ejecuta un lote de 3 a 6 variaciones utilizando una biblioteca de prompts consistente; bloquea la configuración de renderización para obtener un color e iluminación estables en todas las salidas.
- Evalúa las variaciones en cuanto a continuidad de fotogramas y alineación con el storyboard; elige la mejor coincidencia y exporta un vídeo base a un archivo de montaje.
- Mantén la trama de los elementos visuales aplicando un lenguaje de cámara uniforme y señales de iluminación en todas las variaciones.
- Edición y gradación de color
- Importa a un editor profesional; coloca los clips en una sola línea de tiempo y córtalos para mantener un ritmo ajustado hacia el arco narrativo.
- Aplica la gradación de color utilizando LUTs y ajustes manuales para unificar el tono; adapta los ajustes a la estilización digital o 3D elegida (style3d, aspecto cómico).
- Añade voz en off, efectos de sonido y música para realzar el ambiente; asegúrate de la sincronización con los ritmos de movimiento y las transiciones de fotogramas.
- Comprueba la sincronización de audio, la continuidad y los artefactos; verifica que cada fotograma mantenga la idea y la estética deseadas.
- Documenta los ajustes en un manual conciso y crea una lista de verificación rápida para los próximos ciclos; implementa pases de renderizado más rápidos para aprobaciones.
- Registra los comentarios en un archivo central y aplica los cambios al siguiente lote para aumentar la eficiencia.
- Archiva los masters, proxies y archivos de proyecto con una nomenclatura coherente; registra las versiones de las herramientas y la configuración de renderizado en un archivo dedicado.
- Entre iteraciones, conserva al menos una variación caprichosa y una variación más moderada para expandir las ideas.
- Comparte un breve resumen con los compañeros de equipo para alinear objetivos y mantener estándares profesionales.
Utiliza la IA en tu flujo de trabajo: cuándo confiar en la IA frente al refinamiento manual
Comienza con la IA para generar imágenes y animaciones base automáticamente, ten un concepto claro y una resolución alcanzable; reserva el refinamiento manual para la textura, la sincronización y el movimiento sutil.
La IA puede capturar ideas rápidamente en el papel y convertirlas en renderizados aproximados, incluidas secuencias surrealistas, pero la gradación de color y la profundidad deben ajustarse manualmente para evitar un aspecto plano.
Las plataformas con herramientas personalizables te permiten adaptar animaciones y visuales; la IA puede automatizar la alineación para la sincronización de labios y la sincronización de voz en off, mientras que un toque humano perfecciona la dicción y el estado de ánimo.
Resolución y pipelines de renderizado: ejecuta pases de etapa de IA para acelerar el proceso, luego renderiza las secuencias finales a alta resolución después de los ajustes manuales.
Flujo de trabajo editorial: dentro de una sola sesión, las ideas que dibujas en el papel, convertidas en escenas digitales, luego refinadas: balance de color, sombras y detalles de textura.
Colaboración con profesores y directores: comparte borradores de IA en la plataforma, solicita comentarios e itera hasta que las imágenes vendan el concepto.
Implementa controles de calidad: movimiento, continuidad, sincronización de audio y coherencia visual
Ejecuta un pase de control de calidad automatizado inmediatamente después de renderizar utilizando un módulo de software especializado que marca el jitter del movimiento, la deriva de la continuidad, la desalineación del audio y los cambios de color en las secuencias. Elige una línea base de proyectos anteriores y adapta los umbrales según el aspecto y el objetivo de entrega; produce un informe limpio con etiquetas de aprobado/fallido y un resumen listo para compartir para flujos de trabajo de publicidad e Instagram.
Verificación de movimiento: mide el movimiento por fotograma con flujo óptico o coincidencia de bloques; calcula el desplazamiento RMS y el momento a través de los fotogramas. Movimiento RMS aceptable: 0.3–0.6 px por fotograma para segmentos estables; hasta 1.0–1.5 px para movimientos rápidos tipo garabato, más de 1.5 px activan alertas. Si aparecen picos, activa automáticamente la estabilización o ajusta el tiempo del fotograma; conserva los puntos de inflexión que señalan movimiento intencional.
Verificación de continuidad: rastrea la iluminación, la temperatura del color, las sombras y la exposición a través de las transiciones. Utiliza una curva de referencia limpia y la coincidencia de histogramas para mantener una apariencia constante entre tomas. Busca desajustes en los puntos de inflexión o cambios de perspectiva que rompan el impulso; asigna una puntuación de continuidad de 0 a 1, y aplica automáticamente una LUT personalizada si la puntuación cae por debajo de 0.8, lo que indica la necesidad de una alineación de gradación de color.
Sincronización de audio: ejecuta la correlación cruzada entre la forma de onda de audio y las señales visibles (movimiento de labios o sílabas coincidentes). Establece una tolerancia dentro de ±25 ms para el habla, ±40 ms para momentos críticos de sincronización de labios y ±60 ms para señales ambientales. Asegura la alineación en toda la secuencia; si se detecta deriva, ajusta la línea de tiempo o vuelve a codificar el audio con un ligero remuestreo; genera un registro que muestre la distribución del desplazamiento y las correcciones recomendadas.
Coherencia visual: aplica un único pipeline de diseño que cubra color, grano, brillo y suavidad de bordes. Bloquea las relaciones de aspecto y evita los recortes a mitad de secuencia; aplica la coincidencia de histogramas para mantener el balance de color entre escenas; verifica la coherencia de la textura en papel, tela y líneas de garabato; mantén la coherencia del movimiento y la iluminación, incluido el movimiento de giro y la búsqueda de desajustes tentativos. Utiliza una métrica perceptual como SSIM para apuntar por encima de 0.92 para segmentos limpios.
Integración del flujo de trabajo: ensambla una plantilla de CQ lista con métricas como movimiento_rms, puntuación_continuidad, desplazamiento_sincronización_audio y puntuación_coherencia_visual. Exporta los resultados como JSON y adjúntalos a los metadatos del activo; ofrece sugerencias específicas con puntuaciones numéricas y un conjunto de acciones correctivas; permite simplificar compartiendo los resultados con equipos que manejan activos publicitarios y publicaciones de Instagram.
Automatización y personalización: establece umbrales predeterminados por aspecto, luego permite que proyectos especializados adapten los valores; aplica algoritmos personalizados que ajustan el comportamiento por escena automáticamente; devuelve un informe limpio y listo para la toma de decisiones; ofrece opciones como aprobado o necesita revisión y conversión a especificaciones específicas de la plataforma.
Análisis e iteración: rastrea el impulso del movimiento, los puntos de inflexión y la consistencia de la textura en un bucle impulsado por el diseño. Esas ideas ayudan a simplificar los pipelines creativos, convirtiendo garabatos en secuencias pulidas listas para compartir; la magia ocurre cuando un control de calidad de precisión eleva los activos finales para campañas publicitarias y feeds de Instagram.