
Recomendación: planifica una configuración concreta y específica que priorice el consentimiento, el manejo de datos y la claridad de la licencia. Elige una herramienta con términos transparentes, procesamiento local u opciones de nube auditables, y controles de eliminación sencillos. Si tienes intención de compartir los resultados, documenta el alcance del proyecto y obtén la aprobación explícita para usar medios de los participantes, garantizando beneficios para todas las partes interesadas y evitando sorpresas para ellos.
Las características clave a evaluar incluyen enmascaramiento preciso, calidad de salida ajustable y un flujo de trabajo de *vista previa* simplificado que confirma los resultados en segundos. La mejor herramienta admite la carga *fácil* de medios, acepta el procesamiento por lotes y ofrece una ruta de exportación sencilla que te permite reutilizar la configuración para tus trabajos futuros, maximizando la eficiencia. Las *características* que elijas también deben alinearse con los objetivos de *aprendizaje* de tu equipo y los requisitos *seleccionados* del proyecto.
Para limitar la desinformación, prefiere soluciones que muestren la procedencia del modelo, divulgaciones y marcas de agua opcionales o metadatos que indiquen las ediciones. El flujo de trabajo seleccionado debe incluir controles de consentimiento, notas claras sobre la procedencia y un rastro sencillo de las ediciones, apoyando el aprendizaje y la práctica de legado responsable en todos los equipos.
Los planes de pago a menudo abren opciones máximas de salida, retención más larga y acceso a API para la automatización. Busca recursos de aprendizaje estructurados, conjuntos de datos de ejemplo y una lista de preguntas para hacer antes de la adopción. Alinea tu biblioteca de plantillas con la marca seleccionada y los estándares de edición de legado para mantener tu trabajo coherente en proyectos futuros, al tiempo que obtienes beneficios concretos para tu audiencia.
Al publicar en canales de distribución, asegúrate de tener los derechos para usar el material y proporciona claramente la configuración de privacidad a tu audiencia seleccionada. Si surgen preguntas sobre legalidad o ética, consulta la documentación y los metadatos que acompañan a cada archivo, y mantén un registro de las decisiones para respaldar la transparencia y la confianza, protegiendo tu proyecto de interpretaciones engañosas.
Esquema práctico para una guía rápida de intercambio de rostros de alta calidad
Comienza con una selfie de alta resolución y un retrato objetivo, cárgalos en la plataforma, habilita la alineación automática y guarda una línea base generada antes de los refinamientos.
Preparación de activos: Sube selfies claras con expresiones neutras; nombra los archivos claramente (selfie-fuente, retrato-objetivo); selecciona la orientación izquierda si es necesario; revisa las sombras alrededor de la mandíbula y la boca para evitar uniones.
Editar y refinar: Usa controles simples para ajustar el balance de color, la mezcla de bordes y la alineación de puntos de referencia; revisa los resultados generados, compara con los originales y ajusta las luces; en el caso de sujetos femeninos, ajustes sutiles en las cejas y los labios mejoran el realismo; evita el exceso de suavizado para mantener la textura natural.
Flujo de trabajo con inswapper: Esta plataforma viene con herramientas y preajustes; los créditos se rastrean por creador; puedes usarlos para acelerar la producción; mira los looks recomendados y elige nombres que reflejen el tono; edita con el editor integrado y luego guarda como una nueva versión.
Plan de exportación: Exporta la salida de alta resolución, guarda una copia localmente y conserva metadatos como nombres de origen y notas de edición; puedes iniciar sesión o usar el modo invitado si está disponible; se pueden compartir con la comunidad si se permite.
| Paso | Detalles |
|---|---|
| 1. Prepara los activos | Selfie y retrato objetivo de alta resolución subidos; nombra los archivos claramente; establece la orientación izquierda si es necesario. |
| 2. Alinea y previsualiza | Usa la alineación de puntos de referencia; verifica el ajuste de la mandíbula y la boca; inspecciona las sombras y la mezcla de bordes. |
| 3. Genera y ajusta | Ejecuta la generación, revisa los resultados, ajusta el balance de color, las sombras y las mezclas de bordes; repite una o dos veces. |
| 4. Edita y revisa | Usa las herramientas de edición para refinar los looks; asegúrate de la simetría y la textura natural; compara con los originales. |
| 5. Guarda y créditos | Guarda con nombres descriptivos; registra los créditos; anota la plataforma utilizada y los IDs de los creadores; sube a la carpeta del plan si es necesario. |
Gracias a la plataforma e inswapper por proporcionar herramientas sencillas para producir resultados pulidos.
Elegir la plataforma gratuita adecuada: compatibilidad y límites
Elige un motor oficial basado en navegador con notas de compatibilidad claras y límites transparentes para mantener tu proyecto rápido y predecible para la creación futura.
La compatibilidad depende de los formatos de material de entrada aceptados (MP4, MOV o clips comunes), la resolución máxima y los controles de generación. Prefiere opciones que se mantengan de manera fiable entre 24 y 60 fotogramas por segundo, proporcionen un identificador para que las sesiones reproduzcan los resultados de tu material original y mantengan el procesamiento integrado para minimizar la latencia.
Los límites varían: techos de generación diaria, marcas de agua, ventanas de retención de datos y si el procesamiento se realiza localmente dentro del navegador o en la nube. Si necesitas más capacidad, la opción de compra debe presentarse claramente y no ocultarse detrás de términos oscuros.
Comprobaciones prácticas: revisa la documentación oficial sobre los formatos admitidos, prueba con clips cortos para evaluar la alineación y la iluminación, y haz clic en la configuración para ajustar la resolución y la velocidad de fotogramas. Este flujo de trabajo sencillo puede mejorar tu creación, convirtiendo la exploración en una aventura, ayudándote a lograr el aspecto ultra suave que deseas, con los ojos mantenidos en la alineación adecuada.
Preparación de rostros de origen y destino: consejos para una alineación óptima
Comienza con una toma frontal y neutra de la cabeza con mirada fija; esto mejora inmediatamente la precisión de la alineación y reduce la deriva entre generaciones.
- Calidad del material y captura: Utilice material de origen y destino de alta resolución con orientación frontal y expresión neutra. Grabe a una altura de 3000–4200 px; PNG conserva los bordes y previene artefactos de compresión, lo que ayuda mucho a la detección de puntos de referencia y permite una edición rápida para lograr puntos de referencia consistentes en varias generaciones. Esto también garantiza que tenga material que ahorra tiempo en trabajos posteriores.
- Iluminación y color: Iluminación difusa y uniforme desde múltiples ángulos; evite sombras duras que oculten puntos clave. Mantenga la iluminación dentro de +/- 1 punto en ambas tomas y establezca un balance de blancos consistente (aproximadamente 5500–6000 K). Para flujos de trabajo de macOS, exporte en sRGB para preservar la precisión del color y minimizar sorpresas posteriores.
- Encuadre y distancia: Centre la cabeza en el encuadre y llene aproximadamente entre el 60% y el 80% del espacio vertical para ambas muestras. Mantenga una distancia de cámara similar para minimizar las diferencias de escala; esto ayuda a evitar la necesidad de un posprocesamiento extenso y mantiene estable el trabajo de alineación para muchas generaciones.
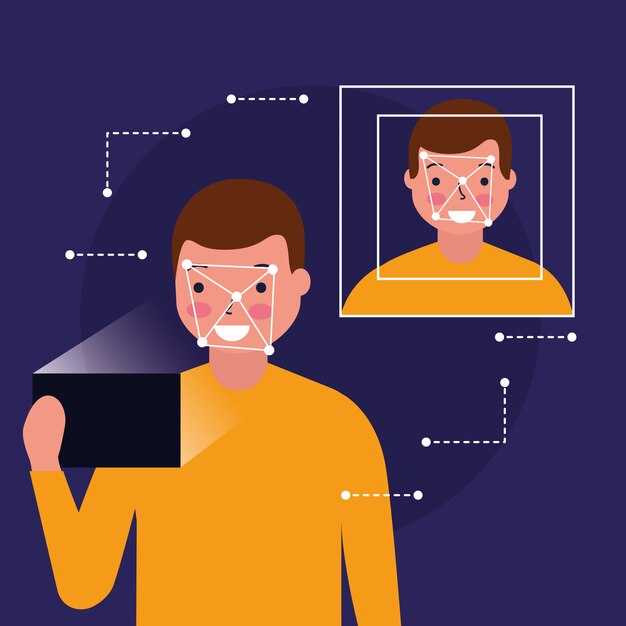
- Visibilidad de los puntos de referencia: Asegúrese de que ambos ojos, la punta de la nariz y las comisuras de la boca sean claramente visibles; elimine las oclusiones por cabello o gafas siempre que sea posible. Capture un poco de mejilla y mandíbula para ayudar a una detección sólida y reducir el riesgo de bloqueo en regiones esenciales.
- Fondo y desorden: Utilice un fondo liso y sólido y evite texturas o patrones que puedan confundir la detección de puntos de referencia. Un entorno limpio bloquea las distracciones y mejora la fiabilidad de los resultados de la alineación.
- Accesorios y apariencia: Mantenga el cabello alejado de las sienes, minimice las joyas reflectantes; si las gafas son necesarias, utilice lentes antirreflejos o inclínelas ligeramente para evitar reflejos que bloqueen puntos importantes.
- Nomenclatura y metadatos: Nombre los archivos claramente (material_fuente.png, material_destino.png) y adjunte notas que describan la pose, la iluminación y la distancia. Adjuntar estos detalles ayuda a la educación y al trabajo futuro, y facilita que otros revisen su proceso.
- Formato y gestión del color: Guarde en PNG o JPEG de alta calidad con un perfil sRGB; evite la compresión pesada que introduce artefactos. Utilice siempre material sin marca de agua para evitar que la marca interfiera con la alineación.
- Configuración y ajuste de parámetros: Comience con una tolerancia de alineación moderada, mantenga la escala cerca de 1.0 y limite la deriva de rotación. Guardar estas configuraciones garantiza la consistencia en trabajos futuros y simplifica las generaciones repetidas.
- Prueba e iteración: Ejecute 2 o 3 generaciones de prueba para verificar la alineación; ajuste el recorte o la colocación de los puntos de referencia según sea necesario. Este paso de aprendizaje evita la pérdida de tiempo y mejora las habilidades con el tiempo.
- Carga y almacenamiento: Mantenga los originales en un bloque separado antes de cargarlos; utilice una carpeta dedicada para evitar confusiones y sobrescrituras accidentales. Guardar copias de seguridad es esencial para el trabajo continuo y mantiene su material organizado.
- Ética, licencias y calidad del flujo de trabajo: La educación y el uso responsable protegen su legado y la confianza de la audiencia; asegúrese de tener los derechos para editar y reutilizar el material. Si no está seguro, no continúe y busque permiso.
- Comprobación de calidad antes del uso final: Verifique que no haya marcas de agua y que no haya artefactos en la superposición de puntos de referencia. Las fuentes sin marca de agua evitan distracciones y garantizan que el resultado sea épico para contextos de entretenimiento.
Este enfoque realmente le ayuda a aprender rápidamente, a optimizar su flujo de trabajo de manera eficiente y a obtener resultados fiables en segundos. Gracias por leer; si desea más orientación, suscríbase para recibir actualizaciones o considere la compra de activos verificados. Los memes pueden ser útiles para pruebas rápidas, son atractivos y educativos; no se salte la preparación, solidifica la base de su trabajo y apoya un legado de alta calidad.
Cambiar caras en vídeos: guía rápida paso a paso
Paso 1 – Definir el objetivo y las restricciones legales. Si ha iniciado un proyecto creativo, confirme los permisos de los clips de origen y los participantes. Esto previene el mal uso y protege su reputación.
Paso 2 – Elija su pila tecnológica y arquitectura. Normalmente dependerá de herramientas locales para mantener el control, no de motores en la nube. Cree una biblioteca de activos de muestra y notas; esto ayuda a la consistencia entre proyectos y al resultado final.
Paso 3 – Recopilación de datos: material de origen, iluminación y variedad de sujetos. Incluya múltiples ángulos, expresiones y escenas de playa para probar. Esta diversidad mejora los modelos de aprendizaje profundo más adelante.
Paso 4 – Preparación de máscaras y mapas de alineación. Calibre los puntos de referencia y cree una máscara de mapeo; utilízala para regular cómo se transfiere la apariencia. Esto sienta las bases para una salida fluida y una clonación exitosa de la apariencia.
Paso 5 – Ejecución del pipeline de alineación y mezcla. Verifique que las fuentes se alinean bien; luego, mezcle los bordes para reducir las uniones. Genere una representación inicial para su revisión.
Paso 6 – Comprobación de calidad y nitidez. Compare el color, el tono y la consistencia de los bordes. Si es necesario, afile las texturas y ajuste la gamma para reducir las bandas. Esto ayuda a que el resultado final se vea natural en diferentes dispositivos de reproducción.
Paso 7 – Exportación y revisión de funciones. Guarde múltiples variantes: ultra-limpia, de gama media y una salida conservadora para satisfacer diferentes necesidades del proyecto. Incluya metadatos, etiquetas de versión y un registro para referencia futura. Esto proporciona una biblioteca sólida para aventuras futuras.
Paso 8 – Solución de problemas y ética. Si aparecen artefactos, ajuste las máscaras, el difuminado o la dilatación; vuelva a ejecutar con parámetros ajustados. Considere siempre el consentimiento, los derechos y el posible mal uso. Ya sea que comparta resultados públicamente, asegúrese de tener la autorización adecuada.
Paso 9 – Documentación y flujo de trabajo de legado. Capture la configuración en notas, mantenga un pipeline estilo fábrica y almacene una copia de seguridad profunda para uso a largo plazo. Informe a otros sobre el proceso de clonación y los pasos de producción para que los equipos puedan reutilizar la técnica en proyectos futuros.
Paso 10 – Pruebas en diferentes escenarios y seguridad. Practique con secuencias controladas, incluida una escena de playa, y luego expanda a entornos más complejos. Explorar diferentes ángulos le ayuda a comprender qué funciona y qué debe refinarse para un uso responsable.
Manejo de diferentes formatos y resoluciones de vídeo
Recomendación: exporte sus clips de origen como MP4 utilizando el códec H.264, a 1080p y 30 fps; apunte a una tasa de bits de 8 a 12 Mbps para equilibrar el detalle y el tamaño del archivo, asegurando un movimiento fluido y realismo.
Utilice contenedores alternativos como WebM (VP9) cuando la audiencia utilice navegadores con soporte MP4 limitado; verifique la reproducción en la plataforma y los dispositivos, y prefiera formatos que decodifiquen eficientemente en GPUs comunes, lo que generalmente requiere una carga mínima de CPU durante la representación; hacer clic en la configuración de exportación le ayuda a comparar resultados.
Estrategia de resolución: mantenga la relación de aspecto original; si la fuente es 720p y se necesita 1080p, escale solo si puede aplicar escalado de alta calidad; de lo contrario, manténgase en 720p; la relación de aspecto común es 16:9 para evitar barras negras; el recorte debe mantener la imagen centrada en el sujeto.
Velocidad de fotogramas: coincida con la velocidad de fotogramas de origen, típicamente 24, 25 o 30 fps; evite la conversión pesada de velocidad de fotogramas; para secuencias de acción considere 60 fps, pero tenga en cuenta el archivo más grande y el tiempo de codificación más largo; pruebe la reproducción para confirmar que el movimiento se sienta natural.
Color y codificación: SDR de 8 bits es estándar; si tiene un rango dinámico más amplio, puede trabajar con 10 bits y HEVC en plataformas que lo admitan; utilice submuestreo de croma 4:2:0 para la mayoría de las entregas; realice una corrección ligera para mantener precisos los tonos de piel y preservar el realismo, evitando la sobresaturación que rompe las señales de identidad.
Privacidad y directrices: el contenido debe respetar el consentimiento y las directrices de la plataforma; mantenga los clips privados restringidos si es necesario; incluya notas de intención y evite distribuir material sin los derechos adecuados; utilice la nomenclatura y los metadatos para respetar los créditos y rastrear la autoría, por ejemplo, guardando un id con saveid; esto simplifica la gestión entre versiones y le ayuda a suscribirse a actualizaciones o registros específicos de la página. Además, tenga en cuenta la ética de los deepfakes y evite el engaño que perjudique a otros.
Flujo de trabajo y metadatos: para la organización, incluya la asociación de página y una etiqueta de versión clara; almacene una copia en una carpeta de legado para preservar las representaciones anteriores; para cada toma, agregue una etiqueta de versión para respaldar los registros de trabajo; considere pequeños ajustes en pixlr para equilibrar la iluminación y el contraste antes de la exportación; guardar los pasos debe ser sencillo, garantizando la facilidad de reutilización en proyectos futuros; verifique siempre la alineación de la cámara y asegúrese de que la apariencia siga siendo perfecta en todas las escenas y dispositivos.
Comprobación de calidad: antes de la exportación final, realice una comprobación rápida en la página de canal real y pruebe con reproducción privada; verifique que las señales de identidad entre géneros sean consistentes y respetuosas; asegúrese de que el clip resultante coincida con la intención y de que la creación mantenga la integridad para la audiencia.
Consideraciones sobre seguridad, consentimiento y privacidad en línea
Asegura siempre el consentimiento explícito e informado de cada participante cuya apariencia pueda ser transformada en una imagen. Define el alcance, la duración y los canales de uso, y proporciona un método de retirada sencillo; si se retira el consentimiento, elimina todas las copias en un plazo de 7 días y detén cualquier procesamiento en curso. Al presentar los resultados, ofrece ejemplos tanto divertidos como sencillos para que los usuarios puedan comparar estilos en segundos, y documenta el contexto de navegación permitido para cada elemento.
Limita la recopilación de datos a lo estrictamente necesario. No conserves los originales más allá de la finalización de una tarea, a menos que el consentimiento cubra la retención. Cifra el almacenamiento, restringe el acceso a personal autorizado e implementa una política de retención con un máximo de 30 días. Permite las solicitudes de eliminación en un plazo de 24 horas y registra la acción para protección y rendición de cuentas.
Las directrices de etiquetado y divulgación de resultados deben ser claras: etiqueta cualquier material transformado con un indicador visible y proporciona una breve explicación del método de generación. Esto protege a los espectadores y reduce la mala interpretación en contextos cinematográficos; presenta el contenido con una descripción o una línea de créditos. Si se retira el consentimiento, elimina el material relacionado en un plazo de 24 horas.
Procedencia y trazabilidad: adjunta un identificador único (swapid) a cada par de activos alterados; almacena la versión del modelo, la fecha y los atributos de entrada seleccionados en los metadatos. Este registro preciso facilita la verificación de la calidad y el origen. Para usos básicos, selecciona un conjunto mínimo de parámetros dentro del generador; para usuarios avanzados, permite opciones más detalladas. Las sombras de la iluminación y el movimiento de la boca deben verificarse para evitar resultados poco realistas.
Control de acceso y protección: requiere autenticación para cualquier espacio de trabajo donde se procesen imágenes; utiliza permisos basados en roles y protección de dos factores. Utiliza un enfoque sencillo para los permisos y proporciona una vía clara para revocar el acceso. Esto permite a los usuarios comprender sus opciones sobre los resultados y los derechos. Si no existe consentimiento para ciertos usos, restringe a previsualizaciones no públicas o a compartir en privado; garantiza la aplicación de la política y preserva la calidad.
Actualizaciones de políticas y rendición de cuentas: los registros de auditoría se conservaron durante 90 días y las revisiones de las directrices se realizan trimestralmente. Supervisa el cumplimiento, ajusta las directrices de protección a medida que evolucionan las leyes y publica avisos actualizados en los días posteriores a los cambios. El enfoque sora se centra en la transparencia, la autonomía del usuario y la información precisa sobre los flujos de trabajo de generación.


