

Fija la idea, esboza 3–5 escenas y establece una única voz coherente. *Dentro* de este enfoque, mapeas la idea en un guion conciso y lo conviertes en imágenes que puedes ver utilizando una pila tecnológica basada en flujos de trabajo asistidos por IA. Utiliza activos *existentes* para acelerar la base y prueba el primer borrador rápidamente para validar el ritmo y la claridad.
Elige *ángulos* y indicaciones de cámara, establece un estilo de *voz* y decide los *idiomas* para llegar a nuevas audiencias. Basándose en estas elecciones, la renderización final será coherente en todos los idiomas. Este proceso te permite adaptarte fácilmente a diferentes mercados y aún deja espacio para exploración adicional; si necesitas iteraciones extra, realiza exploraciones rápidas para comparar el tono y el tempo.
Para convertir ideas en clips terminados, reutiliza guiones existentes, indicaciones de *voz* y recursos visuales preexistentes. *Dentro* del flujo de trabajo, puedes adaptar el ritmo, eliminar las redundancias y *mejorar* el engagement con texto e imágenes concisos. Tradicionalmente, los equipos dependían de ciclos largos; aun así, puedes realizar pruebas rápidas y evaluar los resultados, refinando la salida final para la audiencia. La tecnología detrás de este enfoque es de naturaleza tecnológica, apoyando la salida multilingüe y flujos de trabajo de autoría flexibles.
Preparación del Guion para HeyGen
Recomendación: recomienda un guion maestro de 120–180 palabras dividido en 8–12 tomas, cada una transmitiendo una única idea dentro de un marco de 12–15 segundos. Este guion maestro actúa como la columna vertebral para esas versiones, permitiendo una rápida adaptación a diversas experiencias y audiencias.
*Fase* uno se centra en la ideación y el esquema. Crea un esquema de dos columnas: la columna izquierda narra la toma; la columna derecha enumera las indicaciones visuales y de audio. Convierte las ideas en frases concretas, luego etiqueta cada frase con puntos de referencia de tiempo para asegurar que el ritmo coincida con el plan. Luego, revisa la fluidez y la concisión, asegurándote de que la idea se traduzca en imágenes nítidas.
Planificación de tomas: para cada toma define la idea, el número de *tomas* previsto, las frases habladas, el texto en pantalla y las notas de *postproducción*. Esta claridad ayuda al equipo de revisión y a quienes reutilizan guiones a comprender la intención rápidamente.
Creación de versiones y recursos: produce al menos tres *versiones* del guion: concisa, descriptiva y contundente. Reúne *recursos* como una lista de tomas, notas de vestuario y dos indicaciones de audio. Guárdalos en una carpeta compartida para facilitar la iteración rápida, mucha ayuda y la colaboración.
Control de calidad: ensaya las frases en voz alta, ajusta la cadencia, elimina lo superfluo. Una lectura de 60–90 segundos mide el ritmo frente a las expectativas de la fase y los resultados esperados. Graba la lectura para captar frases torpes y evitar un lenguaje complicado que retrase la revisión.
Plan de postproducción: anota notas de postproducción para el color, indicaciones de iluminación y marcadores de audio. Vincula cada segmento del guion a una indicación visual, haciendo que la integración sea simple y repetible. Este plan puede ofrecer consistencia entre tomas y equipos, y esto ayuda a garantizar experiencias y resultados fiables.
Por qué ayuda: un enfoque estructurado minimiza el retrabajo, mejora la precisión y acorta el tiempo de publicación. El proceso produce una iteración más rápida, resultados mucho más predecibles y un flujo de trabajo constante entre los equipos. Mantén una biblioteca **gratuita** de plantillas y guiones de ejemplo para acelerar la preparación y compartir entre colegas.
Práctica continua: mantén un banco de ideas activo, listas de tomas diversas y un repositorio de guiones existentes. Revisa regularmente la alineación posterior a la fase y solicita comentarios rápidos de una audiencia de muestra para refinar cada fase. Simplifica siempre el camino de la idea al guion final, asegurando una calidad de creación continua y una integración fluida en la producción.
Cómo formatear frases, etiquetas de hablante y marcas de tiempo para importación directa
Exporta un CSV que utilice una fila de encabezado y cuatro columnas: frase,hablante,inicio,fin; los tiempos deben estar en HH:MM:SS.mmm; valida mediante una importación de muestra en el editor para confirmar la alineación y ajusta cualquier discrepancia antes de la producción. Además, mantén el texto de la frase entre comillas si contiene comas.
- Definiciones de columna: frase primero, hablante segundo, inicio tercero, fin cuarto; utiliza un orden consistente para asegurar que los analizadores actuales lean correctamente.
- Etiquetas de hablante: asigna identificadores concisos (SP01, SP02) o nombres; mantén las etiquetas dentro de un único esquema en todas las escenas; identificadores diversos ayudan a mantener las cosas claras durante la exploración y la postproducción.
- Formato de tiempo: HH:MM:SS.mmm, con ceros iniciales; el fin debe ser mayor que el inicio; permite pequeñas brechas para reflejar los puntos de corte.
- Codificación de texto: UTF-8; escapa las comillas duplicándolas; evita caracteres de nueva línea dentro de un solo campo de línea; limita a 200–240 caracteres por línea para mayor fiabilidad.
- Contenido de la línea: cada fila contiene un único segmento hablado; si cambia el hablante, divídelo en una nueva fila con un inicio fresco; evita combinar varios pensamientos en una sola línea.
- Controles de calidad: realiza una vista previa de la importación, verifica el número de líneas, el orden y las marcas de tiempo; comprueba la alineación con el guion gráfico y ajusta en consecuencia para reducir los cambios posteriores.
- Plantillas de ejemplo: proporciona un fragmento de CSV para compartir con compañeros de equipo; esto ayuda a aprender el formato rápidamente y simplifica la incorporación; las plantillas creadas para diferentes escalas de proyectos se convierten en una referencia.
- Formatos alternativos: TSV o JSON pueden estar disponibles; asegúrate de que la herramienta de importación mapee los campos de manera consistente; al elegir, considera si tu flujo de trabajo prefiere tabulaciones o una matriz JSON para el procesamiento por lotes.
- Idea de planificación: explora el guion con antelación; diversas cámaras y ángulos pueden impulsar las etiquetas de campo si planificas líneas separadas por ángulo; esto mejora los resultados posteriores en postproducción; se puede utilizar el ritmo predictivo para estimar las duraciones con antelación.
- Validación: prueba con un conjunto pequeño; verifica los resultados dentro del editor; el ejercicio revela posibles problemas antes de publicar; esto ahorra costos y evita retrabajos.
Dentro del mismo archivo, se pueden añadir columnas opcionales como scene_id y camera_id para capturar variaciones entre ángulos; estas adiciones permanecen dentro del esquema de importación, permitiendo el ritmo predictivo y simplificando la postproducción. Además, este enfoque abre posibilidades más allá del conjunto de campos principal, soporta diversas cámaras y reduce costos.
Ejemplo de CSV:
- frase,hablante,inicio,fin
- "Hola y bienvenidos","SP01","00:00:01.000","00:00:03.200"
- "Proceda al tema dos","SP02","00:00:03.300","00:00:05.000"
Cómo escribir indicaciones de cámara, fondo y utilería que la plataforma reconozca

Comienza componiendo una hoja de indicaciones que enumere las indicaciones de CÁMARA, FONDO y UTILERÍA en líneas separadas, colocadas antes de las frases habladas para asegurar la alineación. Este enfoque hace que la localización sea más fluida para los profesionales del marketing y sus equipos, aumentando el efecto impactante de cada toma y apoyando su capacidad para ofrecer contenido consistente y escalable.
Adopta un formato fijo de indicaciones como: [CÁMARA: primer plano, nivel de los ojos], [FONDO: oficina neutral, luz diurna suave], [UTILIDAD: cuaderno, bolígrafo], [VOZ: cálida, segura]. Cada indicación se vincula directamente a una línea corta de diálogo, manteniendo un ritmo ajustado y facilitando la localización en diferentes mercados y sus equipos.
Define claramente las condiciones de ubicación e iluminación: [CONDICIÓN: luz natural, nublado], [UBICACIÓN: estudio A]. Estos detalles evitan malentendidos cuando los equipos trabajan en diferentes ubicaciones y zonas horarias, y aseguran que la toma coincida con el estado de ánimo deseado.
Antes de escribir el guion, crea una lista de tomas: 1) primer plano de introducción, 2) plano medio en la ubicación B, 3) plano general de cierre. Esto reduce idas y venidas, acelera el aprendizaje y mejora su capacidad para producir guiones rápidamente, con indicaciones concisas que se mapean a las frases habladas.
Luego, realiza una comprobación rápida en un borrador para verificar el reconocimiento de las indicaciones; ajusta la redacción para mejorar la precisión y reducir los fallos que afectan al resultado final, lo que ahorra ediciones y acelera la entrega.
Estas convenciones abren usos artísticos e invaluable posibilidades en múltiples ubicaciones. El impacto es medible: tiempos de respuesta más rápidos, ciclos de revisión más cortos y mayor consistencia entre guiones; la localización mejora y los profesionales del marketing pueden ofrecer mensajes dirigidos que resuenan. Para los equipos que desean escalar contenido en diferentes mercados, este marco ofrece mejoras crecientes y un impacto duradero, y luego mantiene el impulso en proyectos futuros.
Cómo dividir escenas en tomas para una sincronización y transiciones precisas
Comienza esbozando el ritmo central de la escena, luego planifícalo en 8 o 12 tomas para una sincronización precisa y transiciones fluidas. Este enfoque es potente para garantizar la coherencia entre tomas y mejora la eficiencia en la planificación.
Crea una lista de tomas que identifique los sujetos y las acciones por ritmo. Esto equipa a tu equipo para decidir el encuadre y los movimientos de cámara desde el principio, acelerando así las decisiones y garantizando la coherencia.
Estructura las tomas en micro-ajustes: preparación, acción, reacción y finalización. Cada conjunto debe contar una parte de las experiencias de la escena, preservar la calidad artística e integrar sonido y efectos para aumentar el impacto.
Elige la duración de las tomas teniendo en cuenta un ritmo natural: cortes rápidos para la tensión, tomas más largas para el diálogo; luego, aumenta el tempo a medida que se desarrolla la escena.
Utiliza encuadres diversos: planos generales de establecimiento, planos medios para interacción, primeros planos para emociones. Alinea estos con las capacidades de filmación y el equipo disponible; este plan reduce los costes.
Planifica las transiciones con reglas claras: cortes para cambios de tempo, fundidos encadenados para un respiro emocional y transiciones basadas en el movimiento cuando los sujetos se mueven.
Mantén un registro rápido por toma: número de toma, sujetos, duración, movimiento de cámara y efecto deseado; esto utiliza la estructura para informar la edición.
Revisa antes de filmar: haz una lectura rápida, ajusta basándote en los comentarios y decide el orden final.
Durante la producción, el sonido ambiental y la atmósfera del lugar de rodaje impactan la sensación natural; asegúrate de que el plan apoye sus momentos.
Proceso de postproducción (carga): después de filmar, verifica la sincronización con la pista de audio, ofreciendo así un flujo coherente; el resultado mejora las experiencias y te permite contar tu historia con claridad.
Deja que el proceso te enseñe a ajustar decisiones rápidamente; aumentar la flexibilidad te permite adaptarte a los sujetos y a las ubicaciones.
Cómo anotar emociones, ritmo y énfasis para la renderización de voz con IA
Etiqueta cada frase con un trío compacto: emoción, ritmo, énfasis, y luego introduce estos marcadores en un editor central para que la IA pueda renderizar un tono de voz consistente antes de la exportación.
Actualmente, los equipos aprenden de los patrones utilizando una plantilla compartida que captura etiquetas por guion, reutiliza configuraciones y genera nuevas versiones rápidamente, sin esfuerzo, requiriendo ediciones manuales mínimas.
Para el ritmo, asigna valores de tempo por frase: [ritmo: enérgico], [pausa: 250ms], [respiración: corta]. Este enfoque dinámico mantiene la narración atractiva y ayuda al motor a ajustarse a los cambios de contenido, preservando la atención de los espectadores a medida que las escenas cambian. Esta etiquetación también amplía las capacidades en toda la pila de contenido.
Mapea la emoción al contexto: [emoción: sorpresa] para un giro, [emoción: calidez] para un diálogo cercano, [énfasis: fuerte] en sustantivos críticos. Esto ayuda a los espectadores a percibir la intención incluso cuando el habla es automatizada.
Antes de la adaptación regional, mantén un guion maestro con marcadores estables y un registro de cambios. Los equipos de guionistas pueden componer variaciones, y los editores pueden notar las diferencias, lo que te permite ajustar la cadencia y la emoción antes de finalizar el borrador.
Exporta el guion anotado como un archivo estructurado (JSON o CSV) para que los editores puedan acceder a todo en el pipeline de automatización. Guarda plantillas, mantén versiones y asegúrate de que los equipos puedan acceder a los marcadores más recientes antes del día de producción. Esto ahorra tiempo y ofrece una entrega de líneas coherente para los espectadores, al tiempo que te permite contar la historia general con claridad y componer ediciones futuras.
Usando el Flujo de Trabajo de Guion a Video de HeyGen
Comienza por crear una lista de tomas basada en sujetos, ángulos y tono. Mapea cada escena a un fotograma y esboza las voces en off y el texto en pantalla correspondientes basándote en las necesidades de la audiencia. Esto mantiene todo coherente y asegura que generes activos basados en un plan claro antes de renderizar nada. Los cinematógrafos pueden usar esto como base para las decisiones de iluminación y lentes.
-
Mapeo de preproducción: Basado en el guion, define los sujetos, establece algunos ángulos clave (amplio, medio, cerrado) y bloquea el ritmo general. Mantén una hoja de notas compartida para registrar indicaciones musicales, subtítulos y transiciones. Esto reduce el riesgo de ediciones en medio de la secuencia y acelera la ejecución.
-
Configuración de activos y voces en off: Prepara las voces en off en el idioma de destino con una cadencia consistente. Cuando sea posible, obtén activos gratuitos de alta calidad y alinéalos con el tono de cada sujeto. Prepara fuentes y una paleta de colores basada en fotogramas para garantizar la coherencia entre escenas. Esto te da una base sólida para ser más rápido en producción y siempre apoyar a los espectadores con una narración clara.
-
Generación y encuadre: Genera fotogramas iniciales utilizando la herramienta. Enfócate en la composición del fotograma y los ángulos de cámara (amplios, medios y cerrados). Produce varias variantes para cada escena y compáralas una al lado de la otra para elegir el encuadre más fuerte. Mantén un recuento total de fotogramas ajustado para mantener la legibilidad tanto en dispositivos móviles como de escritorio, permitiendo una iteración rápida.
-
Ediciones y refinamientos: Después de los primeros renders, refina la sincronización, ajusta los niveles de audio y aplica correcciones de color. Utiliza ediciones concisas para ajustar el ritmo y reforzar el arco narrativo. Documenta cada actualización para que los compañeros de equipo puedan revisarla y reutilizar los activos más tarde.
-
Entrega y revisión: Exporta a la resolución y relación de aspecto elegidas, valida en los dispositivos de destino y recopila comentarios de los interesados. Itera rápidamente en cualquier edición solicitada, luego finaliza los activos para su distribución. Busca oportunidades para reutilizar activos en futuras campañas y formatos, a menudo.
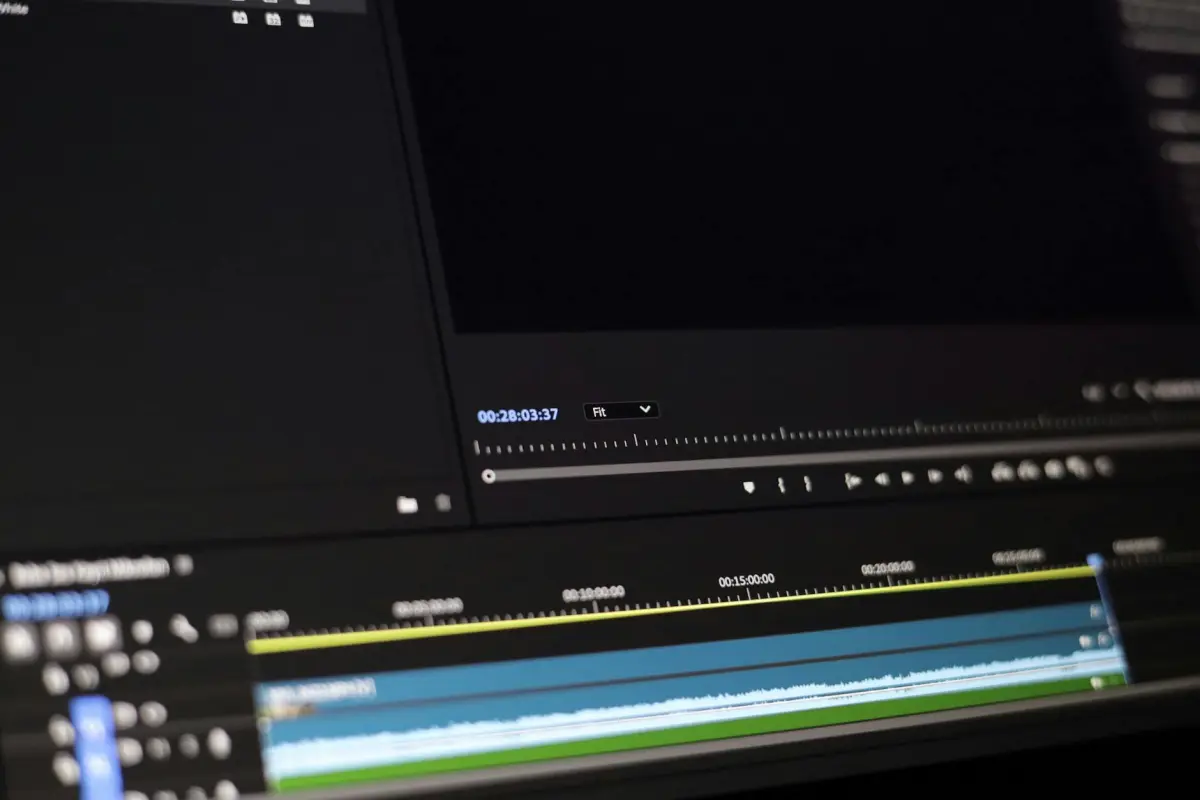
Cómo importar un archivo de guion y elegir la configuración de importación
Sube primero un archivo de guion simple (TXT o DOCX) y habilita la detección automática de idioma para garantizar la compatibilidad global. Este rápido paso mantiene tu flujo de trabajo simple y rápido.
Planifica el mapeo: las palabras clave organizan los temas; las plantillas ofrecen fotogramas listos; el elenco identifica a los actores; las tomas definen bloques de escenas; los ángulos dan forma a la perspectiva; el fondo se ajusta al estado de ánimo; los sonidos establecen el ambiente.
Define la estructura: inserta saltos de escena, indica fotogramas fijos para pausas y establece el tono para que coincida con tu marca.
Elige un preset de importación que se alinee con tus objetivos artísticos: simple, cinematográfico o artístico. Los presets ajustan el color, el ritmo y las capas de fondo, facilitando la configuración.
Revisa en vista previa rápida: comprende cómo las líneas se convierten en imágenes, ajusta el mapeo para garantizar la precisión y refina las palabras clave para una mejor búsqueda.
Guarda tus elecciones como un perfil global; comparte notas con sus cinematógrafos y elenco; funciones adicionales como generadores permiten una iteración rápida.
Consejos: asegúrate de que tu guion utilice palabras clave claras, evita la ambigüedad, mantén el fondo distinto del primer plano y prueba varios ángulos para verificar el ritmo.
| Configuración de importación | Descripción | Valores recomendados |
|---|---|---|
| Formato del archivo de origen | Tipos de archivo de entrada que aceptas, como TXT o DOCX | TXT, DOCX |
| Idioma | Selector o detección automática para reglas y terminología lingüísticas | Inglés, Español, Francés o automático |
| Mapeo de estructura | Cómo las líneas se mapean a escenas, actos o capítulos | Escenas, Capítulos |
| Palabras clave | Términos que activan imágenes, acciones del elenco o configuraciones | usa tus propios términos; alinea con las imágenes |
| Plantillas | Diseños preconstruidos para líneas de tiempo, fotogramas y ritmo | Simple, Cinematográfico, Artístico |
| Elenco | Nombres vinculados a líneas o acciones en escenas | Lista de actores o marcadores de posición |
| Tomas | Número y tipo de tomas por escena | Por escena, ajustable |
| Ángulos | Perspectivas de cámara para cada toma | Amplio, Medio, Primer plano |
| Fondo | Configuración de color de fondo, imagen o gradiente | Color o imagen, coherente con el estado de ánimo |
| Sonidos | Estilos de ambiente, efectos de sonido y música | Ambiental, cinematográfico, ambiente ligero |
| Códigos de tiempo | Habilitar o deshabilitar marcadores basados en el tiempo | Activado o Desactivado |
| Guardar/perfil | Perfil global persistente para reutilización | Global |


