

Recomendación: Aplica un paso de preprocesamiento que reconozca el ruido y aísle los trazos, luego implementa un modelo basado en difusión personalizado para refinar el arte lineal, produciendo un trazado *más limpio* mientras se preserva la intención del autor.
El diseño de la arquitectura y la interfaz moldea la forma en que los artistas colaboran con la herramienta. Un flujo de trabajo *versátil* admite la *personalización* en diferentes estilos de dibujo, facilitando experimentos rápidos y la gestión de cambios, sin interrupciones en la creatividad. Las integraciones con Corel y otras suites amplían el *soporte* para las *creaciones* del estudio y los flujos de trabajo de marketing, permitiendo a los *profesionales del marketing* comparar resultados y seleccionar variantes exitosas.
Para guiar el refinamiento, inyecta *un pequeño empujón* de guía en pasos de difusión decisivos, dirigiendo la coherencia de las líneas mientras se preserva la textura. Un portafolio de modelos cubre escritura a mano, diagramas técnicos y *creaciones* de estilo vectorial, ofreciendo una *mayor* flexibilidad para adaptarse a la estética de la marca. El flujo de trabajo proporciona un control *mejorado*, con previsualizaciones en vivo y un camino claro para la transferencia de *experiencia* entre equipos.
Los beneficios *notables* aparecen cuando los equipos alinean la arquitectura con los objetivos del usuario: una interfaz simplificada, *personalización* en cada paso y un sólido soporte de los *expertos*. El enfoque mejora la cohesión entre los trazos y el espacio negativo, permitiendo a los *profesionales del marketing* lograr ciclos más rápidos y producir *creaciones* consistentes en diferentes canales, con modelos de *difusión* que ofrecen resultados escalables en tamaños y formatos.
A medida que escalas, mantén una biblioteca de presets que codifiquen estrategias de cambio, preserven la intención del creador y permitan una rápida iteración entre equipos. Con un enfoque en la *arquitectura* y una interfaz fácil de usar, la solución se convierte en un activo *versátil* para los estudios que invierten en la producción de arte asistida por IA.
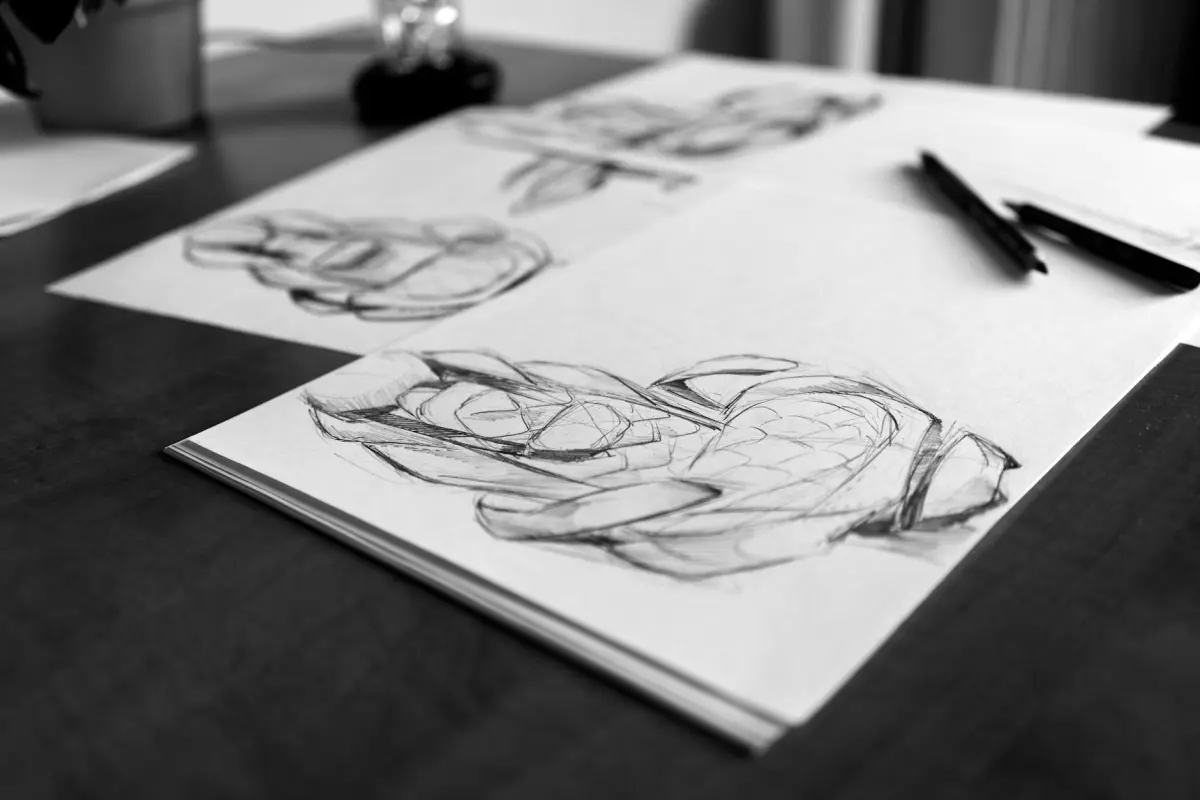
Evalúa la calidad del boceto tosco: determina qué líneas conservar y cuáles redibujar
Comienza con una rápida verificación de calidad: marca las líneas más sólidas que definen la pose, las proporciones y la silueta principal, y deja a un lado las marcas que solo implican textura. Lo que quieres preservar es la estructura clara; usa una escala simple de 3 puntos: 3 = conservar tal cual, 2 = retocar con correcciones menores, 1 = reescribir por completo. Prioriza los bordes que fijan la estructura (articulaciones, columna vertebral, planos principales) y preserva el ritmo del movimiento; todo lo que no contribuya a esas señales se redibuja.
Para permitir la colaboración, anota en una plataforma compartida como Miro y narra las decisiones con comentarios. Arrastra los segmentos conservados a una capa dedicada; conserva solo los contornos básicos y reconstruye el resto en un pase separado, utilizando solo las líneas necesarias. Exporta las líneas conservadas a maquetas preconstruidas, prueba ideas generadas por IA de DALL-E y compara los resultados en plantillas de Vmaker. Siempre invita a recibir comentarios del artista y de los catalizadores; la mayoría de las aportaciones ayuda a converger más rápido. Además, realiza un seguimiento de los cambios en un hilo dinámico para que el equipo pueda iterar conjuntamente hoy.
Marco de decisión para conservar vs. revisar
Céntrate en tres criterios: claridad estructural, consistencia proporcional y legibilidad visual a la escala prevista. Si una línea transmite la ubicación de una articulación o una bisagra importante, consérvala; si solo traza textura, redibújala. Cuando no estés seguro, prueba una alternativa rápida generando un pase paralelo con DALL-E y compáralo lado a lado. La mejor opción es la que reduce la duda sobre el siguiente paso en el estudio.
Flujo de trabajo colaborativo para iteración rápida
Establece un ciclo rápido: una vez que identifiques las líneas a conservar, produce una capa refinada y una iteración limpia con un pincel ligero. Usa maquetas para validar la legibilidad en diferentes medios; presenta a través de notas de audio para ganar velocidad; recopila comentarios de los compañeros de equipo; resume los pros y los contras y decide qué conservar o revisar. Esto construye un proceso colaborativo y accesible que puede convertirse en una línea base estable para resultados generados por IA y para compartir en redes sociales; la plataforma lo mantiene todo en un solo lugar para que puedas iterar hoy mismo.
Elige una estrategia de limpieza: trazado vectorial, limpieza rasterizada o un flujo de trabajo híbrido
Recomendación: comienza con el trazado vectorial cuando los bordes requieran geometría nítida y resultados escalables; este camino ofrece consistencia, tamaños de archivo más pequeños e iteraciones más rápidas en hardware que potencia tus ejecuciones de diseño. Para un diseñador que modela elementos listos para la arquitectura, el vectorial primero se alinea con el flujo de trabajo y mantiene la idea clara, como en una obra destinada a ser reutilizada en proyectos similares.
Usa la limpieza rasterizada para secciones ricas en texturas, gradientes y referencias escaneadas donde el sombreado deba sentirse natural. Este enfoque preserva la riqueza de los detalles y admite subtítulos y narraciones que explican los pasos de refinamiento. Espera pases que consumen tiempo, pero el resultado se mantiene fiel a la imagen de origen y es útil para trabajos en sitios web y portafolios; nunca descuides la protección de la propiedad intelectual al compartir resultados con clientes o en un sitio público.
Un flujo de trabajo híbrido combina ambos métodos: líneas vectoriales para formas y estructura, más pulido rasterizado para textura. Este enfoque es práctico cuando deseas consistencia en las variantes de diseño, como familias de arquitectura, y cuando necesitas mantener una fuerte alineación entre las palabras, los subtítulos y el resultado visual. Representa una ventaja para equipos con experiencia diversa; el flujo de trabajo admite el refinamiento iterativo y acelera el proceso en proyectos pesados y reduce el riesgo de artefactos durante la exportación. Usa ChatGPT para narración o metadescripciones que acompañen el trabajo en tu sitio web; esto ayuda a mantener el concepto claro y accesible. Usa Visla para subtítulos y narración para sincronizar texto con movimiento o diapositivas, mejorando la protección y la consistencia en todos los canales.
Estrategia vectorial primero
Ventajas: Geometría nítida, resultados escalables, ediciones fáciles, tamaños de archivo más pequeños y fuerte consistencia entre páginas. Funciona sin problemas en hardware típico y se adapta al modelado y al diseño orientado a la arquitectura. Este camino es adecuado para diseñadores que desean un proceso predecible y formatos de exportación fiables; admite subtítulos y narraciones alineados con la idea, y presenta una ventaja en la protección de la propiedad intelectual a través de formatos vectoriales.
Desventajas: Captura de texturas limitada, más trabajo cuando el sombreado es esencial y posibles compensaciones en la fidelidad para elementos fotorrealistas. Requiere una planificación cuidadosa durante la traducción de detalles a vectores para evitar artefactos en activos similares.
Consideraciones del flujo de trabajo híbrido
Cuando los activos mezclan geometría con textura, un enfoque combinado brilla. Mantén las capas organizadas, asígnales nombres claros y exporta activos separados para datos vectoriales y rasterizados. El camino híbrido equilibra el refinamiento, la consistencia y la velocidad, y admite una narración unificada a través de subtítulos. Este método se adapta a proyectos de alcance similar a una obra maestra donde la intención del diseño debe sobrevivir en todas las plataformas, y ofrece una ventaja práctica para equipos con experiencia diversa. Para compartir resultados en un sitio web o en revisiones de clientes, puedes confiar en subtítulos impulsados por ChatGPT o Visla para explicar los pasos y proteger la propiedad intelectual.
Define una imagen de referencia: estilo, perspectiva, iluminación y dirección del color
Selecciona una imagen de referencia que fije el estilo, la perspectiva, la iluminación y la dirección del color; esto podría permitir renderizados consistentes y una ideación más rápida. La referencia actúa como una línea base de trabajo que ayuda al progreso y reduce la pérdida de tiempo. Este enfoque podría ser utilizado en proyectos y es un servicio potente para los equipos, creando una biblioteca de ideas a largo plazo en flujos de trabajo digitales; hemos descubierto que mantiene a los colegas alineados y permite tomar decisiones más rápidas.
Estilo y perspectiva
- Aclara el estilo deseado en una sola directiva (línea de trabajo mínima, textura pictórica o gráfico audaz); un objetivo claro también crea una consistencia mejorada y mantiene la experiencia alineada.
- Elige la perspectiva: de un punto, de dos puntos o de tres puntos, y marca la línea del horizonte para guiar las proporciones; esta elección dinámica establece la profundidad para trabajar a diferentes escalas.
- Documenta el ángulo de la cámara y el gesto: anota la inclinación, el escorzo y la orientación de las extremidades para preservar una lectura uniforme de las formas; ajústala a medida que refinas.
- Selecciona materiales de origen que coincidan con el estado de ánimo; omite referencias que choquen con el color o el estado de ánimo; prefiere activos de código abierto para acelerar la ideación.
Iluminación y dirección del color
- Describir la dirección de la iluminación: frontal, lateral o retroiluminada; especificar la intensidad; esto podría permitir un mayor contraste y profundidad.
- Definir la dirección del color: familia de matices dominante, temperatura y tinte de sombra; adjuntar una paleta para mantener la coherencia en la renderización.
- Documentar un guion de color o estado de ánimo; esto mejora la comprensión y reduce las idas y venidas en las iteraciones.
- Mantener el flujo de trabajo amigable con lo digital; el uso de herramientas de código abierto y activos compartidos permite una colaboración más rápida y un mejor progreso.
- Considerar la respuesta del material (metal, tela, piel) a la luz para mejorar el realismo sin perder tiempo; esto ayuda a la pericia y produce resultados más ricos.
- Incluir una verificación de superposición o capa para verificar la alineación antes del trabajo detallado; esta verificación inicial se podría realizar rápidamente y ajustar de manera eficiente.
Alinear e integrar la referencia: escala, rotación, puntos de anclaje comunes
Establezca el marco de referencia a una escala fija de 1.0, rote para alinearlo con el eje principal del diseño y bloquee tres puntos de anclaje comunes: superior izquierda, inferior derecha y centro. Este marco estable se convierte en la única fuente de verdad para todas las salidas en producción, ayudándole a mantenerse en el camino hacia obras maestras y permitiendo transferencias rápidas a los especialistas en marketing y partes interesadas.
Con este marco, puede ajustar la escala rápidamente: calcule s = ancho_objetivo / ancho_fuente; determine la diferencia de rotación theta = ángulo_objetivo - ángulo_fuente; aplique ambas a todas las entradas y vuelva a anclar en los mismos tres puntos. Antes de continuar, valide que las coordenadas mapeadas caigan dentro de tolerancias estrictas (± 2 px en alta resolución) y documente los valores en su plan. Guarde las actualizaciones en el repositorio compartido para asegurarse de que todos trabajen con la misma referencia.
Lista de verificación de implementación
Bloquee la escala a 1.0, establezca la rotación en el ángulo objetivo medido y fije los mapeos de anclaje para que cualquier entrada nueva se alinee en segundos. Utilice tres puntos de anclaje para restringir la traslación después de la rotación, asegurando la coherencia entre los activos posteriores en flujos de trabajo de modelado de manga y deepartio. Este método simplifica la comunicación con el equipo, ayuda a los especialistas en marketing y a las partes interesadas a mantenerse alineados y apoya la creación rápida de banners y otras obras maestras de salida.
Verificación e integración
Después de la alineación, realice una pasada rápida sobre 5-7 muestras para evaluar la efectividad: registre la desviación del anclaje, el error de rotación y la varianza de la escala en minutos. Guarde las actualizaciones en el repositorio central, notifique a los compañeros de equipo a través del calendario y mantenga un registro para refinar el aprendizaje. Esto fortalece los bucles de aprendizaje, mejora la precisión del plan y potencia los ciclos de creación futuros.
Configurar un flujo de trabajo repetible: capas, indicaciones, puntos de control y verificaciones de calidad
Comience bloqueando una pila de cuatro capas y una lista de indicaciones; esto se hace una vez y se mantiene eficiente para muchos activos. La capa 1 alberga un boceto base que captura la pose y la silueta. La capa 2 alberga un trazado limpio con un peso de trazo consistente. La capa 3 maneja el sombreado y el color, incluidos los tonos o degradados estilo manga. La capa 4 aplica efectos de acabado, textura e iluminación. Nombra los grupos claramente y mantén las referencias adjuntas, para que cada ejecución reproduzca la estructura. Esta configuración ofrece una ventaja importante al entregar conceptos de avatares o gráficos más amplios en tiempo real. El uso de ejecuciones por lotes y una interfaz estable lo mantiene eficiente y reduce la pérdida de detalles entre iteraciones.
Flujo de trabajo en capas
Capa 1: el boceto base permanece como línea de referencia; mantenga el boceto en una capa separada para evitar ediciones accidentales de las guías proporcionales. Capa 2: el trazado bloquea la claridad del contorno y la consistencia del trazo; active el suavizado para mantener bordes limpios y al mismo tiempo preservar la energía en el movimiento. Capa 3: el sombreado y el color añaden profundidad; cree mapas de valores, luego aplique color con una paleta restringida para evitar el ruido. Capa 4: los efectos de acabado refinan la textura, la iluminación y la atmósfera sutil; utilice pases de difusión para refinar los reflejos y las sombras. Para activos de estilo avatar y manga, cambie a un aspecto nítido y legible refinando el peso de la línea y reduciendo los píxeles dispersos. Esta estructura se puede gestionar con previsualizaciones en tiempo real y ejecuciones por lotes en una interfaz capaz, evitando reelaboraciones desordenadas.
Indicaciones, puntos de control y verificaciones de calidad
Indicaciones: defina instrucciones específicas de la etapa y almacénelas en una lista. Las indicaciones de la Etapa 1 convierten el boceto en un diseño coherente; las indicaciones de la Etapa 2 se centran en la claridad del contorno; las indicaciones de la Etapa 3 establecen la profundidad del sombreado y el equilibrio del color; las indicaciones de la Etapa 4 finalizan la textura y la iluminación. Utilice indicaciones de cambio para abordar los artefactos detectados; ancle las indicaciones a la referencia actual (avatar o gráficos más amplios) y manténgalas consistentes entre sesiones.
Puntos de control: después del diseño, realice una rápida verificación de alineación; después del trazado, verifique la continuidad del contorno; después del sombreado, confirme el rango de valores y el contraste; después del pase final, evalúe la armonía general.
Verificaciones de calidad: ejecute comparaciones automatizadas con las referencias, mida la pérdida de características críticas y revise si hay siluetas claras, bordes no pixelados y profundidad realista. Si alguna métrica falla, ajuste los controles de la interfaz, vuelva a ejecutar los refinamientos basados en difusión y rederive el resultado para mantenerse en el objetivo. El resultado deben ser gráficos utilizables con una apariencia real y lista para publicar que funcione con iluminación estilo v-ray u otros pases de renderizado. En la práctica, este enfoque produce una transformación más rápida y predecible desde el boceto hasta la obra de arte final, con menos iteraciones y menos redibujo manual necesario.


