


Σχεδιάστε την ιστορία σας σε τέσσερα βήματα και φορτώστε έτοιμα πρότυπα στον επεξεργαστή για να παράγετε αυτόματα δημιουργημένες σκηνές. Αυτή η προσέγγιση βοηθά στο να αιχμαλωτίσετε το κοινό με μια συνεκτική αφήγηση και μια προσωπική φωνή σε όλο το branding της εταιρείας σας. Ο χρόνος που εξοικονομείται εδώ επιτρέπει στην ομάδα σας να επικεντρωθεί στον σχεδιασμό, όχι στην ενασχόληση με ρυθμίσεις.
Επιλέξτε πρότυπα σχεδιασμένα για γρήγορη αφήγηση, αναθέστε ηθοποιούς ή avatars, επιλέξτε σκηνές φόντου και διατάξτε την ακολουθία των λήψεων. Διατηρήστε μια ενεργή ροή επεξεργασίας χαρτογραφώντας την αφηγηματική δομή στη λίστα βημάτων· ορίστε τον τρόπο και τον ρυθμό για κάθε βήμα, ώστε το αποτέλεσμα να παραμένει ομαλό και όχι κοφτό. Ο επεξεργαστής πρέπει να προσαρμόζει τον φωτισμό και το χρώμα σε μια συνεπή διάθεση, ευθυγραμμισμένο αυτόματα με το branding σας.
Στοχεύστε στην τέλεια χρονική στιγμή: αφιερώστε περισσότερο χρόνο στη βελτίωση του σεναρίου παρά στις τεχνικές προσαρμογές, και χρησιμοποιήστε μια προσωπική οπτική γωνία για να ενισχύσετε τη συνάφεια. Χρησιμοποιήστε τον χρόνο της εταιρείας συνετά, ομαδοποιώντας την παραγωγή: σκιαγράφηση, δημιουργία, αναθεώρηση, δημοσίευση. Αυτή η προσέγγιση μειώνει τον χρόνο κύκλου, διατηρώντας παράλληλα την αφήγηση ευκρινή και αυθεντική.
Αποθηκεύστε τους αρχικούς πόρους στον πηγή σας και ανατρέξτε στο υλικό φόντου. Διατηρήστε μια σταθερή παροχή δημιουργημένων στοιχείων και προτύπων, ώστε η ομάδα σας να μπορεί να κλιμακωθεί, είτε είστε μια μικρή εταιρεία είτε μια εταιρεία με πολλαπλές επωνυμίες. Χρησιμοποιήστε βήματα για να χαρτογραφήσετε την πρόοδό σας: ιδεασμός, σενάριο, λίστα λήψεων, συναρμολόγηση, αναθεώρηση, δημοσίευση.
Όταν σχεδιάζετε, βασιστείτε στον επεξεργαστή για να συναρμολογήσετε σκηνές από σαφείς προτροπές, στη συνέχεια δοκιμάστε με μια γρήγορη προσωπική ομάδα εστίασης. Αν η πρώτη εκδοχή αποτύχει να αιχμαλωτίσει, αναθεωρήστε τα πρότυπα, τις επιλογές ηθοποιών και το φόντο για να ταιριάζουν καλύτερα στην ιστορία. Ακολουθώντας αυτά τα βήματα, μετατρέπετε μια πρόχειρη ιδέα σε ένα τελειοποιημένο κινούμενο κλιπ σε στιγμές.
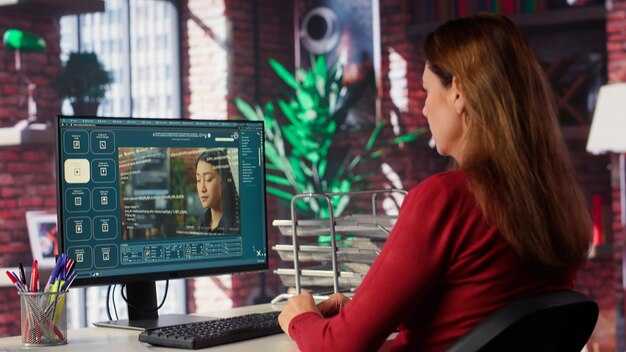
Διευκρίνιση Μορφών Εισαγωγής: απλό κείμενο, περιγράμματα και προτροπές
Επιλέξτε ένα από τα τρία στυλ εισαγωγής για τη ροή εργασίας: ένα απλό, συνοπτικό κείμενο· ένα δομημένο περίγραμμα· ή μια εστιασμένη προτροπή. Αυτό διατηρεί τη διαδικασία υψηλής ταχύτητας και ευθυγραμμισμένη με τα ορόσημα του branding, καθιστώντας εύκολη τη μετάφραση ιδεών σε συνεπή στοιχεία.
Η απλή πεζογραφία πρέπει να δηλώνει το κύριο μήνυμα σε ένα μόνο πέρασμα. Συμπεριλάβετε την πρόθεση του κοινού, τις επιθυμητές κινήσεις και τον τόνο. Επισυνάψτε σημειώσεις για τη χρήση λογότυπου, την παρουσία avatar και τυχόν ήδη εγκεκριμένα στοιχεία branding. Προσδιορίστε την οπτική γωνία του επεξηγητή, το απαιτούμενο στυλ φωνητικών και ένα σύντομο πλάνο ήχου. Αυτή η εισαγωγή μπορεί να μεταφραστεί σε πρότυπα και, με μικρές προσαρμογές, να επαναχρησιμοποιηθεί σε πολλαπλές δημοσιεύσεις, διασφαλίζοντας συνέπεια.
Η μορφή περιγράμματος πρέπει να παραθέτει ενότητες όπως στόχος, σήμα κοινού, δράσεις ανά σκηνή και αναφορές branding. Κάθε στοιχείο λειτουργεί ως σημείο ελέγχου για τον αγωγό μετασχηματισμού· βεβαιωθείτε ότι έχετε σαφή σημεία αγκύρωσης. Αν έχετε μια βιβλιοθήκη προτύπων, οι ενότητες χαρτογραφούνται σε πρότυπα για γρήγορη αναπαραγωγή. Με ένα οργανωμένο περίγραμμα, μπορείτε γρήγορα να δημιουργήσετε προσαρμοσμένες παραλλαγές και δημοσιεύσεις που παραμένουν ευθυγραμμισμένες με το branding, και να κάνετε γρήγορες επεξεργασίες.
Οι προτροπές πρέπει να είναι ακριβείς: προσδιορίστε την περσόνα του avatar, τον τόνο φωνής, τον ρυθμό και τις ακριβείς προτροπές για να καθοδηγήσετε τη μηχανή δημιουργίας. Συμπεριλάβετε λεπτομέρειες όπως χρήση χρωμάτων, τοποθέτηση λογότυπου και κινήσεις avatar. Μια καλογραμμένη προτροπή συνδυάζει κείμενο, σήματα και αναφορές σε υπάρχοντα στοιχεία· μπορεί να μεταφράσει την πρόθεση σε μια επεξηγηματική έξοδο στιγμιαία και να μετασχηματίσει ιδέες σε προσαρμοσμένες σκηνές. Χρησιμοποιήστε πρότυπα για να διασφαλίσετε τη συνέπεια σε όλα τα κανάλια και εφαρμόστε προσαρμογές γρήγορα στις δημοσιεύσεις που έχετε κοινοποιήσει, ώστε κάθε έκδοση να παραμένει ευθυγραμμισμένη με το branding.
Ορισμός Οπτικού Στυλ: θέμα, χρωματική παλέτα και τυπογραφία
Σύσταση: κλειδώστε ένα ενιαίο θέμα και εφαρμόστε το σε όλα τα κλιπ για να διατηρήσετε την προσοχή συγκεντρωμένη. εδώ είναι μια ακριβής προσέγγιση που χρησιμοποιείται από γεννήτριες σε οδηγούς για αρχάριους στα blogs: ορίστε μια ελεγχόμενη παλέτα, καθιερώστε μια στατική τυπογραφική κλίμακα και επισυνάψτε μια ροή εργασίας που καθοδηγείται από μετατροπέα και χαρτογραφεί χρώματα και βάρη με συνέπεια, συν μια συγκεκριμένη χρωματική κλίμακα για να καθοδηγήσει τις μετατροπές. χρησιμοποιήστε αυστηρούς ελέγχους για την επιβολή της παλέτας και της τυπογραφίας. δημιουργήστε ένα μικρό εγχειρίδιο στυλ σχετικά με τη διάταξη και τη χρήση χρωμάτων, στη συνέχεια εφαρμόστε το στα στοιχεία τους, ώστε κάθε δημοσίευση να φαίνεται συνεκτική, όχι τυχαία. αν χρειαστεί να προσαρμόσετε, μην ξαναγράψετε κάθε στοιχείο· αντίθετα, μετατρέψτε τις αποφάσεις σε επαναλήψιμα βήματα που μπορεί να επαναχρησιμοποιήσει η γεννήτρια, αφού κλειδώσετε τα προστατευτικά κιγκλιδρώματα.
Χρωματική παλέτα: ξεκινήστε με μια τριάδα (κύριο, δευτερεύον, τονικό). αν χρειάζεστε ισχυρότερη διάθεση, προσθέστε ένα χρώμα έμφασης για να αποφύγετε επίπεδες σκηνές. διατηρήστε την προσβάσιμη αντίθεση σε όλες τις οθόνες για να υποστηρίξετε την αναγνωσιμότητα σε μεγάλες συνεδρίες και διαφορετικές συσκευές. χρησιμοποιήστε έναν μετατροπέα για να μεταφράσετε τις χρωματικές επιλογές σε LUTs ή σταθερές σκίασης για επικαλύψεις. παρακολουθήστε τη χρήση με έναν βασικό πίνακα: σκηνή, ρόλος, χρώμα και δικαιολόγηση. αυτό βοηθά την ομάδα της εταιρείας να ευθυγραμμίσει τη δημιουργία και να φτάσει στο κοινό-στόχο της κατά τη διάρκεια της δημοσίευσής της και άλλων πλατφορμών με έναν εντελώς συνεκτικό τρόπο.
Τυπογραφία: καθιερώστε μια τυπογραφική ιεραρχία: επικεφαλίδα, υποκεφαλίδα, σώμα κειμένου· επιλέξτε το πολύ μία ή δύο γραμματοσειρές. χρησιμοποιήστε μια συνεπή βασική γραμμή πλέγματος, ακριβές ύψος γραμμής και kerning· εφαρμόστε μια ξεχωριστή κλίμακα βάρους για έμφαση. εξασφαλίστε αναγνωσιμότητα σε κλίμακες κίνησης· χρησιμοποιήστε μόνο δύο γραμματοσειρές το πολύ για να αποφύγετε την ακαταστασία. τεκμηριώστε ακριβή μεγέθη γραμματοσειρών, ύψη γραμμών και τον τόνο χρώματος για κάθε ρόλο, ώστε η αύρα των Κολοσσιανών να μην εισχωρεί. σε περίπτωση αμφιβολίας, προτιμήστε την απλότητα και διατηρήστε την ταυτότητά τους σε ολόκληρη τη διαδικασία δημιουργίας.
Πρακτικά βήματα: εκτελέστε μια δοκιμή σε τρία κλιπ διαφορετικών μηκών για να επαληθεύσετε την αναγνωσιμότητα και τον ρυθμό. διατηρήστε μια στατική γραμμή κεφαλίδας και χρωματικά σήματα για να προσανατολίσετε τον θεατή και να διατηρήσετε τη συνοχή. χρησιμοποιήστε την εδώ σημείωση για να καθοδηγήσετε τους επεξεργαστές και να διατηρήσετε την καθοδήγηση ευθυγραμμισμένη στη ροή δημιουργίας του blog. μην ξεχάσετε να ενημερώσετε το εγχειρίδιο στυλ μετά από κάθε επανάληψη και να εφαρμόσετε τις αλλαγές σε άλλα έργα, ώστε η προσέγγιση να παραμένει συνεκτική, πλήρως ευθυγραμμισμένη με τους αρχικούς στόχους. ο στόχος δεν είναι ένα μεμονωμένο αποτέλεσμα, αλλά ένα επαναχρησιμοποιήσιμο σύστημα που μετατρέπει ακατέργαστο υλικό σε μια συνεκτική ακολουθία για το κοινό τους, έτοιμο να δημοσιευτεί ως ανάρτηση αλλού, όπως απαιτείται.
Ορισμός Προδιαγραφών Βίντεο: ανάλυση, ρυθμός καρέ, διάρκεια και αναλογία διαστάσεων
Σύσταση: Ξεκινήστε με 1920x1080 στα 30fps ως την κύρια βάση· για μορφές προσανατολισμένες σε κινητά ή κοινωνικής δικτύωσης, χρησιμοποιήστε 1080x1920 (9:16) ή 1080x1080 (1:1). Κρατήστε τα κλιπ σύντομα–15s, 30s, 45s, 60s, ή 90s–εξαγάγετε έτοιμα μέσα ως MP4 με H.264 και AAC ήχο.
Επιλογές ανάλυσης: βασιστείτε σε 16:9 για το blog και τη ροή εργασίας στο στούντιο, με 1280x720 ως μια ελαφριά εναλλακτική και 3840x2160 για παραγωγές υψηλής ποιότητας. Βεβαιωθείτε ότι τα επιλεγμένα αρχεία ευθυγραμμίζονται με το κύριο κανάλι και αποφύγετε ανεπιθύμητα περιθώρια· αυτό διατηρεί το φόντο καθαρό και τον χαρακτήρα προσκηνίου ευκρινή.
Ρυθμός καρέ: 24fps προσφέρει μια κινηματογραφική αίσθηση, 30fps ταιριάζει στις περισσότερες ροές εργασίας, 60fps είναι καλύτερο για σκηνές με πολλή δράση. Η επιλογή που θα κάνετε πρέπει να ισορροπεί την ομαλότητα της κίνησης με το μέγεθος εξαγωγής· χρησιμοποιήστε 30fps ως προεπιλογή και κρατήστε τα 60fps για ακολουθίες που απαιτούν επιπλέον ρεαλισμό.
Διάρκεια: Σχεδιάστε για εισαγωγές 15s–30s, οδηγούς 30s–60s, ή επεξηγητές 90s. Μεγαλύτερα κομμάτια μπορούν να χωριστούν σε μια σειρά στο blog, διατηρώντας έναν γρήγορο ρυθμό επεξεργασίας· κάθε τμήμα πρέπει να έχει ένα σαφές καρέ-κλειδί σε μια μετάβαση για να διατηρείται οτιδήποτε έντονο.
Στρατηγική αναλογίας διαστάσεων: Ξεκινήστε με 16:9 ως το κύριο πλαίσιο· για ροές κοινωνικής δικτύωσης, προετοιμάστε εκδόσεις 1:1 και εκδόσεις 9:16 για ιστορίες. Δοκιμάστε προεπισκοπήσεις σε διάφορες συσκευές για να διασφαλίσετε ότι κρίσιμα στοιχεία παραμένουν εντός ασφαλών περιθωρίων· αν χρειαστεί, χρησιμοποιήστε έναν μετατροπέα για να μεταφράσετε στοιχεία και να εξάγετε παραλλαγές γρήγορα.
Σημειώσεις ροής εργασίας: διατηρήστε το φόντο ελάχιστο για να αφήσετε τον χαρακτήρα και το μήνυμα να αντηχούν· όταν επεξεργάζεστε, μια βασική προσέγγιση που άρχισε να γίνεται πραγματικά αποδοτική βασίζεται σε έτοιμα στοιχεία και έναν συνεπή ρυθμό καρέ-κλειδιού. Αυτό συνδυάζει μέσα, απλές επικαλύψεις κειμένου και γρήγορες κοπές για να παράγει μια ομαλή αφήγηση με λίγα κλικ. Χρησιμοποιήστε έναν φάκελο πολυμέσων στο στούντιο για οργανωμένα αρχεία, βεβαιωθείτε ότι υπάρχουν όλα τα απαιτούμενα στοιχεία και εξαγάγετε έτοιμα αρχεία που υπερτερούν των παλαιότερων εξαγωγών.
Κατασκευή Χάρτη Σκηνών: μετατροπή κειμένου σε storyboard και σήματα σκηνών

Σύσταση: δημιουργήστε ένα storyboard 6–8 πλάνων που αποτυπώνει την κύρια πορεία, και στη συνέχεια κλειδώστε το τελευταίο πλάνο ως CTA. Κάθε πλάνο πρέπει να διαθέτει μια διακριτή λήψη, ένα φόντο, ένα avatar και μια συνοπτική οδηγία δράσης. Αυτή η προσέγγιση διατηρεί το έργο ευθυγραμμισμένο, απαιτεί προσοχή στην ποιότητα και επιταχύνει την παραγωγή κατά τη χρήση του Colossyan Studio και premium στοιχείων. Η ύπαρξη ενός σαφούς χάρτη σε ένα μόνο έγγραφο το καθιστά από μόνο του ένα ζωντανό σχέδιο για την ομάδα, εύκολο στην επεξεργασία και κοινή χρήση.
Ροή εργασίας και Παραδοτέα
- Καθορισμός στόχου: προσδιορισμός του κοινού, των περιορισμών πλατφόρμας και του σκοπού του τελευταίου πλάνου. Ορισμός χρονικού προϋπολογισμού ανά λήψη (6–12 δευτερόλεπτα) και συλλογή αρχείων φόντου, επιλογών avatar και παραλλαγών φωνής για να ταιριάζει στον τόνο.
- Σύνταξη του πλέγματος σκηνής: 6–8 πλάνα, το καθένα με ετικέτα λήψης, φόντο, πόζα avatar, δράση και ένα υπαινιγμό για λεζάντα ή διάλογο. Επισήμανση των πλάνων με σαφήνεια για την απλοποίηση της επεξεργασίας και τη διατήρηση της συνοχής της επιλογής.
- Βήμα μετατροπέων: χαρτογράφηση αφηγηματικών σημείων σε οπτικά στοιχεία χρησιμοποιώντας μετατροπείς. ανάθεση σκηνής φόντου, επιλογή avatar και εφαρμογή οδηγιών κίνησης. προσαρμογή του χρονισμού για να διατηρηθούν τα οπτικά στοιχεία ελκυστικά σε όλες τις πλατφόρμες.
- Διαχείριση στοιχείων: συλλογή και οργάνωση εικόνων φόντου, αρχείων ήχου και στοιχείων avatar. αποθήκευση σε φάκελο έργου με συνεπή ονομασία για την επιτάχυνση του χειρισμού κατά τη σταδιακή εργασία. χρήση στοιχείων που έχουν ήδη δημιουργηθεί για την επιτάχυνση της παραγωγής.
- Επιλογή λήψης και ρυθμός (Συμβουλές): επιλογή 5–7 κύριων λήψεων: εισαγωγική, αλληλεπίδραση, κορυφαία στιγμή και κλείσιμο. ακολουθήστε παραδοσιακές πρακτικές πλαισίωσης και εύκολες μεταβάσεις για να αιχμαλωτίσετε το κοινό.
- Ελέγχοι ποιότητας: επαλήθευση χρωματικής βαθμονόμησης, φωτισμού, αναγνωσιμότητας λεζάντας και καθαρότητας ήχου. διασφάλιση ότι η ακολουθία υποστηρίζει τη φωνή και ευθυγραμμίζεται με τη διάθεση του φόντου.
- Παραδοτέα: παραγωγή ενός PDF storyboard και ενός φύλλου οδηγιών σκηνής. διατήρηση μιας premium έκδοσης για ανασκόπηση και μιας ελαφριάς έκδοσης για κοινή χρήση σε πλατφόρμες και με το κοινό στο Colossyan Studio.
Διατηρήστε τα αρχεία οργανωμένα και προσβάσιμα. η κοινή χρήση ενός καλά δομημένου χάρτη επιταχύνει τη συνεργασία και διασφαλίζει ότι τα τελικά οπτικά στοιχεία παραμένουν πλήρως ευθυγραμμισμένα με την αρχική ιδέα, έτοιμα να εφαρμοστούν στο έργο σε οποιαδήποτε συμβατή πλατφόρμα.
Ενσωμάτωση Ήχου: αφήγηση TTS, μουσική και ηχητικά εφέ
Σύσταση: επιλέξτε μια προσαρμοσμένη φωνή TTS με φυσικό ρυθμό και συνδυάστε την με ένα σύντομο, άδεια χρήσης φιλικό μουσικό υπόβαθρο. προσθέστε ένα ή δύο διακριτικά ηχητικά εφέ για να τονίσετε βασικές στιγμές, και στη συνέχεια κλειδώστε τη μίξη πριν από τα reels.
Οι συντάκτες που μετασχηματίζουν στοιχεία πρέπει να ξεκινούν με μια ενιαία πίστα αφήγησης και μια συνοπτική ηχητική οδηγία. Χρησιμοποιήστε προτροπές για τον έλεγχο του ρυθμού, της έμφασης και των παύσεων. Χρησιμοποιήστε προτροπές κειμένου για τον έλεγχο του ρυθμού, της έμφασης και της προφοράς. Η γεννήτρια μπορεί να αποδώσει αυτόματα, αλλά θα χρειαστεί να ελέγξετε για ακρίβεια στην προφορά, ειδικά για τα ονόματα χαρακτήρων και τους όρους επωνυμίας.
Διασφάλιση συνέπειας σε όλα τα κλιπ: ορισμός στόχος έντασης (για παράδειγμα, -16 LUFS) και εφαρμογή ήπιας συμπίεσης. χρήση μετατροπέων για την κανονικοποίηση των ρυθμών δειγματοληψίας σε 44,1 kHz ή 48 kHz. Μια ελαφριά κοπή EQ για χαμηλό βόμβο και μια απαλή αύξηση high-shelf ενίσχυση στη φωνή βοηθά στη διατήρηση της ευκρίνειας όταν παίζει μουσική από κάτω. Διατηρήστε το μουσικό υπόβαθρο 10–20 dB κάτω από τον διάλογο.
Μεταφράζετε σενάρια σε άλλες γλώσσες εισάγοντας κείμενο στην ίδια γεννήτρια αφήγησης και αποδίδοντας παραλλαγές γλώσσας. Αυτό διατηρεί τον χαρακτήρα και τον χρονισμό, ενώ επεκτείνει την εμβέλεια. Όταν ξεκινάτε πολυγλωσσική εργασία, διατηρήστε ένα οικογενειακό φωνής για όλες τις τοποθεσίες για να διατηρήσετε τη συνέπεια της επωνυμίας.
Οι δύσκολες προφορές πρέπει να αντιμετωπίζονται με φωνητικό οδηγό και ρητές προτροπές για κάθε όρο. Μπορείτε να εφαρμόσετε μια σύντομη σημείωση προφοράς στην προτροπή και να χρησιμοποιήσετε σύντομους, συχνούς ελέγχους κατά την επεξεργασία. Απλά, διατηρήστε μια ισορροπία που επιτρέπει στον διάλογο να παραμένει στο προσκήνιο, ενώ οι ήχοι συμπληρώνουν την ίδια την δράση.
Συμβουλές για την αποφυγή κοινών προβλημάτων: ακρόαση σε συσκευές-στόχους, περιορισμός του δυναμικού εύρους εάν τα κλιπ αναπαράγονται σε θορυβώδη περιβάλλοντα και επιβεβαίωση ότι οι λεζάντες ευθυγραμμίζονται με την αφήγηση. Τα οφέλη περιλαμβάνουν ταχύτερη παραγωγή, συνεπή επωνυμία και επεκτάσιμη ροή εργασίας για reels που μπορούν να μεταφραστούν σε social, marketing και product demos.


