

Začněte s jedinou šablonou klipu, která odpovídá vaší požadované náladě, a nechte ji vést každý další klip. Díky pracovnímu postupu založenému na umělé inteligenci můžete sladit tón s pohybovými pokyny a zvukem a zároveň udržet proces jednoduchý. Pro uživatele, kteří usilují o profesionální výsledky, je tento přístup efektivní a snižuje počet zpětných úprav, jakmile začnete.
Vytvořte si základní sadu 3–5 šablon a 2–3 balíčků aktiv, které jsou pravidelně přidávány. To pomáhá uživatelům rychle dodávat konzistentní klipy. Pohybový klip v rozlišení 1080p vykreslený na grafické kartě střední třídy se dokončí během několika sekund; vyšší rozlišení nebo delší sekvence mohou trvat déle, ale digitální pracovní postup se dobře škáluje pro týmy. Tento přístup zůstává ideální pro ty, kteří potřebují rychlé zpracování se zvukovou vyvážeností a dobrými výsledky. Tyto klipy lze sestavit do videí pro sdílení na sociálních sítích.
Pro zjednodušení produkce přizpůsobte své potřeby 3krokovému postupu: (1) shromáždění aktiv (loga, fonty, zvuk) (2) konfigurace základní šablony s požadovaným tempem a barevným stylem (3) vykreslení a iterace. Jakmile začnete tento proces používat, rychle transformuje mnoho variant; nástroj nevyžaduje kódování a automatizuje běžné kontroly synchronizace rtů a rytmu. Pro profesionální vzhled udržujte krátké délky klipů a slaďte pohyb s normami platformy.
Analytika řídí optimalizaci: sledujte dobu setrvání, míru přeskočení a opakované sledování segmentů, abyste mohli vést další dávku. Spuštění 2–3 variant A/B může znatelně zvýšit zapojení. S každým přidaným aktivem se zážitek více sladí cílové skupině a pracovní postup se stává efektivnějším pro kampaně, které se musí škálovat napříč kanály. To je obzvláště užitečné pro digitální týmy s náročnými potřebami.
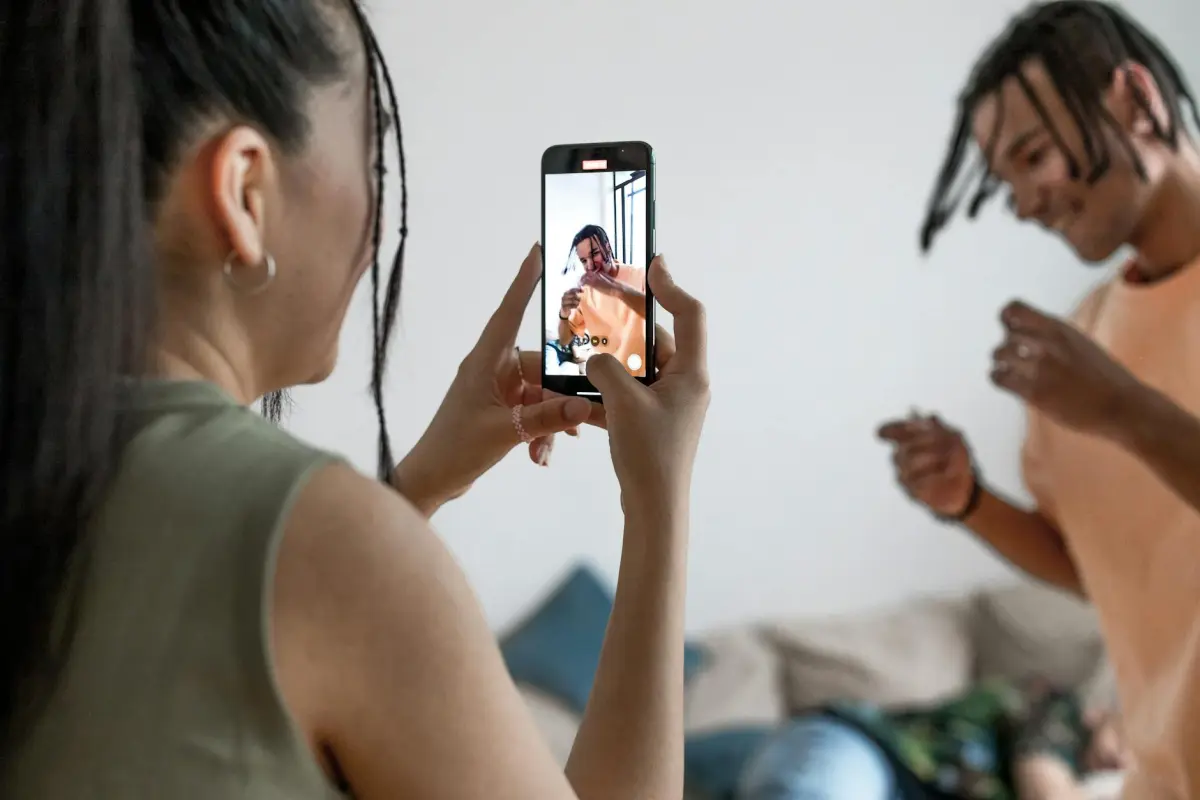
Je umělá inteligence pro převod obrazu na video na mobilních zařízeních proveditelná?
Doporučení: Na mobilních zařízeních je montáž obrazu do pohybu proveditelná pro běžné použití; použijte AI přímo na zařízení s lehkou knihovnou předvoleb; tento přístup přináší nejlepší, nejjednodušší a uživatelsky přívětivé výsledky.
Hardwarová omezení: výdrž baterie, zatížení CPU/GPU, RAM. Telefony střední třídy s 6–8 GB RAM mohou vykreslit sekvenci o délce 5–12 sekund s jednoduchým motivem; pro delší nebo bohatší obsah offloadujte do cloudu, pokud to síť a zásady dovolují; trendy ukazují, že tvůrci upřednostňují iterativní cykly; zajistěte zachování kontextu a energetickou účinnost.
Strategie: udržujte malá aktiva, používejte jeden motiv, umisťujte text a grafiku tak, abyste maximalizovali čitelnost; používejte na zařízení hlas pro vyprávění nebo přidávejte hlasové komentáře; jakmile aktiva oříznete, vyhněte se těžkým přechodům; vizuálně ostré výsledky často závisí na osvětlení a emocích; vylepšené upscaling může být použito.
Pracovní postup: vyberte tvůrčí aplikaci s nejlepším uživatelským rozhraním, kurátorovanou knihovnou a snadným exportem; začněte s motivem narozeninové montáže nebo jiným kontextem; procházejte šablony, vyměňujte fotografie, upravte časování; během okamžiku se promění v uhlazený klip.
Důkazy: svědectví zdůrazňují jednoduchost, dobré výsledky a rychlou iteraci; uživatelé často chválí snadné sdílení a schopnost přizpůsobit tón publiku; příklady ukazují emoce prostřednictvím barev a tempa.
Závěr: Mobilní proveditelnost se zvyšuje, když smícháte inferenci na zařízení s inteligentním záložním řešením cloudu, optimalizovanými fonty, umístěním a zvukem; pro rychlé, speciální projekty je cesta na zařízení dobrá; pro bohatší příběhy naplánujte tvůrčí pracovní postup, který umožňuje hlas a hlasové komentáře, a mějte na paměti ochranu dat.
Jak umělá inteligence z obrazu na video interpretuje vizuály na chytrých telefonech
Vyberte 3–5 aktiv a 2 jednoduchá pozadí, poté proveďte experiment na svém smartphonu, abyste zjistili, jak AI pro převod obrazu na video překládá vizuály do poutavých klipů.
Interpretace na zařízení analyzuje média bod po bodu – pohybové vektory, rozložení barev a obrysy objektů – takže dokáže zvolit tempo a přechody bez storyboardu. Systém používá neomezené výzvy k řízení stylu, zatímco pozadí jsou segmentována, aby byl objekt v popředí. Tyto kroky se často provádějí v rámci aplikace a export vygeneruje klip připravený ke sdílení, zatímco stejný proces formuje videa, která se zobrazují na obrazovce.
Chcete-li dosáhnout vysoce kvalitního výstupu, poskytněte neuvěřitelně čistá média, vyhněte se přeplněným pozadím a vyberte vertikální snímky pro sociální sítě; nástroj často zachová detaily a poskytne snadný pracovní postup od začátku do konce. Nástroje zabudované do platformy zjednodušují export a snižují potíže, což vám umožňuje generovat animovaná aktiva přímo na zařízení.
Formáty sociálních sítí upřednostňují stručné, poutavé segmenty; produktové týmy mohou tato aktiva znovu použít k testování titulků a pozadí, což urychlí iteraci jejich kampaní a uvede obsah na trh rychleji. Přístup vygeneruje klipy, které působí přirozeně, koherentně a připravené ke sdílení bez dalších kroků.
Součást procesu: 1) výběr aktiv; 2) výběr pozadí; 3) nastavení délky a snímkové frekvence; 4) export vysoce kvalitních médií; 5) kontrola na zařízení pro potvrzení zarovnání snímků a rytmu, který již není potřeba.
Doporučené mobilní aplikace a webové nástroje pro tvorbu na cestách
CapCut na mobilu je ideální pro úpravy na cestách, nabízí formáty včetně 1080p a 4K, překryvné vrstvy obrazu, pohybové efekty a připravené miniatury, podporuje propagační klipy a umožňuje okamžité sdílení.
Navíc InShot zůstává uživatelsky přívětivý, s šablonami a předvolbami, které převádějí mezi formáty (čtvercový, vertikální, 16:9). Od iOS po Android poskytuje aktiva připravená k propagaci pro sociální kanály, jako jsou titulky, překryvné vrstvy a hudba, a pomáhá vám zvážit různé poměry stran navzdory ohromujícímu výběru; navíc podporuje offline úpravy.
Clipchamp, webový nástroj, nabízí řadu výkonných funkcí, včetně úpravy s pomocí AI, aktivy z knihovny předloh a exportu v dostupných formátech (MP4, MOV, WEBM) s nastavitelnými poměry stran. Poskytuje připravené miniatury a propagační šablony, užitečné zejména pro týmy a jednotlivé tvůrce, aby zajistil konzistentní branding produktů napříč platformami.
Kapwing podporuje spolupráci pro týmy a další osoby a nabízí pohybové šablony, převod textu na řeč, automatické titulkování a konverze formátů. Je k dispozici na mobilních zařízeních i na webu, pomáhá vylepšit branding napříč platformami a umožňuje rychlou iteraci.
Na iOS poskytuje LumaFusion profesionální víceúrovňové úpravy, pohybové předvolby a exporty až do 4K. Podporuje překryvné vrstvy obrazu, klíčové snímky a barevné korekce, takže je ideální pro tvůrce, kteří chtějí na cestách hlubší kontrolu.
Pracovní postup krok za krokem pro přeměnu obrázků na krátká videa
Doporučení: Naplánujte projekt s jasným rozsahem: chcete přeměnit sérii existujících obrázků na kompaktní prezentaci o délce 60–90 sekund, vyberte širokoúhlý formát 16:9 pro YouTube, který odpovídá očekáváním diváků a poskytuje profesionálně vypadající výsledek.
Sbírejte aktiva: shromážděte 8–12 obrázků, ověřte rozlišení, ořízněte na konzistentní poměr stran a upravte jas, abyste udrželi jednotný vzhled napříč sekvencí.
Vytvořte rychlý storyboard v krocích: uspořádejte obrázky do částí, které vyprávějí příběh, naplánujte tempo a rozhodněte, kde se objeví titulky; to zajistí plynulý přechod.
Otevřete Pictory v uživatelsky přívětivém rozhraní a spusťte nový projekt; nastavte cílový snímek na 16:9, poté importujte aktiva. Tato příručka udržuje kroky snadno sledovatelné a pomáhá vám pracovat efektivně.
V tomto kroku vyberte přechody a časování: aplikujte řadu jemných přechodů, posuvných pohybů a jemných zoomů; udržujte každý snímek kolem 2–4 sekund v závislosti na obsahu.
Opatrně přidejte překryvy: titul na začátku, volitelné titulky ve spodním třetině a závěrečný snímek s údaji o tvůrci; zajistěte, aby text zůstal pro diváka atraktivní a čitelný.
Přidejte zvuk: smíchejte hudbu bez licenčních poplatků s sekvencí nebo přidejte krátký hlasový komentář; vyvažte úrovně, abyste nepřehlušili obraz.
Často přehrávejte: zkontrolujte časování, zarovnání snímků, barevnou konzistenci a synchronizaci zvuku; opakujte, dokud nebude snadno sledovatelný.
Dokončete plán pro export: vyberte MP4, 1080p, 30fps a konzervativní datový tok pro plynulé přehrávání na YouTube; pojmenujte soubor popisně a připravte miniaturu.
Kde publikovat: nahrajte na YouTube nebo vložte na stránku projektu; sledujte výkon prostřednictvím zpětné vazby diváků a zlepšujte aktiva pro budoucí části projektu.
Klíčová nastavení kvality: rozlišení, snímková frekvence, tempo
Základní: uzamkněte 1920x1080 při 30 snímcích za sekundu; exporty zůstávají zvládnutelné a vzhled zůstává ostrý na většině zařízení. Pokud plánujete širokou distribuci nebo portfolio, exportujte samostatnou verzi 4K (3840x2160) a zachovejte původní vysoce kvalitní záznam pro budoucí úpravy.
- Rozlišení
- Základní: 1920x1080 při 30 snímcích za sekundu; rovnováha mezi přehledností a velikostí souboru, vhodná pro publikování na většině platforem.
- Cesta k upgradu: použijte 2560x1440 nebo 3840x2160 pouze v případě, že vaše aktiva podporují upscaling; to zachovává vzhled na velkých obrazovkách a umožňuje oříznutí bez ztráty důležité tváře nebo obrázků.
- Poměry stran: 16:9 je standard; pro vertikální kanály použijte 9:16 nebo 1:1; zajistěte, aby obsah zůstal v bezpečné oblasti, abyste zabránili oříznutí okrajů.
- Snímková frekvence
- 24fps dodává filmový nádech; 30fps je široce podporováno a nabízí plynulý pohyb; 60fps funguje dobře pro rychlou akci nebo výukové programy, které vyžadují ostrý pohyb.
- Klíčová je konzistence: zachovejte stejnou snímkovou frekvenci napříč scénami, abyste zabránili trhaným přechodům, například při publikování na více platformách.
- Otestujte sekvence s intenzivním pohybem, abyste se vyhnuli trhavosti; použití správné snímkové frekvence pomáhá vzhledu a pomáhá těm, kteří chtějí plynulé zážitky.
- Plynulé přechody mezi změnami scén snižují únavu a zlepšují celkový zážitek.
- Tempo
- Definujte tempo v sekundách na střih: 0,8–1,2 s pro rychlé klipy na sociálních sítích; 1,5–2,5 s pro vysvětlení; 3–4 s pro kroky vyžadující detaily.
- Udržujte rozmanitost: střídejte rychlé střihy s delšími záběry, abyste podpořili vyprávění a snížili únavu.
- Vylepšete animacemi a titulky; tyto nástroje mohou efektivněji prezentovat nápady a udržovat kreativní tok bez námahy.
- Vyhněte se běžným chybám: příliš rychlé střihy zmeškají informace; příliš pomalé tempo působí nudně; před exportem upravujte iterativně.
- Zajistěte, aby tempo odpovídalo hudbě a klíčovým slovům, která chcete zdůraznit; tempo, které působí přirozeně, zlepšuje výkon publikování.
- Pro speciální kampaně přizpůsobte tempo příběhu a publiku, abyste maximalizovali dopad.
- Úsilí = nižší, když předvolby řídí časování; najděte rytmus, který snižuje manuální úpravy a udržuje obsah poutavý.
Tip: vyberte si základ, který odpovídá vašim přáním a trendům, a poté jej přizpůsobte pro potřeby publikování. Najděte rovnováhu mezi snadností a variabilitou pohybu; používejte předvolby pro bezstarostnou práci. Při exportu vytvořte více verzí, abyste pokryli scénáře publikování. Hleďte na trendy ve svém oboru, abyste zůstali kreativní a přinášeli konzistentní výsledky s nástroji pro animaci prezentačních řádků a titulků, které odpovídají vašim klíčovým slovům.
Omezení a tipy pro optimalizaci výkonu na mobilních zařízeních
Snižte výstupní rozlišení na 1280x720 a omezte snímkovou frekvenci na 24 nebo 30 snímků za sekundu; to přímo snižuje zátěž procesoru/grafického procesoru a využití paměti na většině mobilních zařízení při zachování čitelnosti pro poutavé výsledky. Nikdy nezačínejte s nejvyšším nastavením; vždy testujte postupně.
Zvolte formáty a kodeky, které nepřetěžují zařízení: používejte předvolby kompatibilní s H.264/AVC nebo HEVC; mějte na paměti, že některé formáty nefungují dobře na starších zařízeních. Pro širokou kompatibilitu volte populární formáty navržené pro širokou podporu a udržujte knihovnu aktiv štíhlou.
Nikdy nenačítejte všechny aktivy najednou; vyhněte se stahování ze vzdálených zdrojů; přednačtěte je z paměti pomocí kurátorované digitální knihovny aktiv s mnoha populárními prvky; tento design umožňuje plynulejší časování a snižuje spotřebu energie na mobilních zařízeních.
Používejte zoom a přiblížení pouze v případě potřeby; vyhněte se častým interakcím zoomu; předrenderujte zobrazené zvětšené snímky v editoru; to pomáhá využití CPU a udržuje ostrou hranu pro poutavé sekce; zajistěte, aby se prvky uživatelského rozhraní nerenderovaly každý snímek; ukládání do mezipaměti může pomoci.
Deaktivujte skripty pro detekci obličeje, pokud se nepoužívají; tyto algoritmy, které běží pro každý snímek, mohou procesor zahlcovat; naplánujte tyto skripty během nečinných období; použijte masky s nižším rozlišením pro sledování obličeje; nikdy nespouštějte všechny úlohy na plný výkon.
Testujte na široké škále zařízení; měřte časování snímků, vybíjení baterie a tepelné škrcení; cílem je 24 snímků za sekundu na středním hardwaru a upravujte tak, abyste udrželi poutavý výstup bez přetěžování zdrojů; ujistěte se, že pokrýváte populární profily zařízení a podle toho upravte předvolby.


