

توصية: قم بقص الفواصل الزمنية باستخدام أداة واحدة، بالمجان، ودون خطوات غير ضرورية؛ سيبدو مقطع الفيديو الخاص بك أنقى، وأنشئ تفاعلًا، ووفر وقت الانتهاء.
ابدأ بالسماح للأداة بفحص اللحظات الصامتة، مما يتيح قص الفواصل الزمنية، وقم بقصها. اعتمد على الإشارات الصوتية حتى تتمكن من العمل مع الضوضاء في الخلفية، ولكن تجنب قطع الحوار. قم بذلك بسرعة ويدويًا عند الحاجة؛ تكون النتيجة تحريرًا أنقى سيوفر وقت الانتهاء ويحافظ على تفاعل الجمهور.
للحفاظ على الإيقاع، قم بمحاذاة القصات مع اللحظات الرئيسية في اللقطات. استخدم الكاميرا كنقطة ارتكاز، وقم بتطبيق انتقالات سلسة لتجنب الاهتزاز. يقلل هذا النهج من ضوضاء الخلفية أثناء التشغيل، ويجعل المقطع يبدو أكثر إحكامًا، ويدعم التفاعل عبر المنصات.
باستخدام سير العمل هذا، ستنهي العمل بشكل أسرع، ولن تعيد العمل على أقسام ضخمة أبدًا، وستتجنب القصات المتكررة. العملية المبسطة تعمل على أي إعداد، وتحافظ على الإيقاع ثابتًا، وتساعدك على إنشاء تسلسل خالٍ من الضوضاء يبدو طبيعيًا للمشاهدين عبر الأجهزة.
باختصار، تساعد مجموعة الأدوات هذه المجانية في تقليل الفواصل الزمنية، والحفاظ على الطاقة، والحفاظ على الزخم، حتى يظل الجمهور منخرطًا إلى الأبد دون العناء اليدوي.
سير عمل سريع ومجاني لإزالة الفواصل الزمنية

ابدأ بنسخ الجدول الزمني إلى مشروع احتياطي. قم أيضًا بفحص المسار الصوتي للصمت ووضع علامات قطع لتقصير الفجوات، مع الحفاظ على الإيقاع الطبيعي وتجنب التحرير المفرط. قم بإجراء اختبار سريع على قسم قصير لتأكيد النتيجة.
قم بنسخ الصوت حرفيًا لتحديد أوقات البدء والانتهاء؛ توجه هذه الخطوة إلى مكان تشديد التدفق دون التضحية بالمعنى. استخدم أداة مجانية لإنشاء النسخة المكتوبة وتصدير ملف نصي للمرجع.
قم بمحاذاة القصات مع إشارات النسخة المكتوبة حتى يتحرك إيقاع الفيديو مع الكلام؛ يجب أن تتزامن إجراءات الكاميرا مع حدود الكلمات للحفاظ على الزخم. يظل الانتهاء العام طبيعيًا وبجودة الاستوديو.
استخدم محررًا مجانيًا لتطبيق أوامر الاقتصاص وتعديلات التموج التي تتقلص أجزاء الصمت دون تغيير اللحظات الأساسية. يركز هذا النهج على إزالة فترات الصمت الطويلة فقط مع الحفاظ على الصوت الأساسي. ببساطة، تختفي الفجوات ويحافظ التسجيل على التوازن.
قم بعرض مسودة وراجعها على شاشات الهاتف المحمول وسطح المكتب؛ إذا لزم الأمر، اضبط المستويات للوضوح. تأكد من بقاء محاذاة النسخة المكتوبة دقيقة حتى يتطابق تدفق الصوت مع المرئيات.
انشر مقطعًا قصيرًا لزيادة الوصول الفيروسي؛ يمكن للمسوق إعادة استخدام النسخة المكتوبة لمقاطع الفيديو الاجتماعي، بينما يعيد المعلم استخدامها للدروس. تعمل سير العمل الروبوتية على تسريع مهام الفحص دون تكلفة إضافية، وهذا سيمكّن فريقك من توسيع الإنتاج.
تظهر النتائج المبلغ عنها أن الجمهور يظل منخرطًا. بشكل عام، يظل الناتج طبيعيًا، مع لمسة نهائية بجودة الاستوديو وصوت واضح. يساعد النهج أيضًا المشاهدين على البقاء مع المحتوى.
تنسيقات التحميل وحدود الحجم
توصية: قم بالتصدير إلى MP4 باستخدام H.264 للفيديو و AAC للصوت، بدقة 1920 × 1080، وبمعدل 30 إطارًا في الثانية؛ حافظ على كل ملف أقل من 4 جيجابايت والأقسام أقل من 60 دقيقة لتحسين سرعة المعالجة والتفاعل بشكل كبير لسير العمل هذا.
تشمل التنسيقات المدعومة MP4 (H.264)، MOV، و WebM؛ للاستيراد الصوتي فقط، استخدم MP3 أو AAC لوضعها بجوار المرئيات؛ أضف تسميات توضيحية كملفات SRT أو WebVTT وقم بتطبيقها على الجدول الزمني لسهولة الوصول.
نسب العرض إلى الارتفاع: 16:9 لمعظم خلاصات الأخبار؛ 1:1 للمنشورات المربعة؛ 9:16 للمقاطع العمودية؛ للمحتوى الطويل، خطط لنسبة عرض إلى ارتفاع متسقة عبر الأقسام لتجنب الانتقالات غير المريحة.
تعتمد حدود التحميل على الخطة؛ تحقق من مصدر المعلومات في مركز مساعدة Clipchamp للحصول على الأرقام الدقيقة. قم بضغط المصادر الأولية قبل الاستيراد لتوفير الوقت والحفاظ على جودة شاملة عند النشر على شريط الأدوات والحفظ إلى الأبد. بعد المعالجة، يمكنك إضافة المصادر وتطبيق اللمسات النهائية مع التسميات التوضيحية ومحاذاة الصوت للحفاظ على تفاعل عالٍ.
الكشف التلقائي عن الفواصل الزمنية واختيارها

ابدأ بسير عمل من مرحلتين على كل تسجيل: أولًا فحص الطاقة لتحديد الصمت القصير، ثم وضع علامات اختيار للقصات للتعديلات.
عيّن معايير الصمت حول -40 ديسيبل فل سكيل (dBFS) لمدة 0.25-0.35 ثانية لتحديد فجوة؛ في البيئات الصاخبة، اضبط على -42 ديسيبل فل سكيل، وفي الاستوديوهات الهادئة استخدم -38 ديسيبل فل سكيل. تحقق من ضوضاء الطيف والسياق الزمني لتجنب الأخطاء التي تقلل من وضوح الملف.
منطق الاختيار يفضل القصات في نهاية الجمل أو فواصل الإيقاع الطبيعية، ويحافظ على الكلمات المحيطة سليمة، ويستخدم القص لضمان بقاء الانتقالات سلسة. هكذا تظل اللحظات غير المريحة قليلة دون التضحية بالمعنى أو التدفق، وهي تدعم إيجاد التوازن الصحيح بين الإيجاز والاكتمال.
قم بتصدير ملف محدد بعلامات التحرير؛ هذا يمنح المصداقية لمدخلات المسوق ويسرع التكرارات التي يجدها المشاهدون جذابة. احفظ نسخًا نظيفة يمكن إعادة استخدامها لمشروع آخر، مع الحفاظ على سجل لإزالة الانحرافات الطويلة أو عبارات الحشو للرجوع إليها في المستقبل في الملف.
قم بنسخ النص حول القصات للحفاظ على السياق؛ تساعد محاذاة الكلمات في التحقق من بقاء القصد المنطوق سليمًا وتقلل من الضوضاء في التسميات التوضيحية. يمكن تحديد الثرثرة غير الضرورية للإزالة أو الإزالة المستهدفة للحشو، مع الحفاظ على الرسالة الأساسية موجزة وواضحة.
إليك قائمة تحقق عملية تظل قابلة للتنفيذ: ابدأ بالإعدادات المسبقة المضبوطة لأنواع الملفات المختلفة، وقم بإجراء فحص سريع على كل جزء، وسجل التعديلات لتوثيق مكان حدوث الإزالة، وأعد الفحص بعد التصدير لتأكيد قص جاهز للفيروسات يمكن أن يبقى إلى الأبد ويعمل كقالب قابل لإعادة الاستخدام لتسجيل آخر في هذه السلسلة. هنا، الهدف هو زيادة المصداقية، وتقليل الإحراج، وتقديم تجربة واضحة للجمهور.
الضبط اليدوي الدقيق: ضبط نقاط البداية/النهاية
حدد نقطة البداية ونقطة النهاية الدقيقة لكل مقطع على الجدول الزمني، مع التركيز على فترات الصمت والفجوات لتقليص المحتوى بشكل كبير. استهدف فترات الصمت التي تقل عن 0.2-0.4 ثانية والفجوات الأطول من 0.6 ثانية للحفاظ على وتيرة ثابتة.
قم بفحص التسجيل لتحديد الفواصل الزمنية، وفترات الصمت، والتوقيت غير المتساوي؛ ضع علامات قطع عند الفجوات الطويلة، ثم قم بقص هذه الأجزاء للحفاظ على تدفق طبيعي.
استخدم القص لإزالة الأجزاء غير الضرورية مع الحفاظ على الرسالة الأساسية؛ تأكد من بقاء أصوات المعلم والمسوق واضحة وذات مصداقية، وحافظ على حركة الكاميرا ثابتة لتجنب الاهتزاز.
عند ضبط علامات البداية/النهاية، استهدف إيقاعًا طويلًا ومتساويًا؛ تجنب القصات المفاجئة التي تخلق شعورًا غير متساوٍ، ودع البريق في المرئيات ينبثق من انتقالات نظيفة.
تظهر المقاييس المبلغ عنها زيادة التفاعل بعد تشديد الفواصل الزمنية؛ يبهر المحتوى الآن الجمهور ويكتسب مصداقية لخبرة المعلم؛ تُظهر مقاطع الفيديو تدفقًا أكثر تماسكًا.
نصائح عملية: قم بتسمية الأقسام الطويلة لتجنب القص الشديد؛ حافظ على التسميات التوضيحية والكلمات موجزة لتقليل العبارات غير الضرورية؛ يمكن لضبط دقيق على مقياس الملي ثانية أن يحسن بشكل كبير من الاحتفاظ بالمشاهد. إذا بدا القص خاطئًا، فراجع الجزء الذي تم إزالته وأعد إدراجه للحفاظ على السياق.
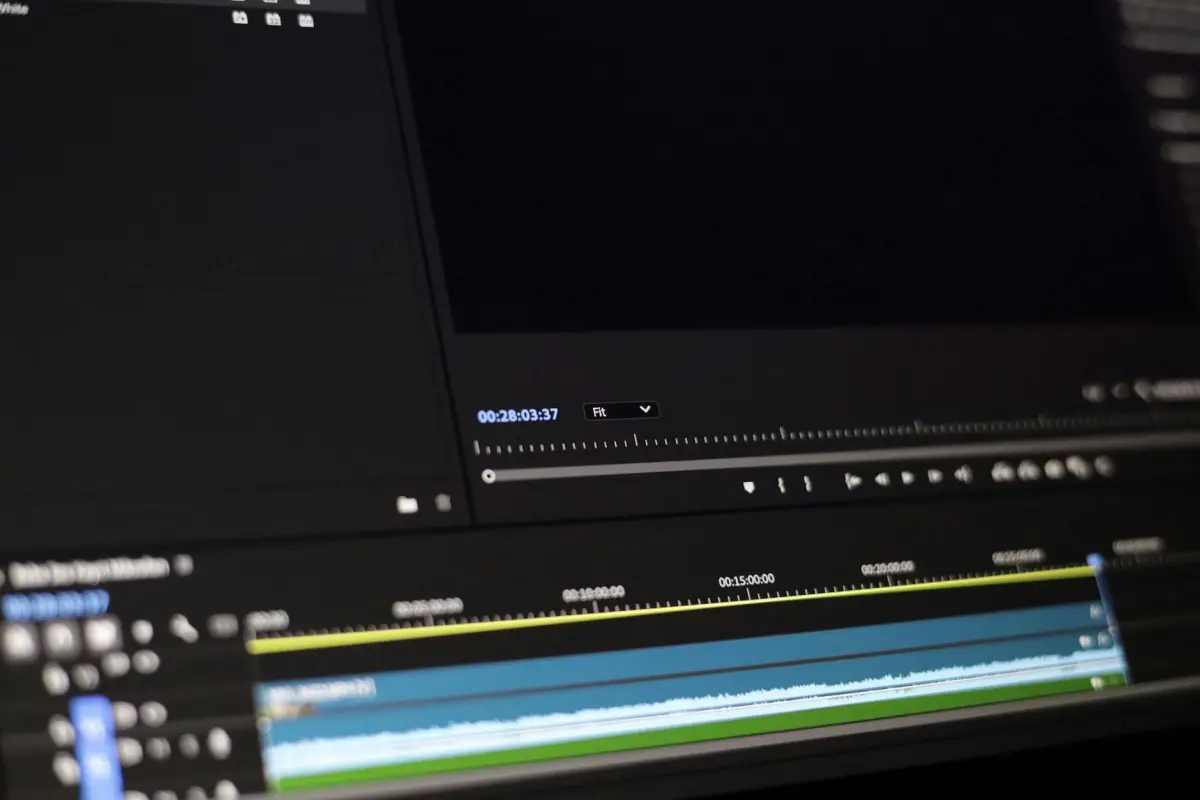
إعادة تشغيل المعاينة: التحقق من القصات قبل التصدير
قم بمعاينة كل قص عن طريق إعادة التشغيل المتحركة، وانتقل على طول الجدول الزمني باستخدام مفاتيح الأسهم، وقم بتأكيد التوقيت بسرعة 1x قبل تصدير مجموعة المقاطع.
قم بتعيين ميزانية زمنية لكل قص: 0.5-1.5 ثانية؛ إذا امتدت فجوة أو ضوضاء لأكثر من 0.25 ثانية، فقم بتقصيرها وفقًا لذلك.
استخدم شريط الأدوات لتبديل المعاينة التلقائية؛ يؤدي النقر إلى بدء التكرار حتى تتمكن من ملاحظة التسلسل حتى ترضى عن الانتقالات.
افحص الانتقالات بحثًا عن توقيت آلي؛ تجنب التحولات المفاجئة؛ تبرز لحظات "البوف"، لذا اجعل الحواف سلسة بشكل كبير للحصول على تدفق طبيعي يحافظ على تفاعل المشاهدين ويتجنب الإلهاء.
خطط وخزن نسختين: ملف رئيسي ونسخة مقصوصة؛ مخاطر صفرية ومقارنة أسهل للمراجعات.
يجب التقاط بيانات وصفية المصدر: مصدر المعلومات، الطابع الزمني، زاوية الكاميرا؛ هذا يساعد في العثور على المقاطع بسرعة أثناء العمل لاحقًا.
بعد التحقق، أضف رسالة موجزة في الملاحظات لوصف قرارات القص؛ هذا يساعد المتعاونين ويجعل إعادة الاستخدام في المشاريع الفيروسية أكثر سلاسة.
| الخطوة | الإجراء | الأداة/ملاحظات | الوقت/المعايير |
|---|---|---|---|
| 1 | تمكين تحريك الإعادات في المخطط الزمني؛ المسح بالأسهم | فحص بسرعة 1x | التحقق في الوقت الفعلي |
| 2 | تعيين ميزانية وقت لكل قطع | نافذة 0.5–1.5 ثانية | التقصير إذا كانت الفجوات > 0.25 ثانية أو ظهر تشويش |
| 3 | تبديل المعاينة التلقائية في شريط الأدوات؛ النقر للتكرار | معاينة تلقائية | التكرار حتى يصبح نظيفًا |
| 4 | التحقق من الانتقالات والتوقيت | الانتباه إلى التوقيت الآلي؛ التعديل تدريجيًا | ضمان تدفق سلس |
| 5 | حفظ إصدارات الخطة | أساسي مقابل مقصوص | صفر مخاطر |
| 6 | تسجيل البيانات الوصفية | المصدر، الطابع الزمني، زاوية الكاميرا | قابل للتتبع |
| 7 | وضع علامات على القصص في الملاحظات | حقل الرسالة | يساعد المتعاونين؛ قابل للتطبيق للحملات الفيروسية |
إعدادات التصدير: التنسيقات، الدقة، والتنزيل
اختر MP4 (H.264) بدقة 1080p/30fps مع 12 ميجابت في الثانية للفيديو و 192 كيلوبت في الثانية للصوت؛ اضبط معدل الإطارات على تلقائي عندما يكون المصدر متغيرًا للحفاظ على تشغيل سلس للمشاهدين.
لتحسين الجودة للمشاريع المتطورة، انتقل إلى 4K (2160p) مع 35–60 ميجابت في الثانية للفيديو و 256–320 كيلوبت في الثانية للصوت؛ هذا يحسن التفاصيل العامة بشكل كبير للشاشات الكبيرة ويبلغ عن التشغيل في جلسات التسجيل.
- التنسيقات: MP4 (H.264) يظل هو الافتراضي لمعظم المنصات؛ WebM (VP9/AV1) يمكن أن يحسن الكفاءة على المتصفحات المتوافقة؛ للأرشفة أو خطوط أنابيب ما بعد الإنتاج، MOV أو ProRes هو خيار، على الرغم من أن الملفات أكبر.
- الدقة ومعدل الإطارات: 1080p بدقة 30 إطارًا في الثانية افتراضيًا؛ التبديل إلى 60 إطارًا في الثانية للحركة؛ للأسلوب السينمائي، 24 أو 25 إطارًا في الثانية؛ 4K (2160p) مثالي للعروض الكبيرة والمستقبل.
- معدل البت والصوت: 1080p 8–12 ميجابت في الثانية؛ 4K 35–60 ميجابت في الثانية؛ الصوت 192–320 كيلوبت في الثانية؛ معدل العينة 44.1 أو 48 كيلوهرتز؛ استخدم CBR للبث المتوقع، أو VBR لتوفير المساحة دون المساس بجودة التسجيل.
- إعدادات الجودة: فاصل الإطار الرئيسي ثانيتين؛ ملف تعريف عالي؛ مستوى 4.2 أو أعلى؛ مساحة لون Rec.709؛ تمكين المسح أثناء التصدير لاكتشاف الأخطاء؛ هذا يساعد سير العمل العام على البقاء متسقًا.
- التسليم والتسمية: احتفظ بنظام تسمية نظيف يتضمن المشروع والإصدار والتاريخ؛ اسحب الملف إلى موقع التنزيل المستهدف؛ يؤدي النقر على تصدير إلى بدء العملية في شريط الأدوات؛ بعد ذلك، تحقق من حجم الملف والمدة، وتأكد من تطابق الصوت المسجل مع الفيديو. إذا تم الإبلاغ عن مشاكل، فإن إعادة التصدير السريعة دون إعادة ترميز تحافظ على التقدم، وهذا تحرك عملي لتدفق عمل المبدع.
سواء كانت وجهات التوزيع هي YouTube أو Vimeo أو مشغل خاص، يجب أن يحافظ خيار التصدير على مزامنة الفيديو والصوت. اكتشف توازنًا بين الجودة وحجم الملف؛ تساعد عمليات التحقق التلقائية في شريط الأدوات على تأكيد الدقة. يتم تشغيل سير العمل هذا بواسطة مشفرات موثوقة ويدعم مسارًا سلسًا للتسجيل وصناعة النشر للمشاهدين، وللمبدع ككل. هذا النهج يوفر الوقت الذي كنت ستنفقه بخلاف ذلك على اختبار عمليات ترميز متعددة.


