


ابدأ بوصف مشهد حيوي واحد يجسد المكان والحركة والجو العام.
هل تتطلع إلى توسيع نطاق المحتوى دون عملية مرهقة؟ الفرق في إدارة الأعمال تتفهم كيف يمكن للبرامج ترجمة وصف موجز إلى مجموعة من المقاطع، مع معلمات يمكنك تعديلها في دقائق.
بدءًا من قالب شائع، ستحصل على صور متسقة بشكل لا لبس فيه عبر المشاريع. التصاميم بديهية وتمكن غير المصممين من تشكيل القصص والحركة دون الحاجة إلى ترميز، مع لوحة تحكم واحدة لتعديل الألوان والإيقاع ونبرة الصوت.
التكلفة والتوقيت: استهدف مقاطع مدتها 30-60 ثانية بدقة 1080 بكسل؛ تتراوح التكاليف لكل مقطع من 3 دولارات إلى 15 دولارًا اعتمادًا على الطول والأصول والصوت؛ يمكن للشركات البدء بخطة شهرية تتراوح بين 50-200 دولار اعتمادًا على عدد المقاعد؛ قارن الخيارات للعثور على ما يناسب سير عملك، وستوفر أكثر مما تتوقع مقارنة باستئجار استوديو.
عند اختيار البرنامج المناسب، تصبح العملية عملية بشكل لا لبس فيه: لديك مسار لتقديم قصص تواجه العملاء بسرعة، مع مخرجات يمكن نشرها مباشرة على القنوات، مما يمكّن الفرق من مواكبة الطلب واختبار التنوعات ببضع نقرات.
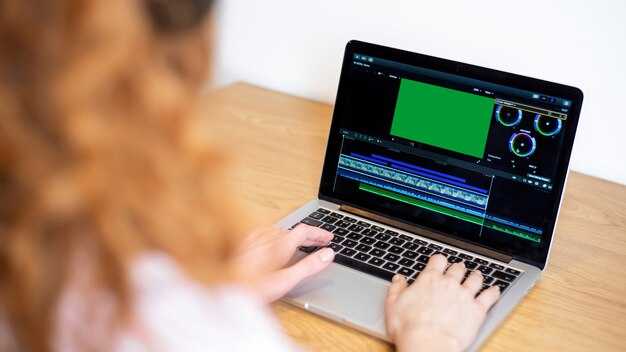
سير عمل عملي من النص إلى الفيديو باستخدام Renderforest
ابدأ بمجموعة موجزة من المطالبات ونصوص محكمة: 60-90 ثانية إجمالاً، 3 مشاهد، ودعوة واضحة لاتخاذ إجراء. استخدم موقع Renderforest لربط المطالبات بالمشاهد، مع الحفاظ على الصوت البشري صادقًا للمعلمين في جميع أنحاء العالم.
اجمع المواد: صور وخانات وأقراص فيديو قصيرة بدون حقوق ملكية دون تعقيد الترخيص. إذا كنت تفتقر إلى الأصول، استخدم مكتبات القوالب التي توفر مرئيات مدمجة. قم بمواءمة الأصول مع التفضيلات الإقليمية في مناطق مختلفة وقدم تعليقات توضيحية متعددة اللغات؛ ثم قم بتنزيل الملف الذي تم إنشاؤه للاستخدام المحلي.
النموذج والانتقالات: اختر نموذج سرد قصصي يتناسب مع النص؛ أدخل انتقالات للإيقاع؛ استخدم الشروحات لتوضيح الأفكار المعقدة، باستخدام التكنولوجيا الحديثة لتبسيط إنشاء الخطوات.
ربط النصوص والمطالبات: اربط كل مطالبة بمشهد وقصة؛ حافظ على الأسطر قصيرة ومباشرة؛ طابق المرئيات مع السرد والنص على الشاشة؛ استخدم المواد لتوضيح النقاط.
مقارنات Powtoons و Maker: قم بتقييم كيف تقارن نهج صانع بأصول Powtoons بقوالب Renderforest؛ استخدم هذا لتخطيط المناطق والوصول العالمي.
النشر والتوزيع: انشر على موقع الويب الخاص بك؛ أنشئ منشورات تربط بالملف القابل للتنزيل؛ احتفظ بالتحكم في العلامة التجارية والشروحات؛ سواء شاركت علنًا أو ضمن دورة تدريبية، تأكد من إمكانية الوصول.
فحص الجودة والتكرار: تحقق من جودة الصورة، وتوقيت الإطارات، والانتقالات؛ تحقق من أن التعليقات التوضيحية والنصوص تلبي معايير إمكانية الوصول؛ لا تعتمد أبدًا على قالب واحد؛ اجمع ملاحظات من المتعلمين والمعلمين.
من المطالبة إلى الفيديو: ترجمة النص إلى روايات مرئية
توصية: حوّل وصفًا موجزًا في سطر واحد إلى لوحة قصص وقائمة أصول دنيا قبل أي خطوات إنتاج للحفاظ على سير المنشورات والموضوع واضحًا لأي شخص مشارك.
- تعريف الفكرة الأساسية: اجعل العنصر الأكثر أهمية في جملة واحدة؛ يجب أن تكون النقطة بشرية وقابلة للتنفيذ للفريق. هذا يبني الاتساق عبر سير عمل المؤسسة ويقلل من التفاعل ذهابًا وإيابًا مع المحرر والفريق، بما في ذلك سارة.
- المسودات والإيقاع: أنتج 3-5 مسودات تحدد المشاهد والانتقالات وشكل كل لقطة؛ قارن التسلسلات الكاملة لتحديد الفجوات والتأكد من أن الانتقالات تبدو طبيعية.
- دليل التصميم: حدد لوحة ألوان، وطباعة، ولغة شكل مرئية تتناسب مع الموضوع والجمهور؛ وثق القرارات في موجز تصميم حي يمكن لأي شخص الوصول إليه.
- سير العمل والأدوار: قم بتعيين المسؤوليات (محرر، مصمم، باحث) وحدد موعدًا نهائيًا يوم الاثنين للمراجعة الأولى؛ هذا يحافظ على العملية احترافية ويمكن التنبؤ بها.
- التكيف والتخصيص: قم بتكييف السرد لمختلف الجماهير - المهنية، التنظيمية، الشخصية - مع الحفاظ على الاتساق؛ استخدم وحدات نمطية يمكن توسيعها أو تبديلها دون كسر التدفق.
- حديث الموضوع والمواءمة: عندما يناقش الفريق موجز المشروع، تأكد من فهم سارة للموضوع؛ إذا لم تفعل ذلك، أعد صياغة الوصف قبل المتابعة.
- الأصول والوصول: اجمع الأصول مبكرًا، ونظمها في مجلد مشترك، وحافظ على المسودات المرقمة لتجنب إعادة العمل في اللحظة الأخيرة.
- فحوصات الجودة: قم بإجراء مراجعات سريعة مع المحرر وأصحاب المصلحة؛ اجمع الملاحظات كنقاط وقم بتطبيق التغييرات في المسودة التالية، بدلاً من إعادة العمل على كل شيء.
- المسار الأكثر كفاءة: صمم جدولًا زمنيًا مع معالم واضحة (المفهوم، المسودة، المراجعة، النهائي) وقم بالتوسع فقط عندما يكون الوضوح قويًا.
صياغة المطالبات للأنماط: النبرة والإيقاع والصور

استخدم قالب مطالبة من ثلاثة أجزاء لتثبيت النبرة والإيقاع والصور قبل الإنتاج: النبرة، الإيقاع، الصور. ينتج هذا النهج نتائج سريعة وقابلة للتكرار ويقلل من التفاعل ذهابًا وإيابًا عبر تكرارات تستغرق أسبوعًا.
- النبرة - حدد الصوت والجو العام بمؤشرات ملموسة. استخدم واصفات تتناسب مع التسليم المباشر: دافئ، طبيعي، واثق، أو مباشر. قم بتضمين مرجع موثوق به من النموذج الذي تختاره، وحدد متغيرات اللغات للجماهير المتنوعة (اللغات: en، es، fr، de، pt، zh، إلخ). قم بإرفاق إشارات اللهجة إذا كان ذلك مهمًا للإيقاع. لا تعتمد أبدًا على الأجواء الغامضة؛ اربط النبرة بسطرين أو ثلاثة أسطر عينة حتى يتمكن النموذج من إعادة إنتاجها باستمرار. هذا المواءمة تقلل من الاحتكاك عبر الأصول وتساعد عندما يتعاون الاستوديو مع المكتبة على مستوى الشركة. هذا سيحسن الاتساق عبر التعليق الصوتي والنص على الشاشة.
- الإيقاع - حدد إيقاع السرد والانتقالات. حدد عدد الكلمات لكل جملة (4-12 كلمة) وأطوال المشاهد (4-6 ثوانٍ للمقاطع الدعائية، 8-12 ثانية للشروحات، 20-30 ثانية للتعمق). استخدم مؤشرات سريعة وتنفسية؛ قم بتضمين توقفات من 0.5-1.5 ثانية بين الأجزاء. قم بمواءمة الإيقاع مع النبرة بحيث تبدو المقاطع الأكثر نشاطًا متماسكة؛ هذا يسرع سير عمل الأسبوع ويقلل من التعديلات. إذا كنت تعمل مع نصوص، اجعل المطالبات موجزة وقابلة للتنفيذ، ودع النموذج يتعامل مع التسليم مباشرة.
- الصور - قم بتسمية النمط المرئي بقواعد صريحة. حدد لوحة الألوان (ساطعة، عالية التباين، أو ظلال ناعمة)، والإضاءة، والتكوين (لقطة مقربة، متوسطة، واسعة). قم بإدراج زخارف أو أصول (أشكال هندسية، أنسجة طبيعية، أيقونات) وشدد على التمثيلات المتنوعة. قم بتضمين تلميحات الترجمة (متغيرات اللغات) واستخدام اللهجة لاتساق العلامة التجارية. حدد ما إذا كان يمكن إنشاء الصور مباشرة بواسطة المطالبات أو الحصول عليها من مكتبة موثوقة؛ تأكد من أن الأصول تتوافق مع النبرة والإيقاع المختارين. قم بإقران الصور مع التعليق الصوتي الذي يعكس نفس الأسلوب، واختر 2-3 زخارف مميزة للأسبوع لبناء التعرف. إذا كنت بحاجة إلى شيء سريع، اختر نمط استوديو واحد وقم بالتوسع لاحقًا بأصول إضافية؛ ترى معظم الفرق أفضل النتائج من خلال توحيد هذا النهج عبر النموذج. لسير العمل، يمكنك استخدام Videoscribe لاختبار الحركة والمرئيات بالتوازي مع المطالبات.
نصائح عملية للتنفيذ بسرعة: اختر نموذجًا تثق به، وحدد مجموعة من 3 مطالبات (النبرة، الإيقاع، الصور)، وقم بتشغيل سباق لمدة أسبوع واحد لمقارنة النتائج عبر اللغات والأصول. امنح إشارات نجاح واضحة (التفاعل، الفهم، الاستبقاء) وكرر على الأداء الأفضل. عند التوسع، يجب أن تظل المطالبات المهاجرة متماسكة عبر جميع الأصول، مما يضمن تجربة جمهور طبيعية ومتماسكة - سواء كنت تقوم بتحديث حملة واحدة أو بناء مكتبة للشركة.
اختيار القوالب والمشاهد في Renderforest
ابدأ بقالب فارغ يتوافق مع سوقك، وقم بتمكين الاقتراحات المدعومة بالذكاء الاصطناعي لملء المشاهد تلقائيًا وربطها بانتقالات واضحة.
مع العديد من الأدوات في المكتبة، اختر قالبًا يناسب هدفك وقم بتخصيص المشاهد لتعكس جمهورك، باستخدام مظهر احترافي وألوان العلامة التجارية.
هذا عدد هواتف موصى به: لقطعة مدتها 60-90 ثانية، استهدف 8-10 مشاهد؛ احتفظ بكل مقطع مدته 7-12 ثانية للحفاظ على الإيقاع وتجنب الحمل الزائد.
حدد النقطة المركزية لكل كتلة واستخدم إطارًا تقديميًا موجزًا لدمج المشاهدين؛ هذا يحافظ على سلاسة الدمج ويقلل من الحمل المعرفي.
يجب أن تكون الانتقالات متعمدة: اقتصر على 1-2 تبديل سلس بين المشاهد؛ احتفظ بانتقال مميز واحد للحظات الرئيسية للحفاظ على تدفق نظيف ومتسق.
يمكن للأصول المولدة تقديم متغيرات بسرعة، مما يحافظ على مرئياتك مع الحفاظ على تناسق العلامة التجارية؛ بتمكين القوالب من التوسع بلا حدود، يمكنك قضاء الوقت في ضبط الألوان والطباعة والشعارات للحصول على لمسة نهائية احترافية وكاملة. متى يتم النشر: قم بإنشاء متغيرات بعد المرور الأول وقارن المقاييس في المعاينة.
للتدفق عبر الشركة، احفظ مجموعة كاملة من القوالب وشاركها مع زملائك لتسهيل الدمج السريع ودورات الموافقة؛ هذا يوفر الوقت ويضمن الاتساق عبر المخرجات.
إعدادات التصدير: الدقة ومعدل الإطارات والترميز وتنسيقات الإخراج
توصية: اختر 1080p بمعدل 30 إطارًا في الثانية باستخدام H.264 بتنسيق MP4 لضمان التوافق على نطاق واسع؛ قم بالترقية إلى 4K بمعدل 30 إطارًا في الثانية أو 60 إطارًا في الثانية و H.265 عندما تكون الجودة مهمة وعرض النطاق الترددي محدودًا. هذا النوع من الإعدادات يحافظ على ثبات الإيقاع وجاهزيته للنشر، مع السماح لك بقضاء الوقت في المخرجات عالية المستوى إذا لزم الأمر.
الدقة: للتسليم عبر الويب، يوفر 1080p (1920x1080) مرئيات رائعة بحجم إخراج معتدل؛ يضيف 4K (3840x2160) تفاصيل للشاشات الكبيرة أو المنصات المتطورة. إذا كان جمهورك يمتد من الهاتف المحمول إلى سطح المكتب، فقدم بديلاً 720p لضمان البث السلس على الشبكات الأبطأ. بالنسبة للمشاريع متعددة اللغات، تأكد من أن الترجمات والرسومات المتراكبة تتوافق مع اللغة وتحافظ على قابلية قراءة الأحرف بالدقة المختارة. تساعد هذه الاستراتيجية متغيرات اللغة والمرئيات على البقاء واضحة عبر الأجهزة والمنصات.
معدل الإطارات: ينتج 24 إطارًا في الثانية إيقاعًا سينمائيًا؛ 30 إطارًا في الثانية هو المعيار لمعظم المحتوى؛ 60 إطارًا في الثانية يعزز وضوح الحركة للمشاهد سريعة الوتيرة. عند مزامنة التعليقات الصوتية والترجمات، حافظ على توافق الإيقاع مع معدل الإطارات المختار لتجنب الانحراف، خاصة مع الأصوات الشبيهة بالبشر التي تعتمد على التوقيت الطبيعي. يدعم هذا النهج تفاعلاً رائعًا دون إرهاق عرض نطاق الشبكة الخاص بالجمهور.
الترميز والحاوية: للتوافق الواسع، استخدم H.264 مع حاوية MP4؛ يوفر H.265 (HEVC) جودة أعلى بنفس معدلات البت ولكن قد يتطلب مشغلات أحدث. إذا كان سير عملك يستخدم برنامج تحرير يفضل الكفاءة العالية، ففكر في ProRes أو أي ترميز داخلي آخر بتنسيق MOV لخطوط الإنتاج الاحترافية. تأكد من أن الترميز المختار يدعم منصات الإخراج المستهدفة، بما في ذلك Powtoons وموقعك الإلكتروني وقنوات التوزيع الأخرى.
تنسيقات الإخراج والتحسين: لا يزال MP4 هو الأكثر تنوعًا افتراضيًا؛ يعمل WebM بشكل جيد مع بيئات HTML5 والمتصفحات الحديثة؛ MOV شائع في خطوط إنتاج التحرير. قم بإنتاج نسختين على الأقل، على سبيل المثال MP4 مع H.264 و WebM مع VP9 حيثما كان مدعومًا. عندما يتضمن المحتوى الخاص بك تعليقات صوتية وترجمات، تأكد من أن الصوت هو AAC بمعدل 128-320 كيلوبت في الثانية و 48 كيلوهرتز، ومتزامن مع المرئيات لتجربة متماسكة. فرق الدمج، غالبًا ما تسلط تعليقات Trustpilot الضوء على قيمة التصديرات المستقرة والجاهزة للنشر؛ خصص مجموعة من ملفات تعريف الترميز والأعلام المتقدمة (مثل فاصل الإطار الرئيسي ومستوى الملف الشخصي) لتسريع العمل المستقبلي. تستفيد تدفقات عمل Powtoons ونشر مواقع الويب من حزمة إخراج متسقة يمكنك إعادة استخدامها عبر المشاريع. استفد من دورة اختبار مخصصة لمقارنة النتائج عبر التنسيقات والأجهزة للعثور على أفضل ما يناسب جمهورك.
أخيرًا، استخدم قائمة تدقيق تصدير موجزة للحفاظ على مستوى عالٍ من الجاهزية: تحقق من اللغة، وتأكد من قابلية قراءة الأحرف، واختبر الإيقاع على الأجهزة ذات نطاقات عرض النطاق الترددي المختلفة، وتأكد من أن جميع الأصول تظل متزامنة مع الصوت. لا تعتمد أبدًا على إعداد واحد؛ خذ مجموعة صغيرة من الملفات الشخصية وطبقها حسب الحاجة لدعم جمهور متفاعل عبر منصات مختلفة، بما في ذلك إصدارات الاثنين وما بعدها. ينتج هذا النهج أصولاً قيمة وجاهزة تتوسع بلا حدود وتدعم تجربة دمج رائعة على موقع الويب الخاص بك.
| الإعداد | الخيارات / القيم | الأساس المنطقي |
|---|---|---|
| الدقة | 720p (1280x720)، 1080p (1920x1080)، 4K (3840x2160) | الموازنة بين الحدة وحجم الإخراج؛ توفير بديل للأجهزة ذات النطاق الترددي المحدود |
| معدل الإطارات | 24، 30، 60 إطارًا في الثانية | 24 للشعور السينمائي؛ 30 للمعايير؛ 60 للإيقاع العالي |
| الترميز | H.264، H.265 (HEVC)، ProRes (MOV) | H.264 التوافق الواسع؛ HEVC الكفاءة؛ ProRes لخطوط إنتاج التحرير |
| الحاوية / الإخراج | MP4، WebM، MOV | MP4 للويب؛ WebM لـ HTML5؛ MOV لسير عمل التحرير |
| معدل البت (المقطع) | 1080p: 8-12 ميجابت في الثانية؛ 4K: 35-60 ميجابت في الثانية | التكيف حسب الحركة والألوان؛ الحركة الأعلى تتطلب المزيد من عرض النطاق الترددي |
| الصوت | AAC، 48 كيلوهرتز، 2 قناة، 128-320 كيلوبت في الثانية | كلام واضح؛ يضمن التزامن مع المرئيات |
الأتمتة والمعالجة المجمعة: توسيع نطاق إنشاء الفيديو بالذكاء الاصطناعي
يتم التحكم في عمليات الدُفعات عبر مستوى مركزي ينسق المهام، ويخصص معرفات، ويكتب سجلات التدقيق. استخدم مجموعة واحدة من المعلمات لتجنب الانحراف؛ حافظ على تحديد المدخلات بدقة لتحسين قابلية التكرار والموثوقية. قدم خطوط أساس شخصية لكل فريق لتخصيص النتائج، واكتب ملخصًا إلى دفتر أستاذ مركزي.
اعتمد مشغل دُفعات بخمس عقد وعمال متوازيين يعالجون الصور والبيانات الوصفية بشكل متزامن، لزيادة الإنتاجية بما يصل إلى 2-4x لأعباء عمل المؤسسات. استخدم قوالب قابلة لإعادة الاستخدام لتوحيد المخرجات وتقليل التعديلات ودعم تدفق إنتاج مبسط. بالإضافة إلى ذلك، قم بتمكين متغيرات مخصصة للأقسام المختلفة مع الحفاظ على جوهر مشترك. قم بإرفاق الترجمات ومسارات الترجمة وبيانات المصدر تلقائيًا دون تدخل بشري.
للحوكمة، احتفظ بمستودع رئيسي للأصول وسجل تغييرات يسجل التعديلات. قم بتطبيق سير عمل للموافقة على المحتوى لا يزال يترك الجزء الأكبر من المهام مؤتمتًا، مع تمكين المراجع البشري من التدخل عند ظهور علامات الجودة.
يجب أن يغطي الدمج الأدوار المطلوبة: مهندس، صانع، معلمين؛ مسار إعداد بخمس خطوات؛ واجهة مستخدم تعتمد على النقر لتعديل نطاق الموضوع. يمكن للفريق التعلم بسرعة عن طريق تشغيل خمس دورات تجريبية من مجموعة البداية، مما يقلل من وقت البدء.
ترجمة الأصول للجماهير متعددة اللغات عن طريق تعيين مصفوفة ترجمة لكل موضوع ورموز أبجدية رقمية؛ هذا يزيد من الوصول ويحافظ على جودة اللغة عالية. يجب على النظام إدخال نتائج الترجمة في كتالوج قابل للبحث والحفاظ على عدد الأحرف لتجنب الاقتطاع في الترجمات أو الصور المصغرة.
تتبع مقاييس مؤشرات الأداء الرئيسية: متوسط الوقت لكل دفعة، ومعدل الخطأ، وحصص المراجعة البشرية. استخدم لوحات المعلومات لتسليط الضوء على الاختناقات الرئيسية وتقديم تحسينات مقترحة. تتيح حلقة ملاحظات مبسطة للمعلمين اقتراح تحسينات، والتي تُكتب مرة أخرى إلى مكتبة القوالب.
للتوسع، امكّن الفرق من بدء خطوط أنابيب جديدة بنقرة واحدة، وإعادة استخدام خمسة قوالب أساسية، والاعتماد على الفحوصات الآلية للتحقق من المدخلات قبل تحويلها إلى مهام. هذا يجعل العملية مرنة لتحولات الموضوعات السريعة ومجموعات الأصول المتطورة، مع الحفاظ على الإشراف البشري عند الحاجة. بالإضافة إلى ذلك، اجعل المخرجات أكثر اتساقًا من خلال تطبيق قواعد التحقق المركزية.


