
التوصية: ابدأ بتجربة لمدة 3 أسابيع عن طريق اختيار تنسيق فيديو أساسي واحد، وقناة مفتوحة، وطبقة تنفيذ مرنة للتعامل مع المهام المتكررة. من البداية، يمكنك تحسين مجموعة الأدوات الإبداعية، ثم التحقق من الأداء باستخدام البرامج التعليمية والتحليلات.
قم ببناء عملية معيارية تتكون من مراحل: استلام الأصول، وعرض الإطارات، والتعليق الصوتي، وشرح النصوص، والتوزيع. استخدم قوالب خفيفة الوزن لتحسين المخرجات وصياغة روايات جذابة بسرعة. قم بتشغيل برامج تعليمية للفريق، وقم بإنشاء فحص لتوافق العلامة التجارية في كل خطوة لضمان الاتساق عبر القنوات.
ربط السلسلة: استخدم Zapier لربط تطبيقات التحرير، والتخزين السحابي، والتوزيع، بحيث تتدفق المقاطع الجديدة إلى قنوات متعددة وتحديث الموقع. حافظ على لوحة مراقبة تدعم التحليلات وتسمح لك بتحليل الأداء بمرور الوقت. بالنسبة للعملاء، أرسل رسائل بريد إلكتروني موجزة تطلب فيها ملاحظات لتحسين النبرة والإيقاع.
التكرار عن طريق فحص البيانات: تتبع مدة المشاهدة، ومعدل الإكمال، ونسب النقر إلى الظهور؛ قم بتحسين الصور المصغرة، والمقدمات، والدعوات إلى اتخاذ إجراء لزيادة المشاركة. استكشف الاختلافات باستخدام البرامج التعليمية وقم بتنفيذ التغييرات في دفعات صغيرة لقياس الارتفاع التدريجي. حافظ على الدورة مفتوحة للمدخلات من فرق متعددة من التسويق والمنتجات والدعم.
قم بترميز مكتبة برامج تعليمية حية، وحافظ على فحص الامتثال لمعايير العلامة التجارية. ستكشف تحليلات الموقع عن استجابة العملاء المحتملين بعد مشاهدة المقاطع، مما يتيح تحسين البرامج النصية والمرئيات. بالتوازي، يمكن لأصحاب المصلحة في الشركة مراجعة النتائج والتخطيط للتكرارات التالية باستخدام القنوات والتجارب المفتوحة.
تخطيط المشهد وتفصيل اللوحة القصصية لعمليات البناء المؤتمتة
ابدأ بلوحة قصصية من صفحتين ومصفوفة لقطات ترسم إيقاعات السرد بالصور والأصول وتنسيقات التسليم، مع التركيز على القيمة التعليمية وتمكين الجماهير من تطبيق ما يتعلمونه.
- النطاق والنتائج: وضح ما ستكتسبه الجماهير المستهدفة؛ حدد كيف ستعزز مجموعة المشهد الفهم والاستيعاب، ثم قم بتخصيص الخطة حسب شريحة الجمهور.
- أين ومتى: قم بإنشاء شبكة مشاهد تسجل الموقع والوقت من اليوم والانتقالات؛ تأكد من أن كل كتلة تخدم غرضًا محددًا وتقلل من تبديل السياق للتنفيذ الفعال؛ حدد مكان كل مشهد في القوس العام.
- اللغة المرئية: قم بإنشاء لوحة ألوان وقواعد طباعة وإرشادات للحركة؛ حافظ على تناسق الأسلوب عبر المشاهد لدعم الاعتراف وتقديم القيمة.
- كتل المحتوى والعلامات: قم بتصنيف الإطارات على أنها تعليمية، أو برنامج تعليمي، أو دراسة حالة؛ قم بإرفاق علامات للبحث ومشغلات الأتمتة؛ قم بتضمين مطالبات Midjourney في ملاحظات الإطارات لإنشاء تنويعات.
- المطالبات والتخصيص: قم بصياغة مطالبات Midjourney مع توكنات الأسلوب وتوجيهات الألوان؛ حدد الدقة ، ونسبة العرض إلى الارتفاع ، والإضاءة لإنتاج نسخ محسنة يمكن تكرارها بسرعة.
- العمليات والتحسين: قم بربط كل مشهد بعملية قائمة على البيانات مع فحوصات الأصول، وفحوصات تناسق الألوان، ومراجعات الإيقاع؛ قم بتحليل الإشارات المدعومة بالأبحاث بشكل متكرر لزيادة القيمة.
- ضوابط الجودة: قم بتطبيق قائمة مرجعية لدقة المحتوى، والمواءمة التعليمية، وإمكانية الوصول؛ اطلب موافقات المراجعة قبل أن تنتقل الأصول إلى المرحلة التالية؛ يدعم هذا المخرجات المتسقة وتقديم القيمة.
- دورات المراجعة والتكرار: حدد إيقاعًا للمراجعة في منتصف الطريق؛ اجمع المقاييس من المعاينات؛ اضبط المطالبات والألوان والتخطيطات لزيادة المشاركة؛ احتفظ بأرشيف للإصدارات لتتبع القرارات.
- تخطيط المخرجات: حدد تنسيقات المخرجات، واتفاقيات تسمية الملفات، وحقول البيانات الوصفية (العلامات، والموضوعات، والبرامج التعليمية) لتبسيط عمليات التسليم للمحررين والفرق الخاصة بالنهاية.
- الأشخاص والخبرات: حدد المتخصصين الذين يتخصصون في ربط النصوص باللقطات؛ تأكد من أن الفرق الرائدة تتعاون مع المعلمين والمصممين ومالكي المنتجات لتقديم محتوى عالي الفائدة يلبي معظم احتياجات المستخدمين.
تقسيم النص إلى إطارات لوحة قصصية مفصلة لكل لقطة لمدخلات الذكاء الاصطناعي
قم بتقسيم النص إلى إطارات: إطار واحد لكل لقطة، كل إطار مصنوع لمدخلات الذكاء الاصطناعي، مع حقول frame_id، scene، visuals، dialogue، و duration.
لكل إطار، املأ: معلومات حول الصورة (المرئيات)، وتفاصيل واقعية، وملاحظات صوت المتحدث، وقطاع الجمهور المستهدف مثل التركيبة السكانية؛ اربطه بنتائج الإعلانات والوصول، بما في ذلك الجماهير الكبيرة.
استخدم البرنامج لإنشاء مصدر واحد للحقيقة: قم بالتصدير بصيغة JSON حتى تظل المدخلات متسقة؛ احتفظ بمحرر مفتوح لإدارة التغييرات والمراجعات؛ تساعد البيانات الوصفية لـ Creatio في تمييز الأصول.
قم بتعيين أنواع اللقطات لكل إطار: واسع للسياق، متوسط للأكشن، وقريب للتفاصيل؛ بالنسبة للمقاطع القصيرة، قم بتقييد كل إطار بما يقرب من 5-7 ثوانٍ واضبط الإيقاع وفقًا لذلك.
دع المبدعين يكررون باستخدام لوحة مسودات: قم بإنشاء مطالبات، واضبط نبرة الصوت، وقم بالمواءمة مع التعلم من الفئات والنشرات الإخبارية لتحسين الشريحة؛ قم بتخزين الأصول في مركز اتصالات مركزي لسهولة إعادة الاستخدام والتحديثات؛ استخدم اتصالات HeyGen لتمييز الأصول.
أغلق حلقة نظافة البيانات: قم بتعيين دور لكل أصل، واربطه بالإطار، وقم بتمييز البيانات الوصفية لتسريع استرجاع المعلومات وإعادة الاستخدام في المستقبل.
| إطار | مشهد | مرئيات | حوار | صوت | ملاحظات |
|---|---|---|---|---|---|
| 1 | خطاف | شروق الشمس في المدينة، إضاءة واقعية | صوت: " يوم جديد، قصة جديدة." | ضجيج الشارع، موسيقى هادئة | مفتوح للجماهير؛ وصول واسع |
| 2 | موقع | داخل المطبخ، شخص يعد القهوة | يقول الشخص: "إليك ما يمكن توقعه." | خلفية هادئة | إيقاع جاهز للمقاطع القصيرة |
| 3 | كشف المنتج | لقطة مقربة على شاشة الجهاز | صوت: "شاهده أثناء العمل." | وتيرة نشطة | ربط بأصول Creatio |
| 4 | دعوة لاتخاذ إجراء | شخص يتفاعل مع المنتج | صوت: "تعرف على المزيد." | موسيقى مبهجة | مطالبة بالاشتراك في النشرات الإخبارية |
تعيين مدادات زمنية دقيقة وحركات كاميرا لكل لوحة في اللوحة القصصية
ترجمة لوحات اللوحة القصصية إلى أوصاف مرئية جاهزة للمطالبات
ابدأ بتحويل كل لوحة في اللوحة القصصية إلى وصف موجز وجاهز للمطالبات يحدد هذه العناصر الأربعة: الموضوع، الإعداد، الإجراء، والمزاج.
للاتساق عبر اللوحات، اعتمد هيكلًا واحدًا: [الموضوع] في [الإعداد]، [الإجراء]، لقطة على مستوى العين، [الإضاءة]، [الألوان]، [الأسلوب]، [المزاج]، [السرد]. مثال: 'مبرمج مركز في معمل زجاجي، ينقر على لوحة معلومات هولوغرافية، على مستوى العين، إضاءة نيون زرقاء، لوحة ألوان باردة، أسلوب سينمائي مستوحى من الانتشار العميق، مزاج هادئ، سرد بصوت أنثوي.'
يجب أن تكون هذه المطالبات جاهزة للتعدد اللغوي: احتفظ بالأسماء الأساسية باللغة الإنجليزية وأضف معدّلات خاصة باللغة لرواية متعددة اللغات؛ تأكد من توافق مؤشر الصوت مع السرد المنطوق عبر اللغات.
سيتم تشغيل هذه المطالبات عبر منصات تدعم تقنيات التوليد المرئي والتصدير مباشرة إلى المراحل اللاحقة؛ استخدم الميزات للحفاظ على اتساق العلامات التجارية والمواءمة المباشرة مع الحملات.
اختبر بنماذج الانتشار وقم بتشغيل برنامج تعليمي سريع للتحقق من أن كل لوحة تظل متماسكة مع النص؛ تتبع احتمالية تطابق مرئي، وراقب التركيز لكل لوحة، واضبط الغرض للحد من الانحراف بين اللوحات.
ستساعد هذه الخطوات في الوصول إلى مليار انطباع من خلال التنسيق عبر المنصات وضمان توافق السرد والصوت الواضح مع النص.
قم بترميز المطالبات بالكامل في قوالب قابلة لإعادة الاستخدام للوحات فردية، مع ضمان ربط مباشر وغرض واضح لكل مقطع، حتى تتمكن الفرق من توسيع نطاق المخرجات مع الحفاظ على اتساق العلامات التجارية وجودة السرد؛ سيساعد هذا النهج الفرق في التعامل مع التحولات في الحملات.
حافظ على تركيز المستخدم، وتكيف مع هذه القيود، واستخدم محتوى برنامج تعليمي للتعلم العميق لتحسين الحرفية بمرور الوقت. ستعمل البرامج التعليمية والمقالات على تعزيز الحرفية العملية وتوسيع قدرات الانتشار عبر الفرق.
إنشاء قوالب لوحة قصص قابلة لإعادة الاستخدام لتشغيل الفيديو الدفعي
ابدأ بقالب لوحة قصة رئيسي يقسم المقاطع إلى كتل ثابتة: خطاف، شرح، عرض توضيحي، دعوة للعمل. احتفظ بأطوال ضيقة لكل كتلة (5-8 ثوانٍ) وخزن القالب في موقع مركزي حتى يتمكن أعضاء الفريق المتعددون من إعادة استخدامه لكل تشغيل دفعي. يعزز هذا الإعداد الاتساق والأداء عبر خط أنابيب يعتمد على البيانات، ويدعم أتمتة الإنتاج الدفعي.
لتحقيق أقصى استفادة، صمم بعقلية معيارية: يجب أن تكون كل كتلة قابلة للاستبدال، ويجب أن يدعم نفس القالب مواضيع متعددة عن طريق تبديل الكلمات الرئيسية والوسائط_المرجعية عبر ملف بيانات. إليك خطوات ملموسة يمكنك تنفيذها اليوم:
- تحديد الكتل والحقول الأساسية: معرف_المشهد، الكلمة_الرئيسية، النسخة، الوسيط_المرجعي، المدة، الانتقالات، التراكبات. قم بتضمين لمسات شخصية عن طريق السماح لرموز {name} ومواءمة مقاطع الشرح مع فوائد المنتج؛ احتفظ بكتلة الشرح كطبقة منفصلة للتحديثات الأسهل.
- بناء عناصر نائبة قابلة لإعادة الاستخدام: قم بإنشاء {title}، {subtitle}، {body}، {explainer_text} وعنصر نائب للوسائط مثل {media_id}. استخدم حقل الكلمة الرئيسية لملء التسميات التوضيحية والنص المعروض على الشاشة تلقائيًا؛ هذا يقلل من التعديلات اليدوية ويحسن الاتساق.
- إنشاء مجموعة بيانات دفعية: قم بإعداد 10-50 عنصرًا بتنسيق CSV أو JSON، بأطوال كتل ثابتة (خطاف 6 ثوانٍ، شرح 12 ثانية، عرض توضيحي 9 ثوانٍ، اجتماعي إثبات 6 ثوانٍ، دعوة للعمل 4 ثوانٍ). قم بربط كل عنصر بمعرف_المشهد، والكلمة_الرئيسية، والوسيط_المرجعي؛ اسحب المحتوى من مصدر البيانات المصدر لـ الاقتباسات والمرئيات؛ تأكد من البيانات الوصفية المكتملة حتى يتمكن خط أنابيب البيانات من التشغيل والعثور على جميع الحقول المطلوبة.
- اختبار ومواءمة الأصول: قم بتشغيل دفعة تجريبية من 2-3 مقاطع للتحقق من التوقيت والانتقالات والتراكبات. شاهد الإطار الأول للتأكد من وضع الألوان والطباعة والشعار؛ قم بإجراء التعديلات على مستوى القالب لتجنب تكرار التعديلات؛ هذا أكثر فعالية من تعديل كل مقطع على حدة، ويساعد في تحقيق نتائج رائعة.
- الحوكمة وإعادة الاستخدام: قم بإنشاء إصدارات للقالب، وخزنه كأصل مشترك، ووثق الحقول المطلوبة (معرف_المشهد، المدة، الوسيط_المرجعي). عند إضافة كتل جديدة، قم بتحديث الرئيسي حتى ترث جميع الدفعات المستقبلية التغييرات؛ تعمل عناصر التحكم على مستوى الكتلة على زيادة القوة للتأثير على النتائج عبر الحملات وإضافة قابلية التوسع للمتغيرات الشخصية والمتعددة اللغات.
نصائح إضافية: استخدم المنصات التي تدعم دمج القوالب، وتأكد من البيانات الوصفية الكاملة في كل صف، وحافظ على اصطلاح تسمية واضح. من خلال مواءمة الأصول حول قالب واحد، يمكن للفرق توسيع نطاق الإنتاج دون التضحية باللمسات الشخصية؛ إضافة التوطين أو الأصوات البديلة تظل بسيطة مع الحفاظ على مظهر وشعور متناسق. إذا كنت بحاجة إلى مرجع سريع، فإن هذا النهج يساعدك في العثور على أنماط فعالة بشكل أسرع ويقلل من التداخل عبر العمليات، حتى عند تغير عبء العمل. راقب المقاييس مثل معدل الإكمال والمشاهدة للتحقق من تأثير كل دفعة قالب، واضبط كثافة الكلمات الرئيسية للحفاظ على الصلة عبر الجماهير.
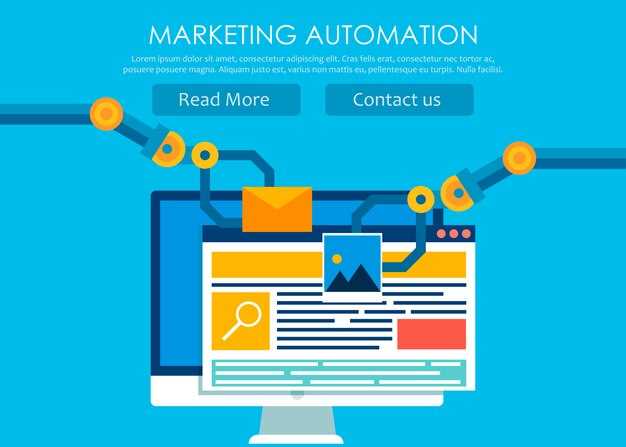
حدد وقم بتوصيل أدوات الذكاء الاصطناعي لـ الأتمتة من البداية إلى النهاية
ابدأ بمكدس من ثلاثة أجزاء: مركز إدخال للموجزات والوسائط، محرك سرد للصوت، ووحدة إخراج رسوم متحركة للمرئيات. قم بتوصيلها بمفاتيح API وخطافات الويب لتمكين الأتمتة من البداية إلى النهاية.
يجمع مركز الإدخال بين النصوص والعروض والمواد والأدوات الخاصة بالعملاء. استخدم مجموعة إصدارات من القوالب للحفاظ على الاتساق عبر أنواع المشاريع والحملات، وتحسين الرؤية للعملاء.
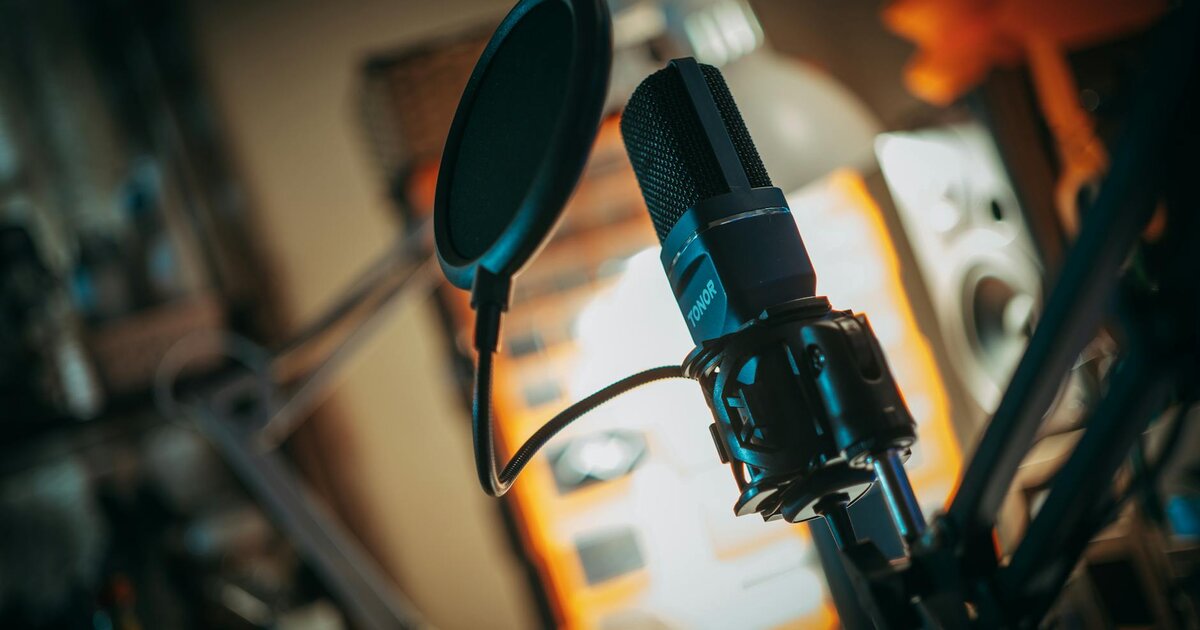
محرك السرد: تقدم elevenlabs توليدًا متعدد اللغات وطبيعي الصوت مع نبرة قابلة للتعديل. اتصل عبر REST API لجلب النص، وتسليم الصوت، وتبديل الأصوات إذا كانت حملة تتطلب لهجة أو أسلوبًا مختلفًا. احتفظ بصوت احتياطي للموثوقية.
الصورة الرمزية والمرئيات: اجمع بين مولد صور رمزية وقوالب رسوم متحركة لتحويل النصوص إلى مقاطع تحمل علامة تجارية. يدعم هذا الإعداد الإعلانات ذات القيمة العالية وتجربة العملاء، ويتوسع بشكل جيد للموزعين والوكالات، ويتيح للفرق التكرار بسرعة.
حوكمة الأتمتة: يقوم منسق مركزي بتوجيه الأصول إلى خطوات السرد والصورة الرمزية والعرض والتوزيع. احتفظ بالسجلات وابحث عبر الأصول لاكتشاف الاتجاهات وتحسين الرؤية والأداء في الحملات.
| المرحلة | المكون | الموصلات | الفوائد | ملاحظات |
|---|---|---|---|---|
| الإدخال | مستودع المحتوى والأصول | استيعاب API، SFTP، تخزين سحابي | استقبال سريع، قوالب مصنفة، بحث سهل | تغذية البيانات للعملاء والمشاريع |
| السرد | محرك صوت elevenlabs | REST API، webhooks | كلام عالي الجودة، خيارات متعددة اللغات | تأكد من التراخيص وحدود المعدل |
| الرسوم المتحركة | مولد صور رمزية + قوالب رسوم متحركة | تمرير النص، ربط الأصول | مقاطع تحمل علامة تجارية وجذابة بصور رمزية | مرئيات متسقة مع العلامة التجارية |
| العرض / التصدير | محرك العرض | وحدة معالجة الرسومات السحابية، قوائم الانتظار الدفعية | توسيع نطاق المخرجات، تنسيقات للتوزيع | تفضل تنسيقات MP4 أو المقاطع |
| التوزيع والتحليلات | مركز التوزيع | CDN، منصات الإعلانات | الرؤية، مقاييس الأداء، التسليم السريع | تتبع الاتجاهات؛ قياس التأثير |
للسرعة، ابدأ بمجموعة صغيرة من العملاء، واختبر نمط صورة رمزية واحد، وصوت واحد. قم بقياس المشاركة، ثم قم بالتوسع إلى قوالب ولغات إضافية لتحسين التجربة والحصول على حصة أكبر من جمهورك، مما يجعل الحملات أكثر فعالية وسهولة في التوسع.
اختر بين محركات تحويل النص إلى فيديو، والصورة إلى فيديو، والرسوم المتحركة
اختر تحويل النص إلى فيديو لسرد مقنع وقابل للتوسع يظل متوافقًا مع العلامة التجارية عبر القطاعات. إنه يقدم مخرجات عملية ودقيقة، ويتيح للفرق الصغيرة العمل بسرعة، ويتضمن خريطة كلمات رئيسية من النص لتعزيز الاتساق.
تتفوق ميزة تحويل الصورة إلى فيديو عندما يكون لديك مكتبة صور وتريد وتيرة ثابتة مع سرد مرئي واضح. إنها تدعم معايير التصميم، وتحافظ على إنتاج نحيف، وتقدم تسميات توضيحية متزامنة مع كل صورة، وهي مصممة لإعادة الاستخدام ويمكن الوصول إليها.
توفر محركات الرسوم المتحركة تحكمًا متقدمًا لتسلسلات توليدية معقدة. إنها تعزز المشاركة لإيضاحات المنتجات والبرامج التعليمية الشائعة، مع إصدار يدعم التوقيت الدقيق والتسميات التوضيحية ومستوى عالٍ من الصقل في تصميم المتجهات.
لتحديد ذلك، قم بربط شرائح الجمهور الخاصة بك، والسرعة المطلوبة، وعمق التكامل. إذا اخترت بين تحويل النص إلى فيديو، أو الصورة إلى فيديو، أو الرسوم المتحركة، فإن الاختيار يعتمد على أهدافك. للنشر الآلي، يساعد zapier في ربط المخرجات بالصفحات المقصودة، أو الوسائط الاجتماعية، أو التحليلات ضمن تدفق واحد؛ تأكد من اختبار إشارات المقاطع والتسميات التوضيحية قبل الإصدار. يقترح هذا النهج نقطة فحص عملية بعد كل إصدار.
تلاحظ Gartner أن الفرق الرائدة تفضل خطوط الأنابيب القابلة للتطوير والتي تعتمد على النصوص للكميات الكبيرة، بينما تناسب التسلسلات الموجهة بالصور الحملات التي تعتمد على الأصول، وتضيف الرسوم المتحركة عمقًا لسرد العلامات التجارية.
فحوصات عملية قبل الاختيار: جرد الأصول، وتحديد خطة إصدارات، وإنشاء خريطة كلمات رئيسية، والتحقق من دقة التسميات التوضيحية، وإعداد لوحات معلومات المراقبة لتتبع جودة التسليم. بعد الإطلاق، راقب ملاحظات المستخدم وقم بالتكرار على التسميات التوضيحية والتصميم والتوقيت لزيادة الاحتفاظ.
اختر أدوات توليف الصوت ومزامنة الشفاه التي تتناسب مع احتياجات لغتك
اختر منصة تجمع بين تركيب الصوت ومزامنة الشفاه للغات التي تستهدفها واختبر أصواتها الافتراضية مقابل نصوص العملاء لضمان التوقيت والتعبير الواقعيين.
تمكّن الخيارات ذات المستوى الصناعي عادةً التحكم في الصوتيات متعددة اللغات واللهجات الإقليمية، مما يتيح لك اختيار أصوات تتناسب مع احتياجات المقطع في كل مشهد. توفر المنصة المتخصصة في مزامنة الشفاه والصوت متعددة اللغات نتائج أفضل. هذا يدعم الاحتياجات المتطورة للصناعة. تساعدك قائمة اللغات والأنماط المدعومة على مقارنة الخيارات والتأكد من أن النتائج تبدو واقعية للأشخاص عبر الأسواق.
اختبر دقة مزامنة الشفاه عن طريق مزامنة الأسطر مع الإجراءات التي تظهر على الشاشة وراقب التوقيت عبر الأجهزة. تساعد الفحوصات المنتظمة للمعايير الصناعية على ضمان الاتساق على المدى الطويل.
تمكّن الأصوات الشخصية العلامات التجارية من التميز في الإعلانات وتمكّن الاتساق عبر المقاطع. يتيح لك هذا الإعداد تنفيذ حملات عبر القنوات. يساعد اختيار الأصوات التي تستخدم ذكاء الكلام على مطابقة النغمة عبر المشاهد، بينما يقوم المبدعون بتخصيص الجنس والسرعة والإيقاع ليتوافقا مع توقعات العملاء. يتيح هذا النهج التحويلات ويحافظ على إيمان الجماهير بالرسالة، وبناء علاقة شخصية مع الأشخاص. يدعم الاختيار الدقيق للخيارات التوافق مع أهداف العميل.
تتعامل المنصة مع النصوص متعددة اللغات والمواءمة الصوتية وتعيين اللهجات عبر الأسواق.